8.5.5 Creating the Web container cluster
Our cluster is called WEBcluster and will be used to provide workload balancing and failover for servlets and JSPs. Our cluster consists of three appservers on two different nodes:
- Web1 on app1Node
- Web2a and Web2b on app2Node
To create a new cluster:
- Log on to the WAS console and select...
Servers | Clusters
In the right pane, a list of clusters defined within the cell is shown. This list should be empty for a recently installed IBM WAS ND V6 cell.
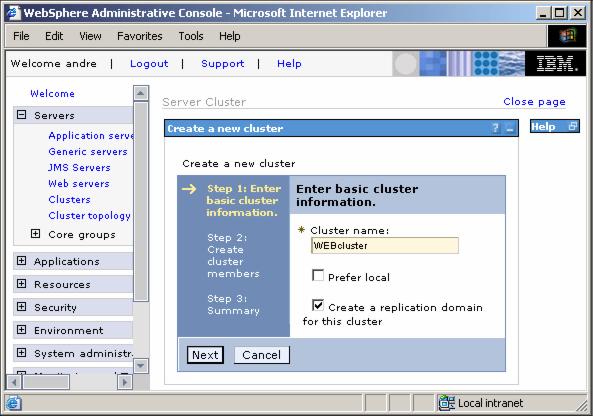
- Click New to create your first cluster. This launches the window for Step 1 of the Create a new cluster process

- Enter the basic cluster information:
- Enter WEBcluster for the mandatory Cluster name field.
- Uncheck the "Prefer local" checkbox.
Selecting Prefer local indicates that EJBs running on the local node should be routed requests to first if the local EJB container is available.
We chose to disable the Prefer Local option in order to demonstrate the workload management features of IBM WAS ND V6. However, we recommend that this optimization be enabled in a performance-tuned environment.
- Check the box "Create a replication domain for this cluster".
This replication domain will be used later when we enable memory-to-memory replication of HTTP session data. Click Next to continue.
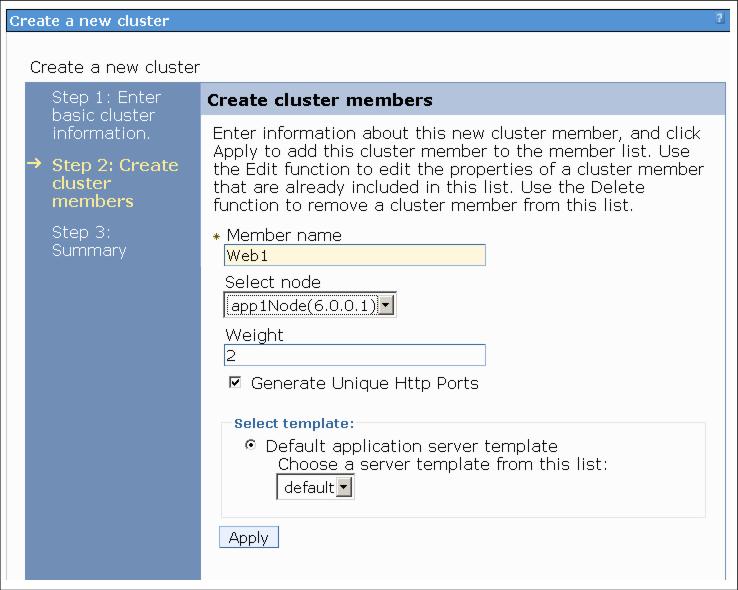
This brings up the Step 2 window shown below which allows you to create new appservers to be added to the cluster.

- To create the three clustered appservers:
- Enter Web1 as the name for the first new member.
- Select app1Node from the Select node pull-down.
- Accept the defaults for all other options and click Apply to continue.
We decided to use the default template for all our cluster members rather than changing the configuration of the first appserver and then using it as a template for the other members.
The only setting we are changing afterwards is the session management configuration. If you prefer, you can now create only the first member and configure the session management for Web1. Then come back to the cluster configuration and add additional members - based on the changed Web1 configuration.
- Repeat steps a to c, add a second appserver called Web2a but this time on app2Node
Do not click Next until all members have been added.
- Again, using the same procedure, add a third appserver called Web2b on app2Node.
- After adding the three members, click Next to continue.
- Check the summary and click Finish to create the cluster.

- After completing these steps, the WAS warns that changes have been made to the local configuration.
Click Save in order to save the changes to the master configuration. Select the Synchronize changes with Nodes check box to make sure the changes are synchronized to all nodes in the cell. Click Save once again.