8.5.2 Deployment Manager installation and profile creation
Starting IBM WAS ND V6 installation opens the launchpad...
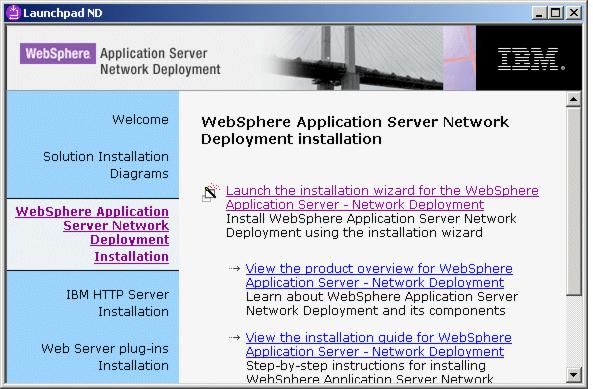
The launchpad allows you to install the WebSphere software (as well as the IBM HTTP server and Web Server plug-ins). Some information is asked for (such as the installation path) before the installation process is completed.
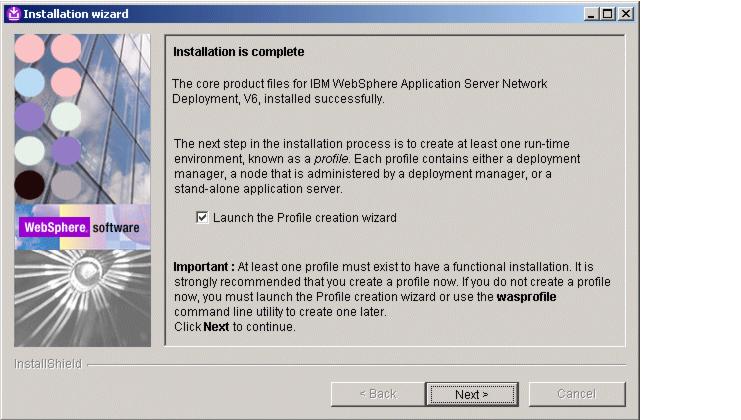
At this point, the user is prompted to run the Profile Creation Wizard, Make sure the checkbox Launch the Profile creation wizard is checked and click Next.
After a successful installation, the Profile Creation Wizard can be found in...
<WAS_HOME>/bin/ProfileCreator
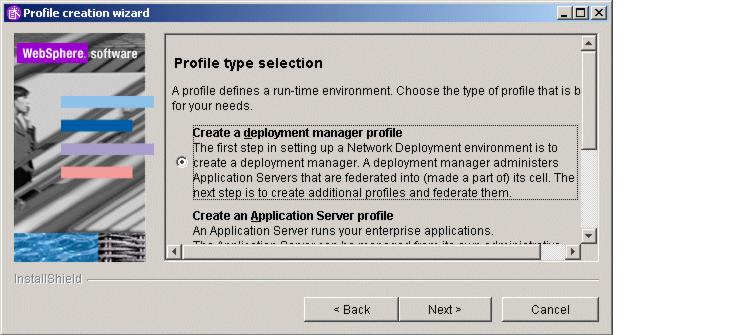
Choose the correct profile type for the node you are installing. Naturally, on the Deployment Manager machine, you select the Deployment Manager profile and click Next,
The wizard then asks for the profile name, Enter dm and click Next (dm becomes the default and unique profile on this node).

In the next window, accept the default profile directory suggested...
<WAS_HOME>/profiles/dm
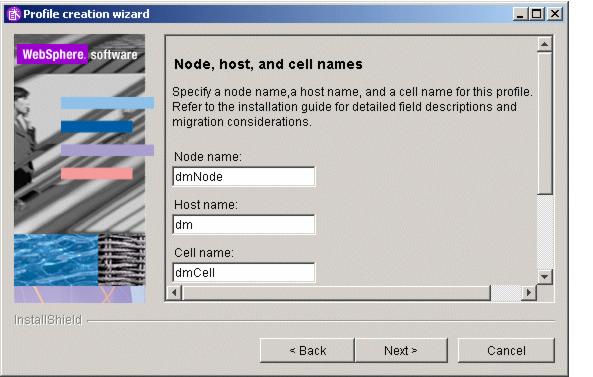
...and click Next. This brings you to the point where names are asked for the node, host and cell. Fill them in and click Next.
Finally, you are presented with a list of TCP/IP ports that will be used by the Deployment Manager. Check them for any possible conflicts with previously installed software, then click Next.
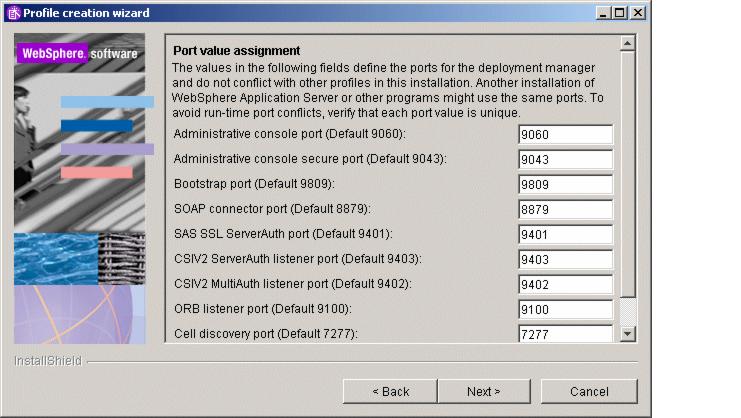
The default Administrative Console HTTP port is now 9060 (no longer 9090).
Windows users can decide in the following window whether the Deployment Manager should be registered as a Windows Service. This is normally recommended, for example to make sure that the Deployment Manager is automatically started after a system restart. If you decide not to register the Deployment Manager as a Windows Service during installation, you can always do it later using the WASService.exe command-line utility.
Click Next several times until the profile installation begins.
After the installation has ended successfully, use Windows Services or open an OS command prompt and start the Deployment Manager:
<WAS_HOME>\bin\startManager.bat
You are now ready to install and configure the IBM WAS ND V6 code on the other nodes.