Creating a performance schedule
After setting up your project and recording a scenario, you can create a performance schedule. In a performance schedule, you basically assemble multiple scenarios with loops, delays, and other items to design a performance workload that matches the scenario to simulate as closely as possible.
Follow these steps:
| 1. | Click...
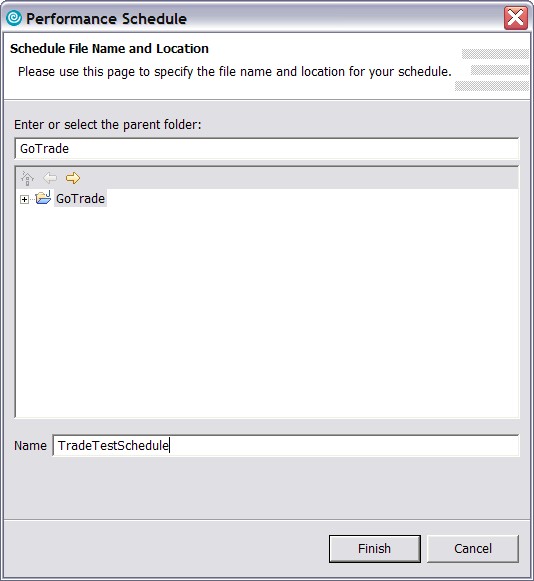
File -> New -> Performance Schedule ...to create a new test schedule called Trade6Schedule in your workspace.Then click Finish, as shown in Figure 10-12. |

Figure 10-12 Create new Performance Schedule wizard
| 2. | Right-click User Group 1, then click Add -> Loop. |
| Note: Loops let you repeat tests and run a test at a rate that you specify. |
| 3. | Click Loop and set the Number of iterations to 200. |
| 4. | Right-click Loop -> Add-> Test, select GoTrade from the list and click OK. |
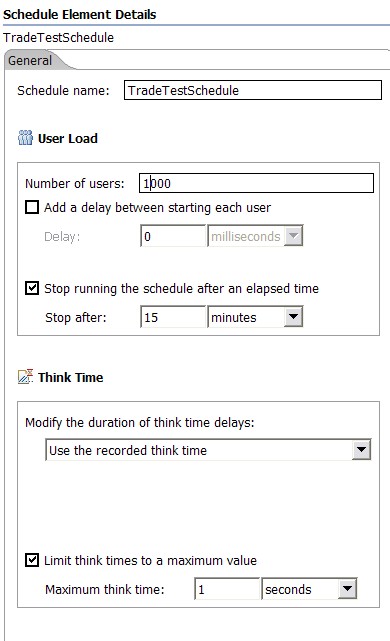
| 5. | Click TradeTestScheldule, and change the Number of users under the Schedule Elements Details to 1000 as shown in Figure 10-13. |
Normally, you would specify how many simulated users are running each script or set of tasks, allowing you to vary the number of simulated users over time. This enables you to start with a small number of users and ramp up slowly to a greater number of users.
However, you have not set the delay between starting each user in order to avoid a ramp-up time and keep the test schedule short.
| 6. | Click Stop running the schedule after an elapsed time and change it to Stop after: 15 minutes, as shown in Figure 10-13. |

Figure 10-13 Trade test schedule details
| 7. | Change the Maximum think time to 1 seconds. |
Real-world users do not request one Web page immediately after another. There are generally delays between viewing one Web page and the next. The term "think time" is the standard way of expressing the addition of a delay into a test script to more realistically simulate user behavior.
Many stress testing tools support randomly generated think times based on a statistical distribution. In this case, the think time as deliberately set to a very small value in order to overload the application.
| 8. | Click File -> Save to save the changes. |
Next