Set up the topology
This topology is fairly straight forward to configure because the Trade3 example comes with scripts that can do all the work for you. This setup will not be the same as what is shown in Chapter 7, Implementing the sample topology.
It involves:
- Setting up the WAS cluster
- Configuring all the JDBC and JMS resources
- Installing the application
- Testing the application
It is assumed that IBM WAS Base V5.1 has been installed on to node app1 and app2 with the Embedded JMS server selected on the install options. A copy of IBM WAS Network Deployment V5.1 is also needed. This should have also been installed on app1.
Also, don't forget about the database setup, assuming the database is remote then the IBM DB2 UDB Client version 8.1 will also need to be installed and configured.
When installing WAS use a user name that is 12 characters long or less. If a user name of 13 or more characters (like Administrator) is used then the JMS server will be unable to start and you will receive the broker error BrokerCommandFailedException: Broker command failed: 3008 exception during server startup.
When this is all completed, the nodes app1 and app2 should be federated into the cell. Once this has been done you are ready to carry on.
Setup Trade3 cluster
With the Trade3.1 application comes a set of scripts to automate the install of Trade3 into a cluster. We are going to use these to speed up the deployment of the example topology.
In Figure 15-14 there are two appservers acting as cluster members inside a cluster. These servers need to be configured first so that the listener ports can be configured in a later step.
The cluster can be setup using the clusterConfig.jacl script. Its syntax is:
wsadmin -f clusterConfig.jacl <clusterName> <nodeName> <serverName> <weight> <preferLocal>
This should all be relatively self explanatory. As there are two servers in this cluster, this will need to be run twice. Here are the commands that we used for this example. These commands are run from the Deployment Manager's bin directory.
wsadmin -f t3install\clusterConfig.jacl Trade3Cluster app1 Trade3Server1 2 true
wsadmin -f t3install\clusterConfig.jacl Trade3Cluster app2 Trade3Server2 2 true
Checking in the Administrative Console should confirm that two servers and one cluster were created. At this stage you might want to enable the Performance Monitoring Service on both servers for later tests. This can be done in the Administrative Console. See 16.2, Performance Monitoring Infrastructure for instructions.
Configure JDBC resources
Trade3 needs access to a database to work. There is another script that will setup the necessary JDBC resources called createTrade3RDBMSResources.jacl. Its syntax is:
wsadmin -f createTrade3RDBMSResources.jacl dbtype <-cell | nodeName> rdbmsDriverClassPath rdbmsUser rdbmsPassword \[oracledbhost\] \[oraclesid\]
In this example there are two nodes. On each node the location of DB2 driver classes is exactly the same, so to save on configuration the JDBC resources can be created at cell level. For this environment it was done using the command:
wsadmin -f t3installl\createTrade3RDBMSResources.jacl db2 -cell /path/to/sqllib/java/db2java.zip db2admin db2admin
To complete the setup of the database access the Trade database needs to be catalogued locally on each of the clients. Refer to 7.7, Installing and configuring Trade3.1 for details on how to do this.
Configure JMS resources
In Figure 15-14 the two nodes have their own JMS servers. When the federation of the nodes into the cells was undertaken, these JMS servers were automatically created. They will currently be in a stopped state.
To enable Trade3 to access each of these JMS servers, the QCF and TCF objects need to be defined at the correct scope. By defining the QCF and TCF objects at the node level, each appserver will use its local JMS server. This is because when the listener port or other calling code does a JNDI lookup for jms/TradeStreamerTCF it will resolve to the reference generated at node level. This is explained in detail in Creation of the JMS provider objects at the correct scope.
The first step in creating these objects is to run the script called createTrade3JMSResources.jacl that comes with Trade3.1. Its syntax is:
wsadmin -f createTrade3JMSResources.jacl nodeName [jmsNode] [serverName] [-cell | -node]}
- The nodename is the name of the node on which the appserver exists.
- The jmsNode is the name of the node on which the JMS server exists.
- The serverName is the name of the appserver that needs its listener ports configured.
To set this up in our environment, the following commands were run:
wsadmin -f t3install\createTrade3JMSResources.jacl app1 app1 Trade3Server1
wsadmin -f t3install\createTrade3JMSResources.jacl app2 app2 Trade3Server2
Use the Administrative Console to verify what has been created. The script sets up:
- Listener ports on each appserver pointing to the correct connection factories. It also changes the number of maximum sessions.
- The queue on the Embedded JMS servers. Using the Administrative Console go to each JMS server to confirm this.
- One QCF, one TCF, one queue definition, and one topic destination at each nodes' scope for the WebSphere JMS provider.
The next step to configure JMS usage is to set up dedicated QCFs and TCFs for the listener ports to use. As discussed in Use separate QCF and TCF for MDBs this allows for specific configuration of a QCF or TCF for listener port usage and makes defining the size of the connection and session pools simpler.
Follow these steps to setup the new QCF and TCF for use by the listener ports on app1. Once completed these steps need to be repeated for app2.
- Open the Administrative Console and expand Resources. Click WebSphere JMS Provider.
- Set the scope to Node app1 as shown in Figure 15-15 and click Apply. (When you come back to this for app2, remember to change the scope to Node app2).
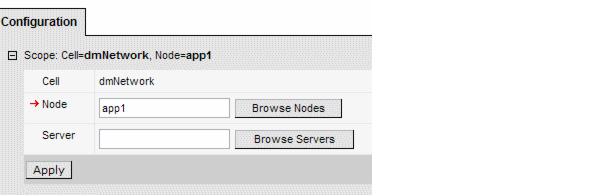
Figure 15-15 Set the scope level to app1
- Click WebSphere Queue Connection Factories. On this page there should already be one QCF called TradeBrokerQCF. This is the QCF that will be used from within all other parts of the application other than the listener port. We are going to create a new one that is just going to be used by the listener port on Trade3Server1.
- Click New and enter the parameters as shown in Table 15-3:
Field Value Name TradeBrokerListenerPortQCF JNDI Name jms/TradeBrokerLPQCF Node app1 (This needs to be app2 when repeating the configuration for app2) This setting points the QCF at the correct JMS server. As there can only be one JMS server per node the node name is sufficient to reference it.
Component-managed Authentication Alias TradeDataSourceAuthData Container-managed Authentication Alias TradeDataSourceAuthData Enable XA True Press OK when finished.
- Go back into the QCF by clicking TradeBrokerListenerPortQCF. Select Connection Pool from the Additional Properties.
- Change Min Connections to 1 and Max Connections to 2. The listener port will only need one connection. Press OK.
- Select Session Pools, again from the Additional Properties pane.
- Change Min Connections to 1 and Max Connections to 5. (The word connections is misleading here, it actually refers to sessions). The listener port will need at most five sessions as this is defined by the maximum sessions setting on the listener port. Press OK and then OK again.
- Go back to the WebSphere JMS Provider and select WebSphere Topic Connection Factories. We are going to create a new TCF that is going to be used by the listener port.
- Click New and enter the parameters from Table 15-4:
Field Value Name TradeStreamerListenerPortTCF JNDI Name jms/TradeStreamerLPTCF Node app1 (this needs to be app2 when repeating this configuration for app2) Port QUEUED Component-managed Authentication Alias TradeDataSourceAuthData Container-managed Authentication Alias TradeDataSourceAuthData Enable clone support Uncheck (false). There is no use of durable subscriptions in this example of Trade3. Enable XA Uncheck (false). There is no requirement for 2PC on this object. Press OK when finished.
- Setup the connection and session pools for this resource by repeating steps 5 to 8 but for the TCF this time.
- The QCF and TCF are now setup. Now you need to change the listener ports to reference them. Go to Servers -> Application Servers -> Trade3Server1 -> Message Listener Service -> Listener Ports. (This will be Trade3Server2 for the app2 node setup.)
- There are two listener ports. Open each of them in turn and change the Connection factory JNDI name to the newly created versions, jms/TradeBrokerLPQCF and jms/TradeStreamerLPTCF respectively.
- Save the configuration.
- Repeat these steps for app2.
The final step for the JMS resources is to enable message persistence. By default the install scripts set the queue and topic destination's persistence to NON_PERSISTENT to increase performance. This needs to be changed for this example. Each node will have a reference under its scope to the queue and topic destinations as this is how the script runs. (Normally this is not necessary, the queue or topic can usually be specified at cell level as there is not normally any node specific information within it).
Within the WebSphere JMS Provider for each node:
- Open WebSphere Queue Destinations and select TradeBrokerQueue.
- Change Persistence to PERSISTENT and press OK.
- Open WebSphere Topic Destinations and select TradeStreamerTopic.
- Change Persistence to PERSISTENT and press OK.
- Save the configuration.
The JMS resources are now all setup for the application.
Install the application
Use the Administrative Console to install the Trade3.ear file. Accept all defaults. See 7.7, Installing and configuring Trade3.1 for installation instructions if needed. The Trade3.ear file is already configured to use the correct JNDI names and listener ports for this example. The fact that we created extra QCFs and TCFs for the listener ports is masked from the application itself through abstraction.
The application is now installed in your cluster and ready to run.
Testing the application
The JMS servers need to be started before the appservers can be. In the Administrative Console start up the JMS Servers (select Servers -> JMS Servers -> <jmsserver_name> -> Start) and verify they started correctly in the JMS server logs.
|
Tip: It is possible to get the JMS servers (or any appserver) to start automatically when the startNode command is run. To change this behavior modify the setting <MyServer> -> Process Definition -> Monitoring Policy -> Node restart state. |
Once the JMS servers have been started, the application server cluster can be started as well.
The Trade3 application will default to using Synchronous as the order process mechanism on each server. For this reason it is worth change the Trade3 configuration on each of the servers. For each server go to...
http://<server_name>:9080/trade/config
...and change the following configuration parameters:
- Order processing mode = Asynchronous_1-Phase
- Enable Operational Trace = True
- Enable Full Trace = True
Press Update config to complete.
Trade3 will now be up and running. Some tests to try out:
- Run the Web primitives PingServletToMDBQueue and PingServletToMDBTopic. Check the SystemOut.log of the server to verify the message has been delivered.
- Stop the listener ports on one of the servers in the Servers -> Application Servers -> Trade3Server1 -> Message Listener Service -> Listener Ports menu. Log into Trade3 and place some orders. The orders will not be completed as the MDBs are stopped. Start the listener ports back up again and on the next visit receive a notification that the orders were completed.
- Start the servers with the Performance Monitoring Service enabled. Open up Tivoli Performance Viewer. Stop the listener ports on one of the servers. This means messages will build up on the queue as they arrive. Use Trade3 to buy a lot of stock or use the Web primitives to build up the messages on the queue. Setup the necessary monitors in Tivoli Performance Viewer and start the listener ports back up. Watch the effect in Tivoli Performance Viewer.
- Stop the listener ports on one of the servers. Purchase some stock then stop the JMS server too. Your orders should remain on the message queue as they are persistent. Start the JMS server back up and then the listener ports and see if the orders are completed.
WebSphere is a trademark of the IBM Corporation in the United States, other countries, or both.
IBM is a trademark of the IBM Corporation in the United States, other countries, or both.
Tivoli is a trademark of the IBM Corporation in the United States, other countries, or both.