Adding the Web server cluster
The next step is to add the Web server cluster to the Load Balancer configuration. In our case the cluster name is cluster.itso.ibm.com and the IP address is 10.20.10.100.
Note: If your hosts are not defined in an DNS server, you need to add the host names and IP addresses to the C:\winnt\system32\drivers\etc\hosts file of each system. For our environment, we added the entries listed in Example 7-2 to our lb, web1, and web2 hosts. Example 7-2 /etc/hosts sample
... 10.20.10.100 cluster.itso.ibm.com cluster 10.20.10.101 cproxy.itso.ibm.com cproxy 10.20.10.102 lb.itso.ibm.com lb 10.20.10.103 web1.itso.ibm.com web1 10.20.10.104 web2.itso.ibm.com web2 ... AIX: On the AIX platform, the file is location is /etc/hosts. |


To add a new cluster:
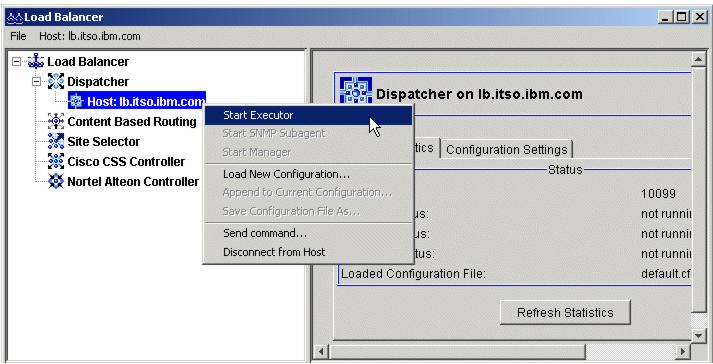
Figure 7-8 Starting the Executor
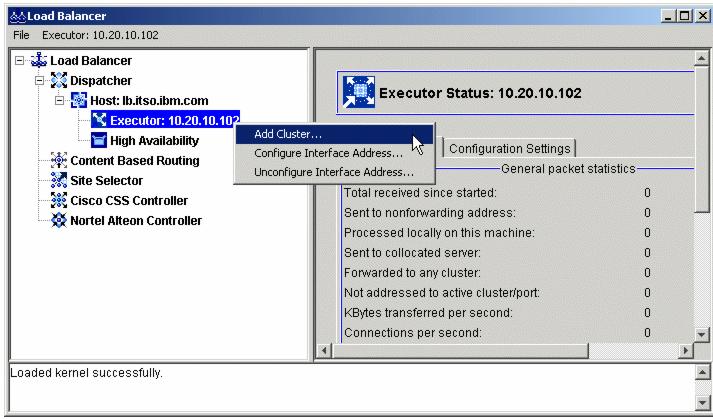
Figure 7-9 Adding the cluster
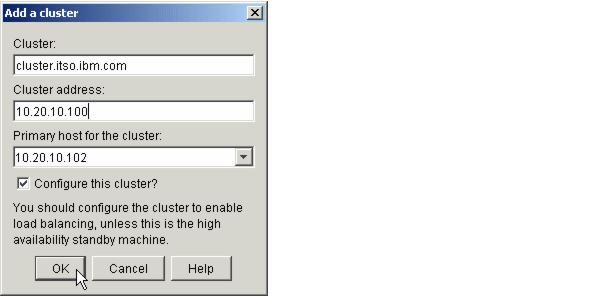
Figure 7-10 Adding a cluster window
WebSphere is a trademark of the IBM Corporation in the United States, other countries, or both.
IBM is a trademark of the IBM Corporation in the United States, other countries, or both.