WebSphere Lombardi Edition 7.2 > Modeling processes > Advanced modeling tasks > Build Coaches
Add sections to a Coach and controlling the layout
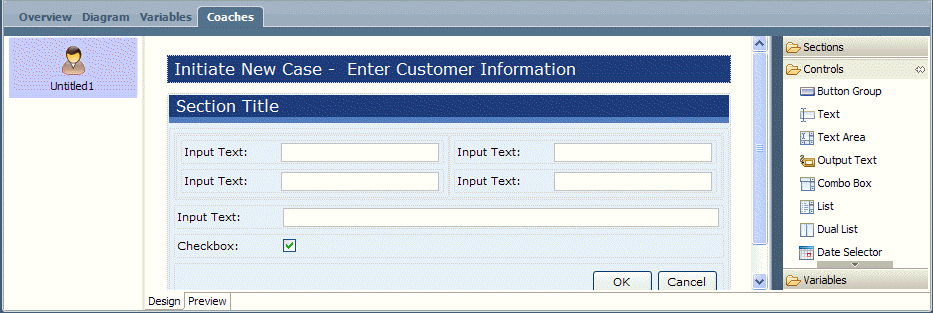
When you create a Human service and drag a new Coach from the service palette to the diagram, the Coach includes several controls by default as shown the following image:

By default, a new Coach contains a single-column section with a title that includes an Input Text control, a Checkbox control, and a Button Group. You can add sections and controls and adjust the layout for your Coach as.
When you use the Activity Wizard to create a Human service, resulting Coaches include a section or control for each of the parameters you choose to use as input or output for the service. For an example of a Coach that is created when using the Activity Wizard, see Build a Human service.
The following steps describe how to build a mockup of a Coach that enables personnel in a call center to collect data about customer issues. The mockup allows you to demonstrate the design to end users as you develop a plan for the steps within a process. You can use feedback from end users to refine the design and thus help guarantee that the eventual implementation meets all requirements.
- To start developing the mockup, change the title of the Coach by clicking the Lombardi Coach title bar in the design area.
-
In the Coach option of the properties, type Initiate New Case - Enter Customer Information as shown in the following image:

- Drag a Two-Column section from the palette onto the design area so that it is positioned directly below the existing Section Title.
-
Drag four Text controls from the palette onto the design area so that two Text controls are in each column :
- Click the Section Title in the design area and in the properties type Customer Information in the Title text box.
-
Click an Input Text control in the design area and in the properties, change the Label for each control to match the following example:

- Right-click the default Checkbox control, and from the shortcut menu that opens, select Delete. Do the same for the default Input Text control. Neither of these controls is needed for this sample Coach.
- Drag a One-Column with Title section from the palette onto the design area so that it is positioned directly below the existing Customer Information section.
- While the new section is still selected, type Case Information in the Title text box in the properties.
- Drag a Text control from the palette onto the design area and place it in the new Case Information section.
-
While the new Text control is still selected, type Case Type in the Label text box and choose Single Select from the Control Type drop-down list as show in the following image:

- Select the Presentation option in the properties and in the Manual Data section, click the Add button.
-
Add the values and display text shown in the following example:

- Drag a Date Selector component from the palette onto the design area and place it directly below the drop-down control in the new Case Information section.
- In the properties for the Date Selector component, change the label to Date Received.
-
Click the default Button Group at the bottom of the design area, click the Presentation option in the properties, and change the label for the OK button to Submit :

- Save your work.
- Click the Preview tab to see how the Coach will look when the service runs. You can make adjustments as you see fit in the Design tab.
Set column widths in a Coach
- Open the service that contains the Coach that you want to change and then click the Coaches tab.
- In the design area, click the section that contain the columns you want to set.
- Click the Presentation option in the properties. If you selected a section containing more than one column, each column is listed in the Columns area in numeric order based on the column ID. Click one of the columns listed to enable the Column Width text box.
-
Specify the width of the column in the Column Width text box using any valid HTML size attribute such as 50% or 110px :

- Click the Preview tab to see how the Coach layout will look when the service runs.
Set the number of columns in a Coach
- Open the service that contains the Coach that you want to change and then click the Coaches tab.
- In the design area, click the section that you want to change.
-
Click the Section option in the properties and then click the up and down arrows for the # of Columns option to increase or decrease the number of columns in the section.
In the following example, one additional column is added to a section that contains a nested two-column section. Notice the behavior of the nested section when its parent section is configured.

- Click the Preview tab to see how the Coach layout will look when the service runs.
Parent topic: Build Coaches