WebSphere Lombardi Edition 7.2 > Modeling processes > Basic modeling tasks
Add events to a BPD
Lombardi enables you to model events that can occur at the beginning, during, or at the end of a run-time process (as opposed to activities that are performed by participants within the process). An example of an event is a message arriving from an external system. Lombardi enables you to specify the trigger type of an event and represent the event with a meaningful icon in your process diagram.
By default, when you . create a Business Process Definition (BPD) in Lombardi, it includes a Start event and an End event. Unlike other events, Start and End events are not triggered by an action. Rather, they are used to simply indicate starting and ending points within a process or service. Other events in Lombardi can be triggered by a due date passing, an exception, or a message arriving. For detailed information about Lombardi event types and their triggers, see Modeling events. The trigger that you want determines the type of event you choose to implement.
Intermediate events (Timer events, Intermediate Message events, and Intermediate Exception events) can be attached to activities within your BPDs or they can be included in the process flow, connected with sequence lines. Other events are simply included in the process flow.
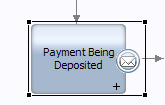
For the Expense Reimbursement sample BPD, we need to include an Intermediate Message Event. The event attaches to the final activity in the process (Payment Being Deposited) so that a message from the external system processing the deposit can notify the activity when the deposit is complete. When the message is received from the external system, the activity closes and the process ends.
- In the Designer view, click the Diagram tab.
-
Drag an Intermediate Message Event component from the palette to the Payment Being Deposited activity.
The event is anchored to the activity. To verify this, select the activity. If the activity's outline includes the event, the event is attached . If not, drag the event closer to the center of the activity.
- Click the attached message event to select it.
- In the event properties, click the Implementation option.
-
In the Attached Event Details section, select the check box for Close Attached Activity.
This option directs the activity to close when the message is received. For our example process, this is how we know the process is complete.
-
In the Message Trigger section shown in the following image, note that you can select or create an undercover agent (UCA) to attach to the event.

Each message event must be associated with a UCA. When you run the process, the associated UCA calls its attached service to perform the required action when the event is triggered.
See:
Parent topic: Basic modeling tasks