![]()
|
|
First install the ND software. Choose the correct location for the binaries (shared or local disk). For more information about installation see the document IBM WAS ND V6: Installing your application serving environment, which can be found at:
ftp://ftp.software.ibm.com/software/webserver/appserv/library/v60/
wasv600nd_gs.pdf
When the code is installed, the next step is to create the profile. To create a managed node (or Node Agent), create a Custom profile or Application Server profile and federate it into a cell. To create a profile:

| Use the Profile creation wizard. |
|
| Use the wasprofile script on a command line. |
In our example, we created the profile using the command line.
Example 9-3 Creating a custom profile using the command line

$ ./wasprofile.sh -create -profileName your_profilename -profilePath /NAS_Path/path_of_your_profile -templatePath /IBM/WAS/AppServer/profileTemplates/managed -nodeName your_profile_node -cellName your_cell -hostName your_virtual_hostname

You can also use the Profile creation wizard to create a profile of a managed node. To start the wizard, for example on Linux, use the following command:
WAS_HOME/bin/ProfileCreator/pctLinux.bin
Then choose the appropriate profile type. In our case, the Application Server profile was chosen, as shown in Figure 9-12.
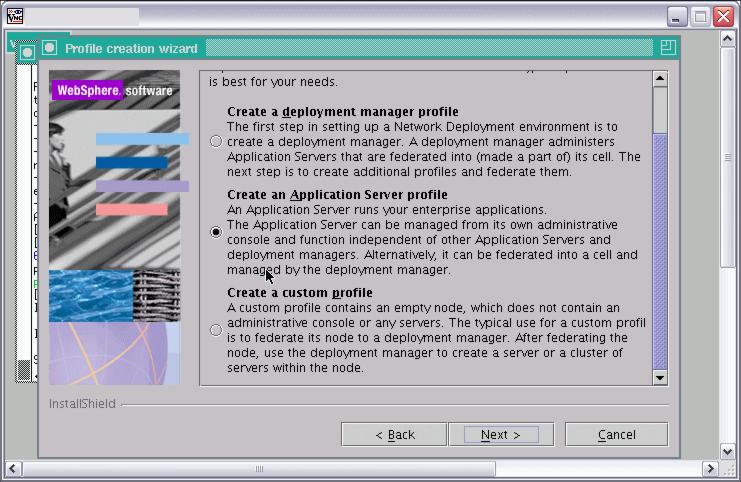
Figure 9-13 Choosing the Application Server profile type - Application Server profile
Attention: To federate an Application Server profile into a cell you have to run the addNode command manually after profile creation. You can also federate a profile into a cell during profile creation. In this case, create a custom profile.
In our example, the DNS entry of the IP Alias is VCluster.ibmredbook.com. This name must be entered as the Host name during profile creation, as shown in Figure 9-14.
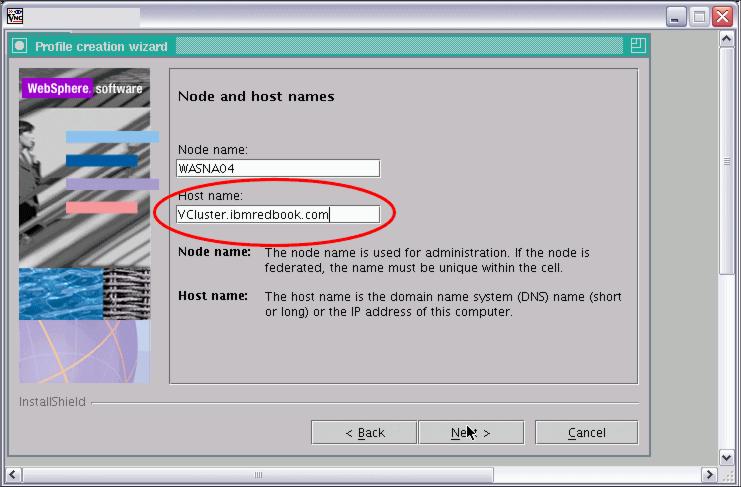
Figure 9-14 Profile creation wizard, prompting for the host name