Step 1: Create a page in the Home area of the site
Step 1 of this tutorial walks you through creating a page in the Home area of the site. This page will display in the site navigation. The Home area of the default portal currently contains two default pages: Welcome and Getting Started. Pages in the Home area of the site provide you with an organizational solution for displaying content and can serve as launch points to other pages and key areas of interest in the site.
We can also create subpages on pages located in the site navigation to organize the information and to add another navigational element to the site.

To create a new page:
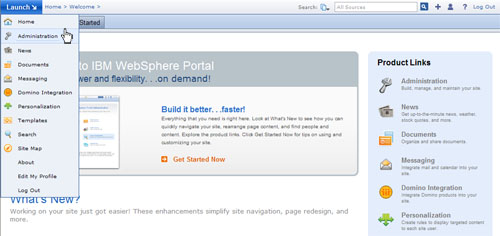
- Click Administration from the main menu
- Click Manage Pages directly from the navigation. Manage Pages presents you with the entire site hierarchy and lets you add, rearrange, and edit all of the pages in the site.
We can also access Manage Pages by clicking Portal User Interface > Manage Pages.

- To start exploring and working with the site, click Content Root.
- The content root contains all of the top level site areas. You will learn how to control which of these top level site areas appear in the main menu at a later phase of this tutorial.
- We can create pages, labels, or URLs under the content root. A page displays content such as subpages and portlets in a single area. A label can be thought of as notebook divider and functions only as an organizational container. A URL can launch external Web sites or pages in the site. In this example, you will learn how to create a page under the Home area of the content root.

- Click Home.
- The Home area is just one of the top level site areas that is located under the content root.
- The
icon beside Home indicates that this area is a label.

- Click New page.
From Manage Pages, you see that the Home label currently contains two pages
, which are Welcome and Getting Started. This organizational structure is also seen when you initially logged in to the site and saw the Welcome and Getting Started pages in the site navigation and saw Home listed in the main menu.

- In Page Properties, type in the name of the new page in the Title field and click OK. In this example, we can type My Page as the title of this new page.
We can specify other page properties such as theme, page layout, navigation type, page type, and caching options for the new page. For this example, we can use the default values for these page properties or try out different options. Refer to the portlet help for more detailed instructions for using Page Properties as you explore the various options.

- Notice that the new page is listed in Manage Pages as one of the pages in the Home area of the site.
Click
or
as appropriate to change the order of My Page in the site navigation.

- Exit Administration by clicking Home from the main menu.
We can also click Home in the quick links bar located at the bottom of the page to return to the Home area of the site.

You have successfully created the new page.
