IWWCM Demo - Workflows and more
Content
- Introduction
- Set up a new workflow
- Develop a content template
- Create a presentation template
- Create a menu design
- Build a site framework
- Create and edit web content
Introduction
Something to keep in mind while creating your WCM content: To prevent corruption of WCM indexes, do not copy and paste information from documents in a proprietary format. For example, do not copy information from an MS Word document and paste into WCM. Also avoid cutting and pasting from Adobe products.
Use an ASCII-editor that does not add any crud to the document. For example, vi, notepad, or TextPad.
Set up a new workflow
- WebSphere Portal Server should be started. Make sure it is. If not, please start it.
- Click on the Web Content Management page.
- In the left hand window, click on the plus (+) icon next to Workflow Management. Then click on Workflow Stages .

- All content in IWWCM must go through a Workflow process before being published. You need to create a Workflow for our web site. A Workflow process is comprised of Workflow stages. Therefore, you first need to create a Workflow stage which you will include in the Workflow process.
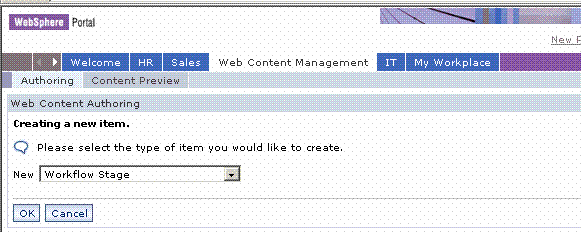
- Click on the New icon.
- Click on OK to select Workflow Stage.
- In the Identification section enter Draft in the Name box. In the Description box enter Create and modify content.

- Click on the Save button.
- Click on the Close button
- Youve now created a workflow stage. In the future, in order to see the new stage, select Workflow Stages under Workflow Management.
- Lets add a second workflow stage called GoLive.
- Click on the New button. Select Workflow Stage. Click OK. In the Identification section enter GoLive in the Name box. In the Description box enter Publish content for viewing. Dont save it just yet.

- Click on the New button. Select Workflow Stage. Click OK. In the Identification section enter GoLive in the Name box. In the Description box enter Publish content for viewing. Dont save it just yet.
- In the Properties section, Click on Select Actions icon under Execute on Entering Stage

- Now add the Action to execute when content is moved to this workflow stage.
- Click on the Add icon.

- Select the Publish action by clicking in the box to the left of the action.
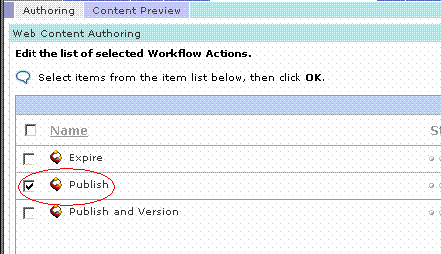
- Click OK.
- Click on the Add icon.
- Click OK again. You should see the action added to the Properties area for the stage.

- Click on the Save button.
- Click on the Close button.
- Add one more stage: Expire (if you need help go back to steps 10 - 14)
- The Identification Name should be Expire.
- Add the Action Expire.
- Once youve added the new stage, remember to click on the Save button and the Close button to return to the window below.
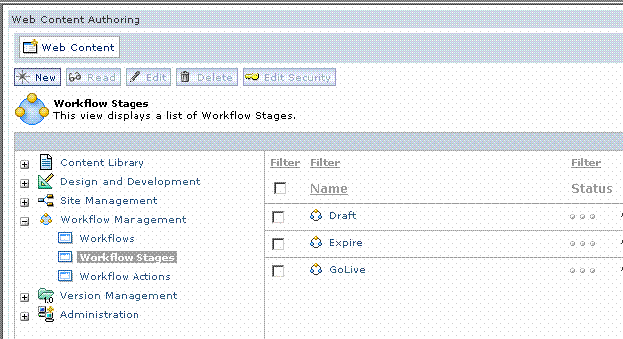
NOTE: You have created 3 stages for your new workflow. The first stage, Draft, is the state where all new content will be created. Once the content is created it will be moved to the second stage, GoLive. This is where the content is published so that it can be viewed by end users. The final stage, Expire, is used when the content reaches its expiration date.
- Now that youve created the workflow stages, create a Workflow and add the 3 stages to it.
- Click on Workflows to select it.

- Click on the New icon.. Make sure Workflow displays in the drop-down list. Click on OK to select Workflow as the object you will create.


- Click on Workflows to select it.
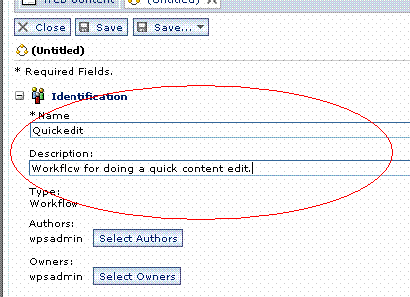
- In the Identification section enter QuckEdit in the Name box. In the Description box enter Workflow for doing a quick content edit.
- Now lets add the 3 stages we created to our Workflow.
- In the Properties section, click the Select Workflow Stages button under Workflow Stages.
- Click the Add icon
- Select the stages, Draft, GoLive, and Expire by clicking the box to the left of each one. Click OK.
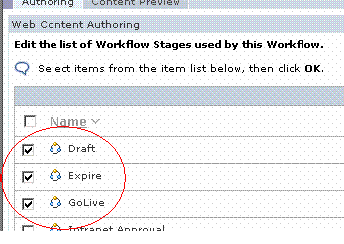
- The order that you see in the Workflow window is not correct (thats because the stage names are listed in alphabetical order). So, move the GoLive stage up one in the list.
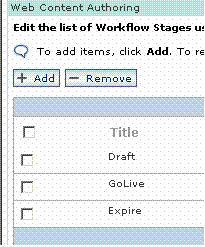
- Select the GoLive stage by clicking the box to its left.
- Then use the Up icon to move it up one in the list. Your stages should be in the order below.
- Click on Ok.
- Now, click on the Select Reject Stage button. Select the Draft stage by clicking on the button next to it. Then click OK.
This tells the Workflow process to move the content back to the Draft stage if it is rejected.

- Now define who can view and use the workflow.
- Expand the Security section.
- In the User Defined section click the Grant Read Access button.

- Click the Add icon.
- In the first drop down box select Groups.
- Enter * as the search criteria.
- Click on the Search icon

- In the Search Results list find [all users] (you may have to scroll to find it)
- Select it by clicking on the box next to it.
- Click OK. Click OK again.
- Click on the Save icon
- Click on the Close icon.
NOTE: You have now created a new workflow along with its stages. As you can see the adding of workflow stages and workflows is pretty simple and easy to do with the new interface in WebSphere Portal.
Develop a content template
- Content creators need a content template to add new content. Normally, there are several implied attributes associated with a piece of content. You will create additional attributes for your DeptNews content.
- Expand the Design & Development section by clicking on the Plus (+) sign.
- Click on Authoring Templates in the expanded list.
- Click on the New icon.

- Select Authoring Template and click on OK.
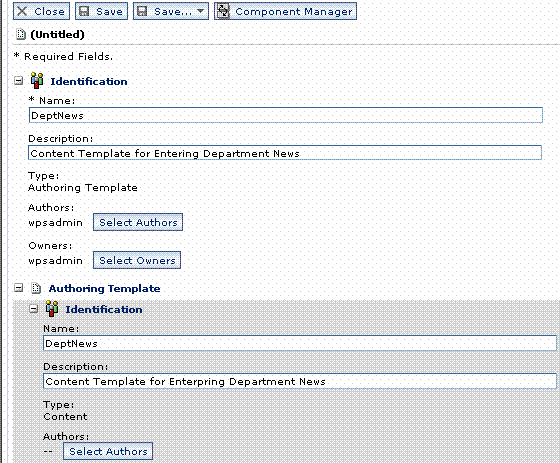
- In the Identification section enter Deptnews as the Name and Content Template for entering departmental news as the Description.

- Enter the same information in Step 1 in the Authoring Template section as shown below.
- Click the Select Workflow button.

- Then select the Quickedit workflow by clicking the button next to it. Click OK.

- Now, click on the Component Manager icon to define additional content attributes for our Deptnews authoring template.

- Click on the Add icon.
- Enter NewsBody as the component Name.
- From the drop down window select Rich Text Component as the component Type.

- Click OK to create the new content component.
- Repeat the same process to add three additional component type as shown below:
NOTE: Component titles are case sensitive. Be careful to capitalize exactly as shown below.

- To move a component up or down in the list to place them in the same order as the picture above, you will select the component you want to move and use the up and down arrows to resequence them.

- Click on OK when youve added all of the components.
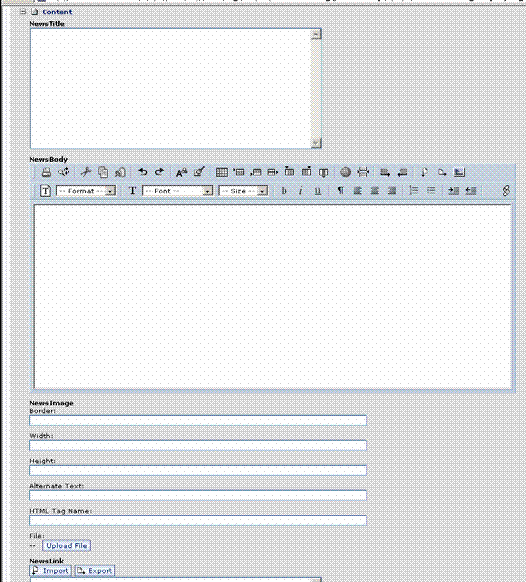
- You will be back on the Authoring Template window. Scroll down to see how the component types you just added are now included. This is where content contributors will enter content for end users to see.
- Click on the Save button.
- Click on the Close button.
NOTE: In this section youve added a new authoring template for content contributors to use.
Create a presentation template
- A presentation template defines the layout of a web page that is presented to end users. The template consists of the layout of components that will be shown in a web page along with the default properties of a web page. It lays out the fields you just created on the Authoring Template. It also positions other components and defines fonts, colors, .CSS, etc for the page.
- Click on Presentations Templates in the expanded list.
- Click on the New icon.

- Select Presentation Template. Click OK.
- In the Identification section enter NewsDetails as the Name and Detail news item page as the Description.

- Insert the HTML code below in the Presentation Template section between the
WebSphere is a trademark of the IBM Corporation in the United States, other countries, or both.
IBM is a trademark of the IBM Corporation in the United States, other countries, or both. tags. Add the following HTML to the Presentation Template skeleton:
<html>
<head>
<head>
<body TEXT="Black" BGCOLOR="White" BACKGROUND="" LEFTMARGIN="0" RIGHTMARGIN="0" TOPMARGIN="0" BOTTOMMARGIN="0">
<AptrixCmpnt context="current" key="NewsTitle" type="content"/>
<AptrixCmpnt context="current" key="NewsImage" type="content"/>
<AptrixCmpnt context="current" key="NewsBody" type="content"/>
<A HREF=""target="Otherwindow">Read more about it...
</body>
</html> - Click on the Save button.
- Click on the Close button.

Create a menu design
- Go to...
- Component Library | New
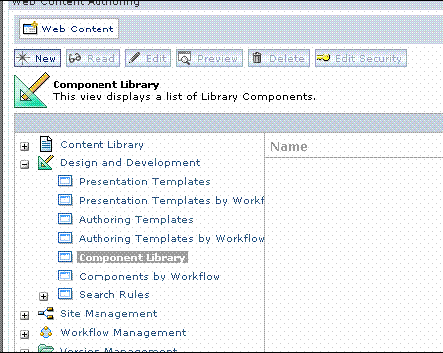
- On the Creating a new item page open the drop down and select Menu Component. Click OK.
- In the Identification section enter:
1) Name: NewsList
2) Description: Menu list for News content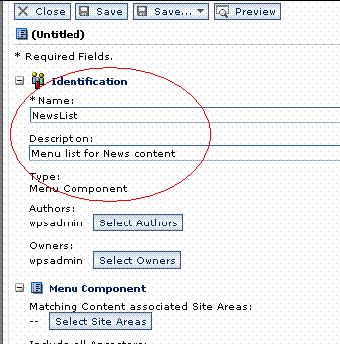
- Associate an Authoring Template with the Menu Component
- In the Menu Component section click on the Select Authoring Templates button

- Click on the Add icon
- Select DeptNews by clicking on the box next to it. This associates an Authoring Template with your web page design.

- Click on OK.
- Click on OK.

- In the Menu Component section click on the Select Authoring Templates button
- In the window, find Include Current Document in Results (if applicable). Click the box to make it active.
- Change the sort keys.
- Find Results Primary Sort Key: and using the drop down box select Publish Date
- Find Results Secondary Sort Key: and using the drop down box select Name

- Now add a header to the menu page.
- Add <h1>Current News</h1>
- The last thing to do is set the News titles up as a link. Find the section Component Design for each Matching Content.
- Add :
<A HREF=<Placeholder tag=href/>><AptrixCmpnt context=autofill key=NewsTitle type=content/></A><br>
Or you can import the MenuMatching.html file in the WebCM 51\labs\Usage Lab folder. Make sure there are single quotes around <Placeholder tag=href/>.

- Add :
<A HREF=<Placeholder tag=href/>><AptrixCmpnt context=autofill key=NewsTitle type=content/></A><br>
- Click on the Save button.
- Click on the Close button.
Build a site framework
- A site framework is what pulls everything together into a coherent flow.
- Expand the Site Management section by clicking on the Plus (+) icon.
- Click on Site Framework.
- Click on the New icon.

- On the Creating a new item page select Site.. Click OK.
- In the Identification section:
1) Name: NewsSite
2) Description: Site for working with departmental news
- Now associate the authoring template and page design to the Site framework.
- Click on the Edit Template Mapping button.

- On the Template Mapping window click on the Add button.
- In the Authoring Templates section select DeptNews by Clicking on the circle next to it.
- In the Presentation Templates section select NewsDetail by Clicking on the circle next to it.

- Click on OK.
- Click on the Edit Template Mapping button.
- Click on OK.
- You should now see the Authoring Template and Presentation Template for the NewsSite.

- Click on the Save button.
- Click on the Close button.
- Now that youve created a site, create a site area within the site.
- Click on Site Framework.
- Click on NewsSite
- Click on the New icon.

- From the pull down window select Site Area. Click on OK.
- On the News Site Area window select NewsSite in the right hand window. Click on OK.

- In the Identification section enter:
1) Name: NewsArea .
2) Description: Area for working with departmental news.
- Now associate the authoring template and page design to the Site Area.
- Click on the Edit Template Mapping button
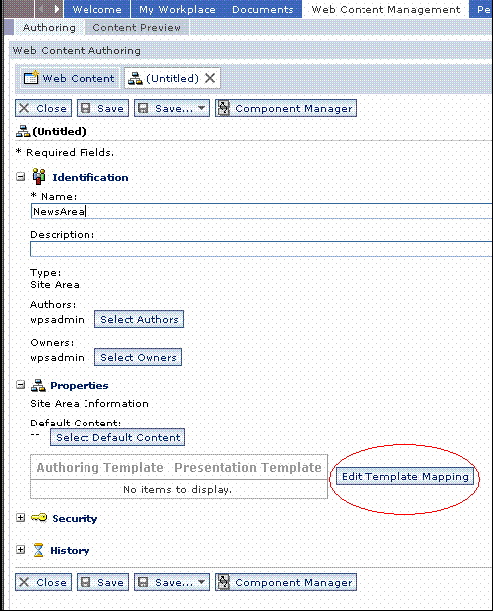
- On the Template Mapping window click on the Add button.
- In the Authoring Templates section select DeptNews by clicking on the circle next to it.
- In the Presentation Templates section select NewsDetail by clicking on the circle next to it.

- Click on OK.
- Click on the Edit Template Mapping button
- Click on OK again.
- You should now see the Authoring Template and Presentation Template for the NewsArea. .

- Click on the Save button.
- Click on the Close button.
Create and edit web content
- Now it is time to create and edit web content.
- Expand the Content Library section by clicking on the Plus (+) icon.
- Click on Content by Title.
- Click on the New icon.
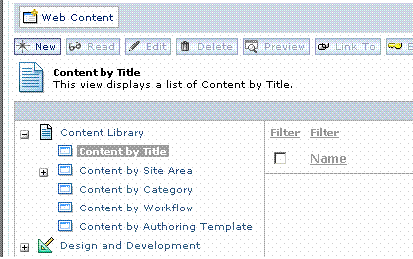
- On the Creating a new item page select Content from the pull down window and click OK.
- From the pull down window under Authoring Templates: select Deptnews.
- In the Site Framework: area click on the Plus (+) sign next to NewsSite.
- In the right hand window select NewsArea by clicking on the circle next to it.

- Click on OK.
- In the Identification section enter
- Name: DeptNews
- Description: Content Template for entering departmental news.

- In the Content section enter the following information:
- In the NewsBody area, click on the Import icon.

- Navigate to the WCM 51/labs folder on your DVD. Select the file called Vacation Specials.htm. This a Microsoft Word document which has been converted to HTML.
- In the NewsImage area bring in a new image by clicking on the Upload Files.. button. Go to DVD and navigate to the WCM 51/Labsfolder. Select the Trips.bmp file to upload. You may want to change the image height to 400 and image width to 400.
- In the NewsTitle area enter New Vacation Opportunities to Yellowstone National Park.
- In the NewsLink area enter the html http://www.yellowstone.cc
- In the NewsBody area, click on the Import icon.
- Click on the Save icon.
- Click on the Close icon.
- Next, expand Content by Workflow by clicking on the Plus (+) icon.
- Expand Quickedit and then click on Draft to see the content you just added.

- To publish the DeptNews, click on the link to the content to open it and then click the Next Stage button. This will move the content into the GoLive stage.

- Click on the Close button.
- Open the GoLive stage, select DeptNews and click on the Preview button to see how the content will look.
WebSphere is a trademark of the IBM Corporation in the United States, other countries, or both.
IBM is a trademark of the IBM Corporation in the United States, other countries, or both.