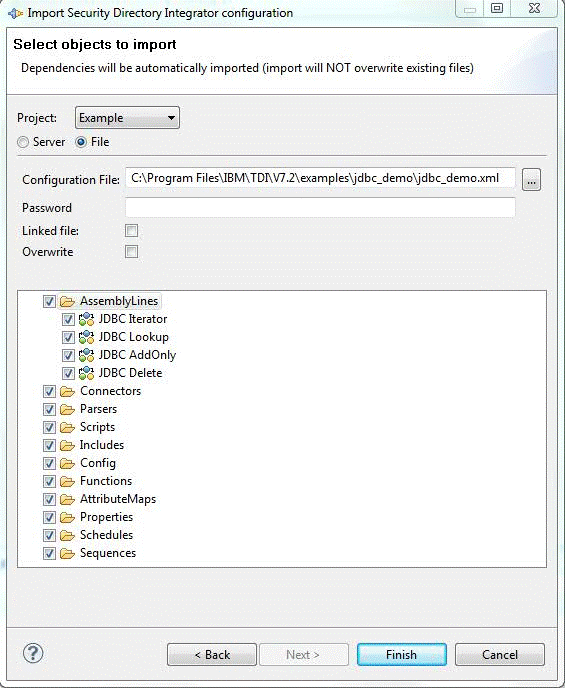
Import Configuration Wizard
We can import configuration files of previous versions using the Import Configuration wizard.
In this wizard you choose the target project and which components
you want to import.
By default all components are selected for import. We can however
check only those you are interested in. If you check a single AssemblyLine
and that AssemblyLine uses connectors in the configuration file, those
connectors will automatically be imported as well.
The Project input field is the target project
into which the configuration is imported. Select the blank option
to create a new project.
The Configuration File input field is the
configuration file you are going to import. If the configuration is
password protected you enter the password in the Password input
field.
When the Linked file field is checked, any
changes made to the imported project are written back to the file
the project was imported from. We can change this setting in the
project properties by clearing or changing the file name for the Linked
file field, as illustrated below:
We can also import configurations from servers. Switch to the
server view by checking the Server radio button.
You start this type of import by selecting the server from the
list of servers in the Server name field. Once
you have selected a server, the list of configurations on that server
is shown in the list below the server name. Since this is a network
operation you may see some of the controls disabled while the list
is being refreshed. From the list of configurations you select the
configuration you want to import. Selecting a configuration downloads
that configuration from the server and populates the tree below with
its contents so we can choose which components to include in the
import.


Parent topic:
Wizards