The stepper and debugger
The stepper and debugger are tools built in to the Config Editor that can help you develop your AcessemblyLines interactively.
We can run the stepper in two modes. One is the normal advanced debugger (activated by the Debugger button, see The Debugger) where you have access to all parts of the AssemblyLine and the other is the stepper (activated by the Data Stepper button, see The Data Stepper) that provides a simpler view of the components and flow. We can toggle between the two by clicking the button in the column view:
 In the stepper view we can switch to debugger view by clicking
the Debugger button. Conversely, switching
from debugger to the stepper you click the Data Stepper button.
In the stepper view we can switch to debugger view by clicking
the Debugger button. Conversely, switching
from debugger to the stepper you click the Data Stepper button.

The Data Stepper
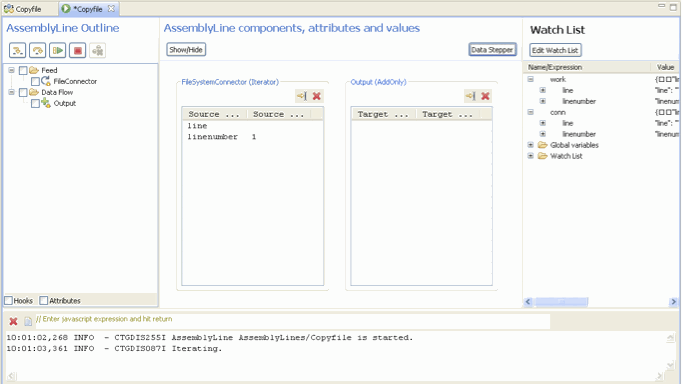
The data stepper provides a column view of all connectors in the AssemblyLine. Stepping through the AssemblyLine will show the data read or written for each component. All data shown in these tables are always after a connector has completed its operationData Stepper main window
 In the right part, the data stepper shows components with an
attribute map vertically. Each component can be removed from the view
by clicking the close button or deselecting it from the Show/Hide dialog.
The button to the left of the close button (
In the right part, the data stepper shows components with an
attribute map vertically. Each component can be removed from the view
by clicking the close button or deselecting it from the Show/Hide dialog.
The button to the left of the close button (

) in each component is a shortcut for “Run to here”. The Next and Run buttons are used to step one component at a time or to run the AssemblyLine to completion. The Stop button is used to pause a running AssemblyLine, or terminate a paused AssemblyLine. The left part of the data stepper shows the outline for the AssemblyLine and the work entry below. In the outline view we can choose to re-launch the AssemblyLine from the context menu. This will start the debugger in a new session and run until the selected component. This is a quick way of getting into the debugger from the data stepper
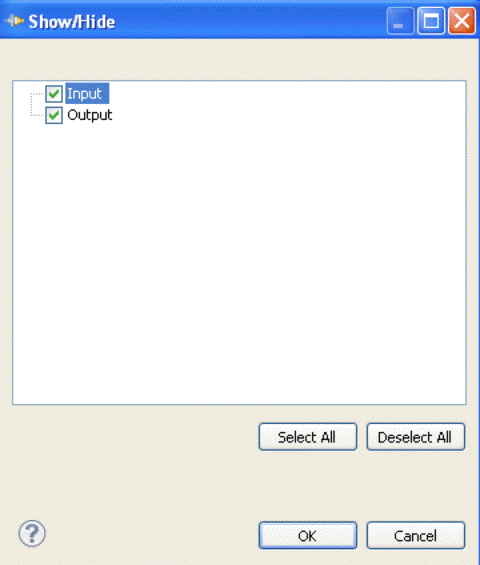
Show/Hide button in the Data Stepper
 The Show/Hide Components dialog
lets you choose which components to show in the view
The Show/Hide Components dialog
lets you choose which components to show in the view
Show/Hide components dialog
The Debugger
When you choose the Debugger view you will
be presented with a layout very similar to the stepper view, but in
the debugger view you see much more of the AssemblyLine components
and you also have the watch window where we can have custom expressions.
The AssemblyLine components tree has a check box for each item you
can check or uncheck to set or remove a breakpoint. Also, there are
more command buttons that enable stepping into components and hooks.
(In the debugger window it can be useful to maximize the editor
with Ctrl-M to get a better overview.)
The tree to the left shows the AssemblyLine components and hooks.
We can toggle the check box for each item to set a break point there.
Double-click the item to view the script, or to enter the script for
a conditional break.
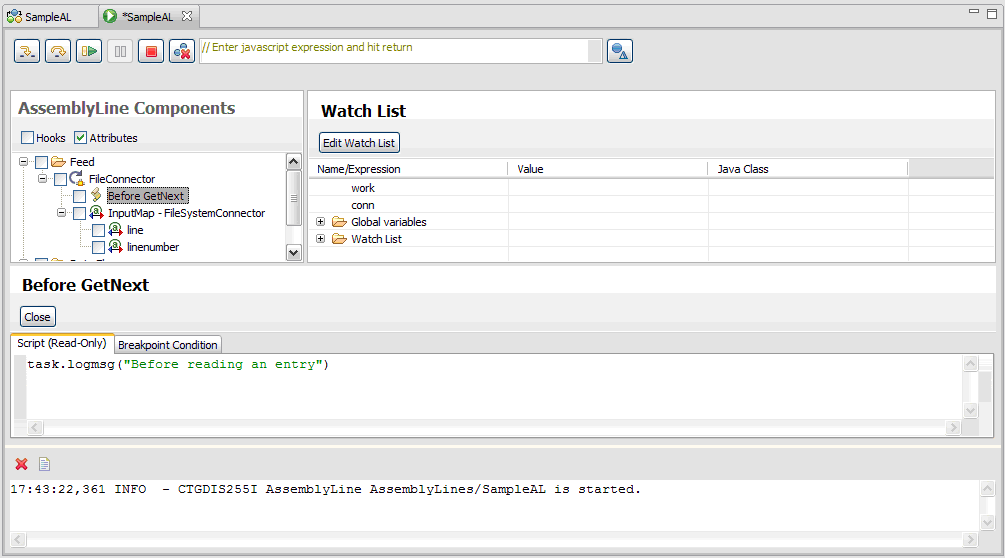
The picture below shows the conditional break tab after double-clicking
the Before GetNext hook. Also note that you
can hide all hooks that are inactive. Showing all hooks lets you set
a breakpoint regardless of whether the hook is active or not. The Attributes check
box lets you hide attribute maps from the tree view.
The attribute map panel shows the components and their assignments
and also the value assigned to the work attribute. The value is a
snapshot from the last break in the AssemblyLine and the Previous
Value is the snapshot value before that. When you step
through the AssemblyLine, the values will reflect maps and scripts
that affect the work entry.
When an error occurs the stepper will show the exception message
and the stack trace in a separate dialog. The log file (on screen)
does not include this stack trace. We can choose to not show this
dialog by selecting the check box or in the Configuration Editor's
preferences page Error dialog: Stack Trace
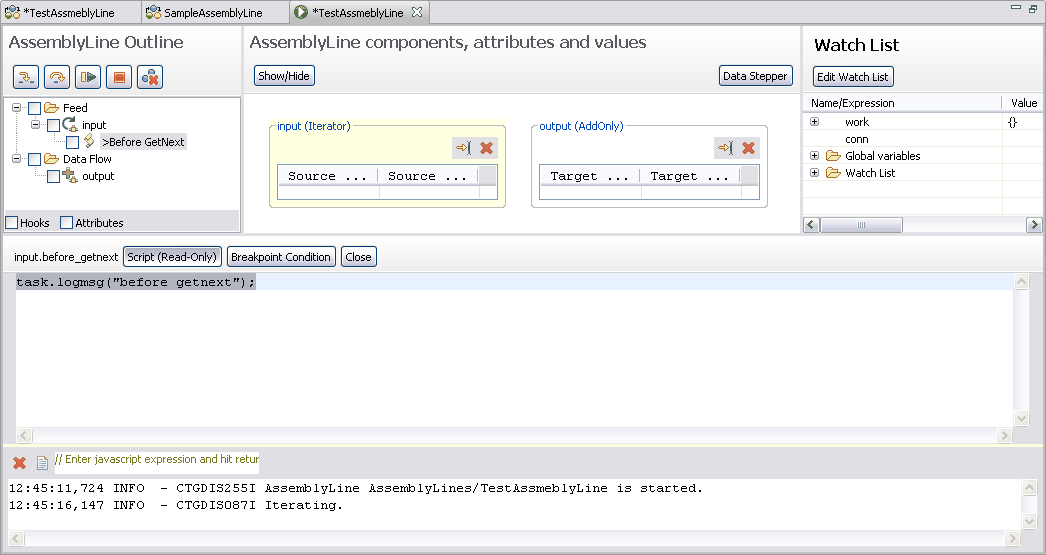
When you reach a breakpoint that contains JavaScript we can step into the script
and have it executed line by line. The script tab will show the script
about to be executed; we can follow the flow by using the Step
Into command (the leftmost of the two Stepper buttons).
As you step through the script, each line will be highlighted before
it is executed. We can also use the Evaluate function
to display script engine variables while you step through a script.
When a script function is about to be executed we can use the StepInto button
to step into the JavaScript function.
If the function is defined outside the current context (for example,
hook, attribute map script) the window is replaced StepInto
function
Stepped-into function
We can also set breakpoints inside scripts. Open the editor for
a script or attribute map and double-click the left margin. A blue
bullet will appear to denote that there is a breakpoint set for that location. Double-click again to remove it. We can also right-click
the left margin or in the text field to toggle break points.

Stepping through scripts

 In this AssemblyLine we have defined a function called myfunc1() in
the before init hook. We will call it from the Script1 component to
show how it appears to you
In this AssemblyLine we have defined a function called myfunc1() in
the before init hook. We will call it from the Script1 component to
show how it appears to you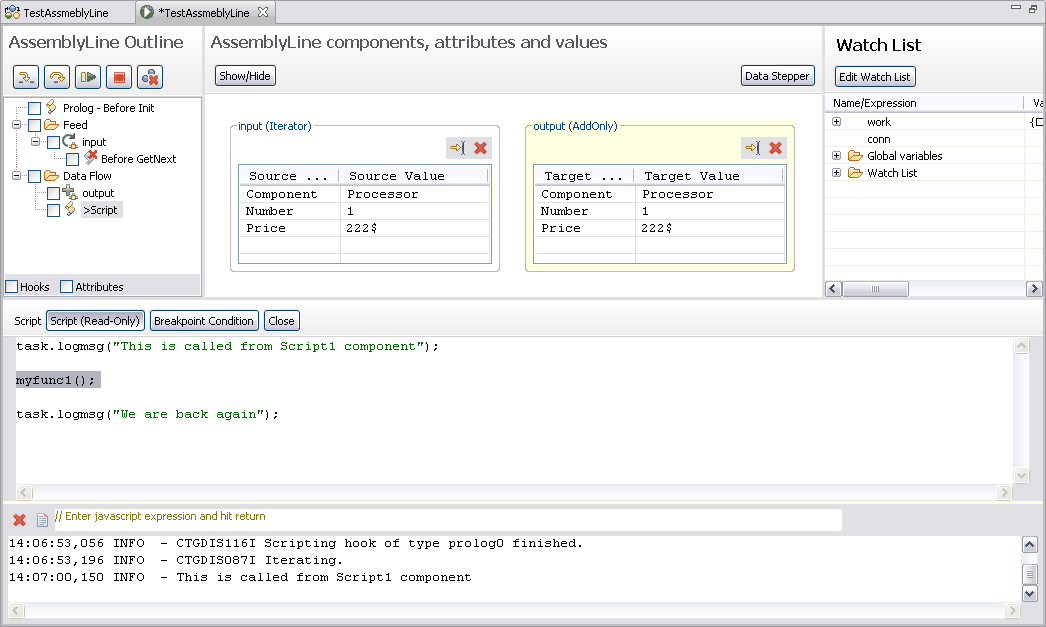 At this point we can press StepOver to continue
with the next statement or press StepInto to
follow the JavaScript function
call:Figure 10. Follow the function call
At this point we can press StepOver to continue
with the next statement or press StepInto to
follow the JavaScript function
call:Figure 10. Follow the function call
 Step into causes the script editor to change to the script from
the before init hook. Notice the changed label that shows where
the script is defined.
Step into causes the script editor to change to the script from
the before init hook. Notice the changed label that shows where
the script is defined.
Parent topic:
Debug AssemblyLines