Import installed packages
Overview
You can use the Import wizard to add existing packages that were installed with installation tools other than IBM Installation Manager. By importing these packages, you can use Installation Manager to manage the packages.
The Import wizard is used only with IBM WebSphere products.
To display the Import wizard either...
- Add a repository for the package. The Import wizard displays when a repository is detected that requires the wizard.
- Enable the preference com.ibm.cic.common.core.preferences.import.enabled using a response file.
Import an existing package
- Start Installation Manager
- Add the location of the repository. Run...
- Click...
-
File | Preferences | Repositories | Add Repository
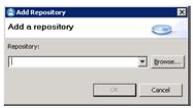
- Enter the path to the repository for the existing WebSphere package and then click OK.
- Click Apply.
- Click OK.
- Click...
- Click Import to open the Import wizard.

The Import button is only visible after a WebSphere repository has been added to the repository list.
- In Installation Directory, click Browse to find the installation directory for that instance of the application server.
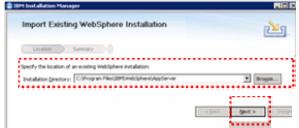
- Click Next.
- If a panel requests a shared resources directory, in the Shared Resources Directory field, enter the path to a shared resources directory or click Browse to find an existing directory to use for the shared resources.

- Click Import to add the installation into the inventory of installed products.
If the import procedure is not successful, click View Log File to troubleshoot the issue.
- Click Finish.
- To verify the import procedure was successful.
-
File | View Installed Packages
See also
Synchronizing with imported packages