Evaluate results for a specific time range
Overview
After you run a schedule, you can further adjust the time ranges in a report. The aggregated results are recomputed to take into account only the data collected during the time range that you specify.To recalculate results for particular start and stop times, you can specify a time range for a report.
For example, you can enter custom start and stop times to:
- Filter out data from the ramp-up or ramp-down phases of test runs, to focus on the time periods when the maximum number of virtual users are active.
- Adjust a stage's time range to account for incorrect settle time.
- Focus on time periods when response time exceeds a certain level, regardless of the number of users.
Adjust the time range in a report
- In the Test Navigator view, expand the project until you locate the run to evaluate.
Each run begins with the name of the schedule or test, and ends with the date of the run in brackets.
- Double-click the run to display the default report.
To select another report, right-click the run in the Test Navigator, and select Display Report.

- Right-click the graph or table to change.
From the pop-up menu, select Change Time Range.

The Select Time Range wizard page opens.
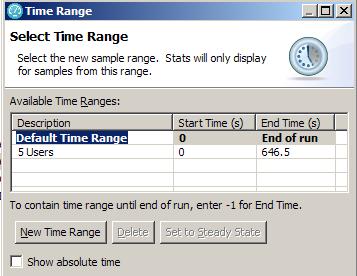
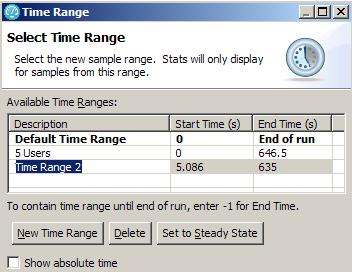
- Click New Time Range.
This adds a new time range to the list shown under Available Time Ranges.
- Edit the Start Time and End Time entries.
Any value between 0.0 and End of run is valid for the Start Time.
To automatically select the time range that includes the maximum number of virtual users in the test only, click...
-
Set to Steady State
- Click Finish.
The current report refreshes, zooming the time axis, to show data only from the specified time range.
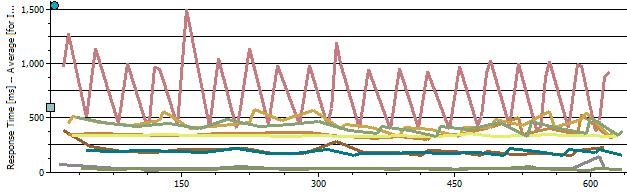
Aggregate results are recalculated to reflect only data from the selected time range. Also, response time breakdown results are recalculated to reflect only data from the selected time range.

Results
The newly specified time range is stored with the report.
To return the report to the complete time range, right-click the report, select Change Time Range and then select Default Time Range from the list of Available Time Ranges.