6.3 Creating the portlet project
In this section, you create a Basic type portlet application with the name ActionEvent. The portlet application will be published and executed in the test environment. Follow these steps:
| 1.
| Open the IBM Rational Application Developer by clicking Start | Programs | IBM Rational | IBM Rational Application Developer V6.0 | Rational Application Developer. If you are prompted to select a workspace, click OK to use the default workspace directory.
|
| 2.
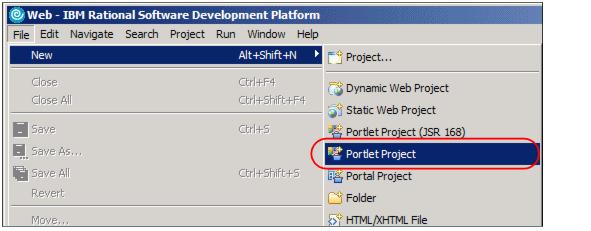
| If you have developed a portlet project before, you can select File | New | Portlet Project. Otherwise, select New | Project.
|
Figure 6-3 Starting a new portlet project
| 3.
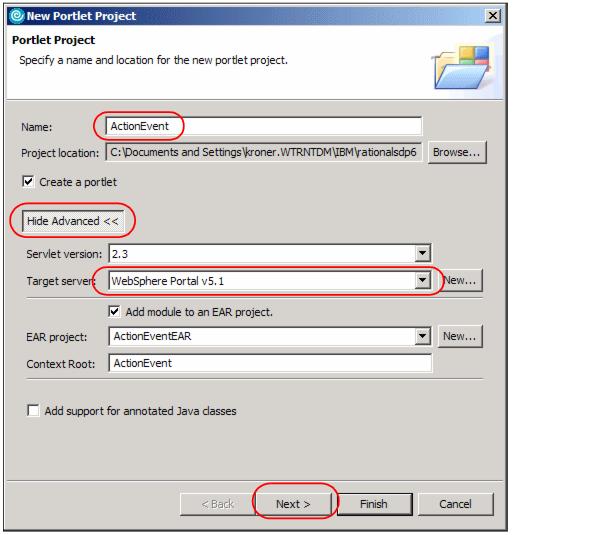
| Name the project ActionEvent. Click the Show Advanced button and select WebSphere Portal V5.1 as the target server. Then click Next.
|
Figure 6-4 Portlet project settings window
| 4.
| Choose the Basic Portlet type. Click Next to continue.
|
| 5.
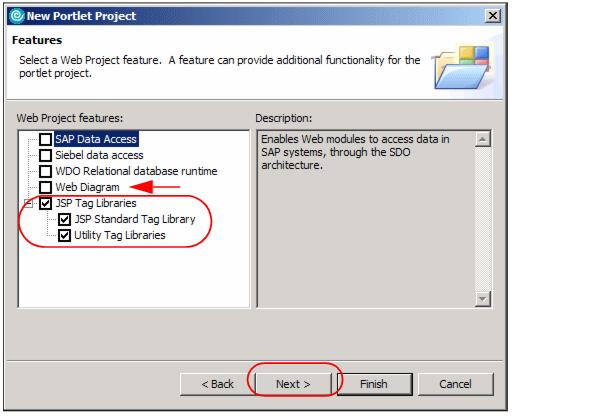
| On the Features window, deselect Web Diagram and select JSP Tag Libraries. Then click Next to continue.
|
Figure 6-5 Adding JSP Tag Libraries
| 6.
| Accept the default settings on the Portlet Settings window. Click Next to continue.
|
| 7.
| On the Event Handling window, deselect Add form sample. Since you will be using the action event listener, leave this option selected. Click Next to continue.
|
Figure 6-6 Event handling window
| 8.
| Since you will not be using the credential vault in this project, accept the defaults on the Single Sign-On window and click Next.
|
| 9.
| Click Add Edit mode on the Miscellaneous window. You will be using it in this scenario. Click Finish to generate your portlet project.
|
Figure 6-7 Add Edit mode
| 10.
| Your project will display in the Project Explorer view on the left-hand side of the workbench.
|
Figure 6-8 Project explorer view
|