JTabbedPane and its pages
The visual editor makes it easy to work with JTabbedPane in the Design view.
You can use the class javax.swing.JTabbedPane to create
a notebook with different pages. When you drop a component onto a JTabbedPane this
becomes a new page and is shown as a child on the Design view and also the
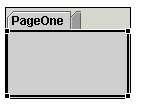
Java Beans view. The Design view shows you the notebook folder and you can
drop new pages at the end of the list of existing tabs. One of the pages is
the active page that you can select in the Design view and work with. To change
the active page select it in the Java Beans view.

In the Design view, you can switch tab pages using the Switch To context
menu. If you right-click the JTabbedPane, you can select the Switch To option
on the pop-up menu to select a tab to bring to the top. New components
can also be dropped on the JTabbedPane in the Java Beans view. If you select
a page in the Java Beans view, the Design view will switch and make it the
active tab so you can work with the child component.

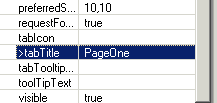
When a component is added to the JTabbedPane,it is done with the method insertTab(String title, Icon icon, Component childJavaBean, String tip, int index). To change the tab's title, its icon, or its tool tip, select the component and change in the Properties view. You can reorder the tabs by using the Java Beans view. Select the tab's component, drag it to the location of your choice, then drop it.
