Your plug-in can contribute menus, menu items, and tool bar items to the workbench menus and toolbar by using the org.eclipse.ui.actionSets extension point. In order to reduce the clutter that would be caused by having every plug-in's menu contributions shown at once, the contributions are grouped into action sets which can be made visible by user preference.
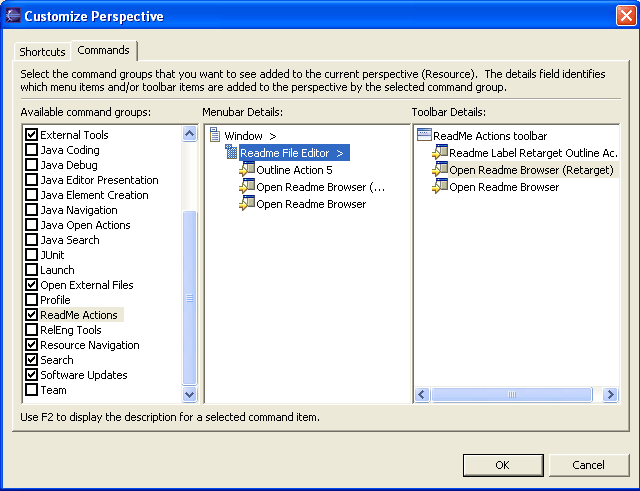
You can see which action sets have been contributed to your workbench by choosing Window->Customize Perspective... from the workbench menu. This option will show you a dialog that lists action sets as groups of commands. A checkmark by a command group means that the menu and tool bar actions are visible in the workbench. You can select the name of the command group to see the list of available menu and toolbar actions to the right. The figure below shows the list of command groups available in our workbench. (Your workbench may look different depending on which plug-ins you have installed and which perspective is active.)

The readme tool uses an action set to contribute several different "Open Readme Browser" actions to the workbench menu. (We contributed a similar action to the popup menu of the resource navigator.) The markup follows:
<extension point = "org.eclipse.ui.actionSets">
       <actionSet id="org_eclipse_ui_examples_readmetool_actionSet"
           label="%ActionSet.name"
           visible="true">
           <menu id="org_eclipse_ui_examples_readmetool"
               label="%ActionSet.menu"
               path="window/additions">
               <separator name="slot1"/>
               <separator name="slot2"/>
               <separator name="slot3"/>
           </menu>
           <action id="org_eclipse_ui_examples_readmetool_readmeAction"
               menubarPath="window/org_eclipse_ui_examples_readmetool/slot1"
               toolbarPath="readme"
               label="%ReadmeAction.label"
               tooltip="%ReadmeAction.tooltip"
               helpContextId="org.eclipse.ui.examples.readmetool.open_browser_action_context"
               icon="icons/ctool16/openbrwsr.gif"
               class="org.eclipse.ui.examples.readmetool.WindowActionDelegate"
               enablesFor="1">
               <selection class="org.eclipse.core.resources.IFile"
                    name="*.readme">
               </selection>
           </action>
           ...
       </actionSet>
   </extension>
Wow, there's a lot going on here! Let's take it a step at a time, looking only at the first action for now.
First, the action set is declared and given a label. The label "ReadMe Actions" (defined for %ActionSet.name key in the plug-in's properties file) is used to display the action set in the dialog shown above. Since we set visible to true, the workbench will initially have the action set checked in the action set list and the actions will be visible.
The rest of the action set declaration is concerned with defining the menu in which the actions appears and the actions themselves.
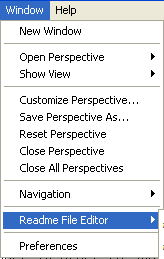
We define a menu whose label appears in the workbench menus. The menu's path tells the workbench to place the new menu in the additions slot of the window menu. (For a discussion of menu paths and slots, see Menu and toolbar paths.) We also define some slots in our new menu so that actions can be inserted at specific locations in our menu.
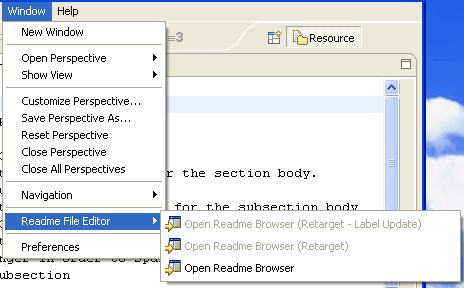
This markup alone is enough to cause the menu to appear in the workbench Window menu.

Next, we define the actions themselves.
The action definition (id, label, icon, class) is similar to the other actions we've seen in views, editors, and popups. We'll focus here on what's different: where does the action go? We use menubarPath and toolbarPath to indicate its location. First, we define the menubarPath to add the action to a slot in the menu that we just defined ( "window/org_eclipse_ui_examples_readmetool/slot1").

Then, we define a new toolbarPath to insert our actions in the workbench tool bar. Since we've defined a new tool path, "readme", the workbench will decide where it goes relative to other plug-in's toolbar contributions.

What happens when the action is selected by the user? The action is implemented by the class specified in the class attribute. The action class must implement IWorkbenchWindowActionDelegate, or IWorkbenchWindowPulldownDelegate if the action will be shown as a pull-down tool item in the tool bar. Since we are not creating a pull-down tool item, we provide WindowActionDelegate. This class is similar to ObjectActionDelegate. It launches the readme sections dialog when the user chooses the action. (We'll discuss the sections dialog in Application dialogs.)
The action also supplies enabling conditions for its menu item and tool bar item. The menu and tool bar items will only be enabled when a single (enablesFor="1") readme file (selectionClass ="org.eclipse.core.resources.IFile" name="*.readme") is selected. This action's menu and toolbar item appear and are enabled by virtue of the markup in the plugin.xml file. None of the plug-in code will execute until the user chooses the action and the workbench runs the action class.
We'll look at the other two actions later in the context of retargetable actions.