Extension point schema editor
You can open the extension point schema editor in two ways: as a by-product of creating a new extension point or by opening an existing extension point schema. By convention, new schemas have the same name as the extension point id with a .exsd file extension. They are placed in schema directory in your plug-in directory tree.
When a new extension point is created in the PDE, the initial schema file will also be created and the schema editor will be opened for editing. You can define the schema right away, or close it and do it later. Making a complete extension point schema allows PDE to offer automated assistance to the users of your extension point.
The PDE schema editor is based on the same concepts as the plug-in manifest editor. It has two form pages and one source page. Since XML schema is verbose and can be hard to read in its source form, you should use the form pages for most of the editing. The source page is useful for reading the resulting source code.
Example: Creating schema for the "Sample Parsers" extension point
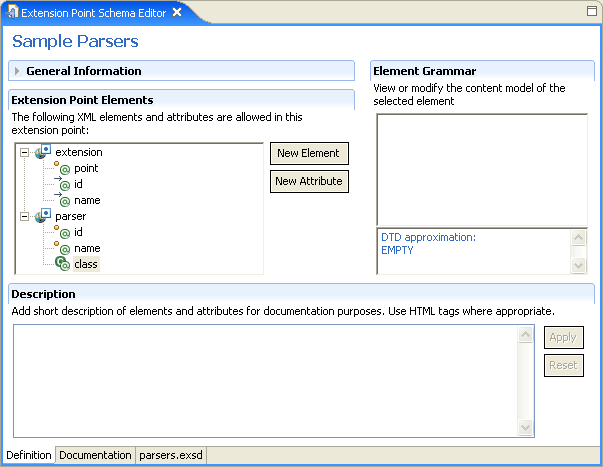
We previously created the "Sample Parsers" extension point and the initial schema. We can now open the schema by going into the schema folder of our project and double-clicking on the parsers.exsd file. This will open the schema editor.
We want to do the following:
- Define the valid XML elements and attributes for the extension point.
- Define the grammar (content model).
- Provide documentation snippets that will be merged into a reference document.
Every extension point schema starts with a declaration of the "extension" element. We will add a new XML element called "parser."
- Press the button New Element in the Extension Points Elements section.
- Move to the Properties view and change its name from "New_Element" to "parser"
- While the new element is still selected, press the New Attribute button. This will create "new_attribute" as its child. Change its name to "id" and use to "required" in the property sheet.
- While still in the property sheet, press the button "Clone this attribute" available on the local tool bar. This will create a copy of the attribute. This is useful because it allows us to quickly define all the attributes without leaving the property sheet.
- Change the name of the new attribute into "name."
- Clone the attribute again. This time, change the name to "class." This attribute will be used to represent a fully qualified name of the Java class that must implement a specific Java interface. We need to specify this so that PDE can later take advantage of it. Change kind from "string" to "java." Set the basedOn property to com.example.xyz.IParser. (This interface does not exist yet, but we will make it later.)
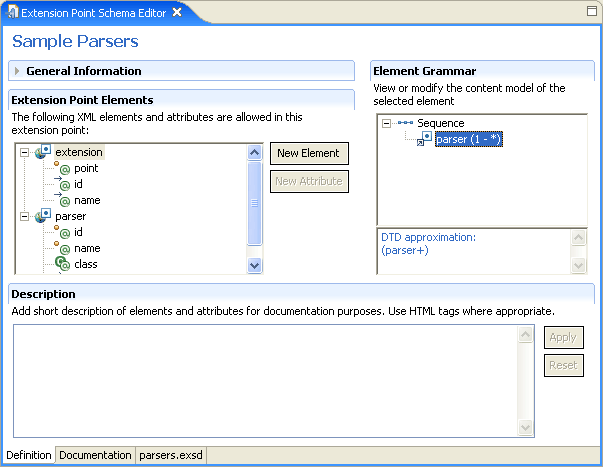
So far, the schema editor should look like this:
We will now add an additional attribute that takes values from a discrete list of choices. This means we need to create an enumeration restriction of the base string type. In addition, we will set a default value for the attribute.
- While the "parser" element is selected, press the New Attribute button. Change its name in the property sheet to "mode."
- Click in the value cell of the "restriction" property to bring the restriction dialog up.
- Change the restriction type from "none" to "enumeration."
- Add the following three choices: "never," "always," and "manual." (These are our three hypothetical modes for the parser extension.)
The restriction dialog should look like this:

When the dialog is closed, change the "use" attribute to "default" and "value" attribute to "always." This establishes the default value. Note that the status line shows an error message as you are typing the value, since it restricts valid values to the three enumeration choices. Once you finish typing, the error message should go away because "always" is a valid value.
Now that we have defined all of the elements and attributes, we need to define grammar. Our goal is to define that the "extension" element can have any number of "parser" elements as children.
- Select the "extension" element. Its initial content model shows an empty sequence compositor.
- Select the sequence compositor and select New->Reference->parser from the popup menu. This will add the parser reference to the sequence compositor.
- The default cardinality of references is [1,1] which means that there can be exactly one "parser" element. That is not quite what we wanted. We select the "parser" reference and change the maxOccurs to "unbounded."
After defining the grammar, the DTD approximation below the grammar section shows what the grammar for the selected element would look like in DTD. This information is provided to help developers who are still more comfortable with DTDs than XML schemas.
Now that we have defined valid elements, attributes and grammar, we need to provide some information about the extension point. There are two types of schema documentation snippets:
- Documentation about elements and attributes
- Documentation about the extension point usage, API, etc.
The first snippet type is provided in the Definition page of the schema manifest. As you select elements and attributes, you can add short text about them in the "Description" section. The expected format is raw HTML (as with Javadoc) and the text will be copied as-is into the final reference document.
-
Select the "id" attribute of the
"parser" element and type the
following in the Description editor:
a unique name that will be used to reference this parser. -
Select the "name" attribute and
add the following text:
a translatable name that will be used for presenting this parser in the UI. -
Select the "class" attribute and
add the following text (note the HTML tags):
a fully qualified name of the Java class that implements <samp>com.example.xyz.IParser</samp> interface. -
Select the "mode" attribute and
add the following:
an optional flag that indicates how often this parser instance will run (default is <samp>always</samp>).
We now have to provide a short text description of the extension point itself. In order to do that, we switch to the Documentation page:
-
You should now be on the "Overview" tab.
In the text editor and add the following text:
This extension point is used to plug in additional parsers. The parsers actually do not work - we have just used them as an example of extension point schema.
Press Apply.
-
Click on the "Examples" tab and add the following text:
The following is an example of the extension point usage:
   <p>
   <pre>
      <extension point="com.example.xyz.parsers">
         <parser
            id="com.example.xyz.parser1"
            name="Sample Parser 1"
            class="com.example.xyz.SampleParser1">
         </parser>
      </extension>
   </pre>
   </p>
Press Apply.
- Select the "API Information" tab and add the following text:
Plug-ins that want to extend this extension point must implement <samp>com.example.xyz.IParser</samp> interface.
Press Apply.
- Select the "Supplied Implementation" tab and add the following text:
XYZ Plugin provides default implementation of the parser.
Press Apply.
Note: Special consideration has to be taken when providing examples. Normally, PDE would treat the provided text as raw HTML and would not respect new line and white space greater than one character (i.e. ignorable white space). This is to be expected when regular text is concerned, but is extremely annoying when providing examples, where tabbing and vertical alignment is significant if the example is to look good. PDE has a compromise for this situation: if it detects the HTML tag <pre>, it will take the content as-is (preserving all characters without modification) until closing tag </pre> is seen. This is why we can provide an example like the above and be confident that it will look good in the final reference document.
You may have already noticed that as you type documentation, more and more elements in the editor Outline view acquire a "pen" image overlay. This little indicator tells you that the element in question has some text associated with it - a quick way to check if the documentation is missing somewhere in the document.

Once we have finished with the documentation, we can take a look at the reference documentation. You can do it in two ways. All the time during your work, you can preview the reference document by selecting Preview Reference Document item from the pop-up menu. Alternatively, you can set up PDE preferences (Preferences>Plug-in Development>Compilers, under Schema tab) to automatically create reference documentation on each schema file change. Regardless of the method to create it, the resulting document for this example would look like this.
![]()