Creating a JUnit test suite
This topic describes the procedure for creating a JUnit test suite.
A Java project must exist and be set to the Test perspective before you can create a JUnit test suite.
- Click File > New > Other...
- In the New dialog box, shown below, expand
the Test folder, expand the Test Suite folder,
and select JUnit Test Suite Definition.

- Click Next. The New JUnit Test
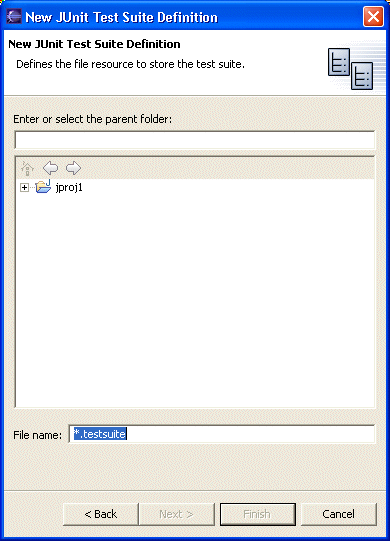
Suite Definition wizard appears, as shown below.

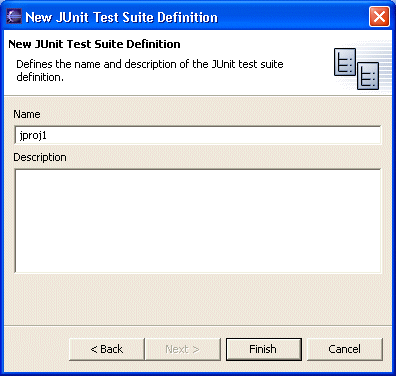
Navigate to the folder that will contain the test suite. Enter a name for the file resource that will store the test suite in the File name field. Click Next. The next page of the wizard appears, as shown below.

- Specify the name of the test suite definition and enter a description of the test suite. By default, the name of the test suite definition is the same name that you specified for the file resource without the .testsuite suffix. The name that you specify here is the name that appears in the Test Navigator. Click Finish to close the wizard. The JUnit Test Suite Definition dialog box opens. At this point the test suite definition exists but it does not contain any test methods. You can now edit the definition by adding test methods and specifying behaviors that control how the methods should be run.
Parent topic
JUnit test overviewNext topic: Editing JUnit test suite