AIX: Install with the graphical user interface
The installation program verifies the operating system and its prerequisites, available disk space, and any required software prerequisites before installation. Do not install two instances of the server at the same time.
- Start the Installation Manager.
- Add the repositories where the installation media exists:
- For each repository.config file in the install archive, add to IIM...
- File | Preferences | Repositories | Add Repositories | Browse | /path/to/portal_eimage/Setup/repository.config | OK
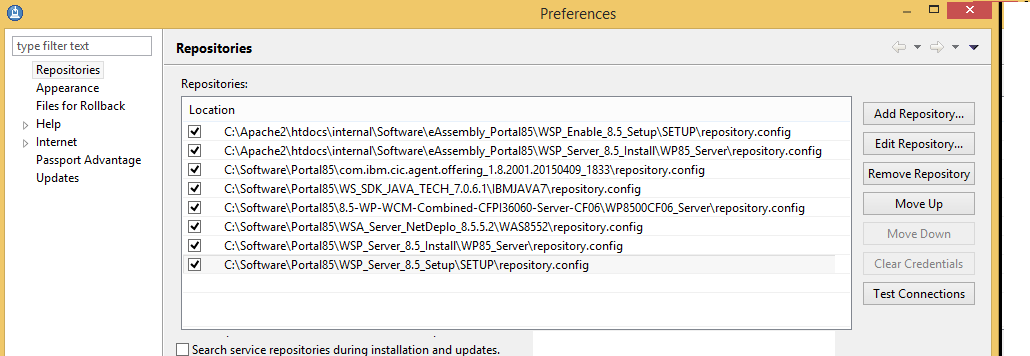
- To ensure the IIM can access service repositories, click...
-
Test Connections
- Select Apply.
- Select OK.
- For each repository.config file in the install archive, add to IIM...
- On the main IBM Installation Manager panel, select Install.
- On Install Packages: Select packages
to install, select the following packages, and then click Next:
- IBM WebSphere Application Server Network Deployment
- IBM WebSphere Portal Server
- IBM WebSphere SDK Java Technology Edition
If we have a WebSphere Portal Enable license, select both the IBM WebSphere Portal Server and IBM WebSphere Portal Enable packages.
- IBM WebSphere Application Server Network Deployment
- On Install Packages: Select the fixes to install, select any required fixes. Then, click Next.
- Accept the license agreement and then click Next.
- Enter the directory where to store shared resources and then click Next.
- Complete the following steps on the Install Packages: Installation Directory panel:
The installation directory specified must NOT contain any files or the following characters: ~ ! @ # $ % ^ & * ( ) _ + { } | < > ? ` = [ ] ; ' , . " and spaces.
- Select the WAS Package Group Name and then enter the installation directory path.
- Select the WebSphere Portal Package Group Name and then enter the installation directory path.
- Click Next.
- Select the WAS Package Group Name and then enter the installation directory path.
- Select the translations to install and then click Next.
- On Install Packages: Select the features to install, expand the WebSphere portal packages to modify the features to install and then click Next.
Ensure that Portal Server Profile is selected to create a profile containing the Portal application server and the product binary files. Clear this option if we need a binary only installation for migration or our clustered environment.
As we select the items, read the Details section for information.
- On Profile configuration details, enter the user ID and password for the configuration wizard administrator.
Then, click Next.
- If we selected the Portal Server Profile package, click Enter the Administrator user ID and password for the Portal Server. Then, select either the Standard or Advanced configuration mode and then enter the parameter details for the selected configuration mode.
Select Advanced to specify URI information specific to the company.
- Confirm the Summary information and then click Install.
What to do next
After a successful installation, the summary displays. Choose the Portal First Steps radio button and then click Finish to start the servers and begin configuring WebSphere Portal with the Configuration Wizard.
To access First Steps later, we can either select First Steps from the Start menu or we can run the ./firststeps.sh task from the WP_PROFILE/PortalServer/installer/wp.firststeps directory. Add the LaunchPadLocale language_code to the firststeps task to change the display to your user locale or to another language.
When we install WebSphere Application Server and WebSphere Portal together, we might find the following message in the SystemErr.log file:
- APPSERVER_ROOT/properties/version/installed.xml (No such file or directory)
This message is part of the installation process and is not repeated after the installation is complete. Therefore, the message can be ignored.