Additional node - Install portal
Author: Michael Pareene
Overview
This section covers adding the additional node to the Deployment Manager cell and adding a new WebSphere_Portal server as a horizontal dynamic cluster member to the previously created dynamic cluster. Once this section is completed, you will have a functional two-node horizontal dynamic cluster using the federated LDAP security.
- Install Installation Manager
- Add WAS v8.5.5 and WAS FP1 to Installation Manager repository...
- Run...
-
cd /opt/IBM/InstallationManager/eclipse/tools
./imcl -c...select...
-
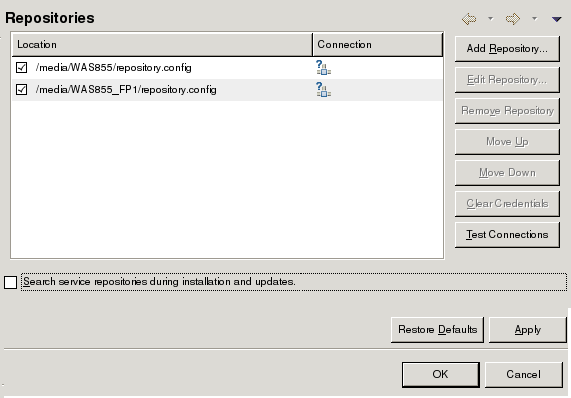
P. Preferences | 1. Repositories | D. Add Repository
- Set...
-
/opt/IBM/Portal/media/WAS855/repository.config
- Add repository for WAS 8.5.5 FP 1
-
/opt/IBM/Portal/media/WAS855_FP1/repository.config
- Select "Search service repositories during installation and updates" to remove the check mark.
=====> IBM Installation Manager> Preferences> Repositories

Repositories:
     1. [X] /opt/IBM/Portal/media/WAS855/repository.config

Other Options:
     D. Add Repository

     S. [ ] Search service repositories during installation and updates

     R. Restore Defaults
     A. Apply Changes and Return to Preferences Menu
     P. Temporarily Keep Changes and Return to Preferences Menu
- Run...
- Install WAS v8.5.5 binaries
- Start Installation Manager GUI...
-
cd /opt/IBM/InstallationManager/eclipse
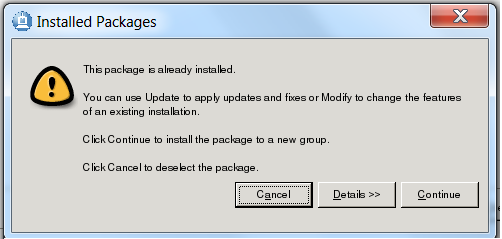
./IBMIM - Select Install, then select Continue in pop-up panel.
- On the Install Packages screen, select...
-
Create a new package group
...and for Installation Directory select...
-
/opt/IBM/Portal/WAS1/AppServer

- Select defaults for remainder of panels, then on summary page, select Install

- On last screen, select None, then Finish
- Start Installation Manager GUI...
- Install Fixes
- Add repository for WAS 8.5.5 FP 1
-
/opt/IBM/Portal/media/WAS855_FP1/repository.config
MyCo has WCM license, which is different from WCM Standard Edition (fewer entitlements). We install...
-
8.0.0-WP-Server-FP001
8.0.0-WP-WCM-FP001Uncheck: "Search service repositories during installation and updates"
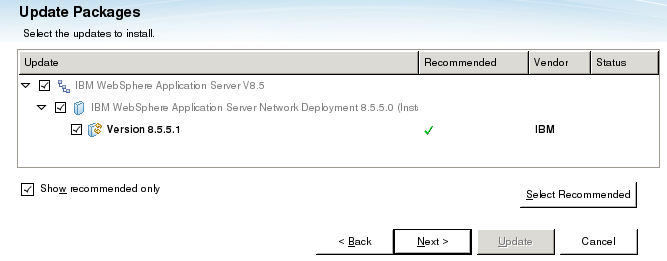
- On the main IIM page, select Update
- On the "Select a package group to find updates for", select first package group

- On the panel, "Select updates to install", verify V8.5.5.1 is selected
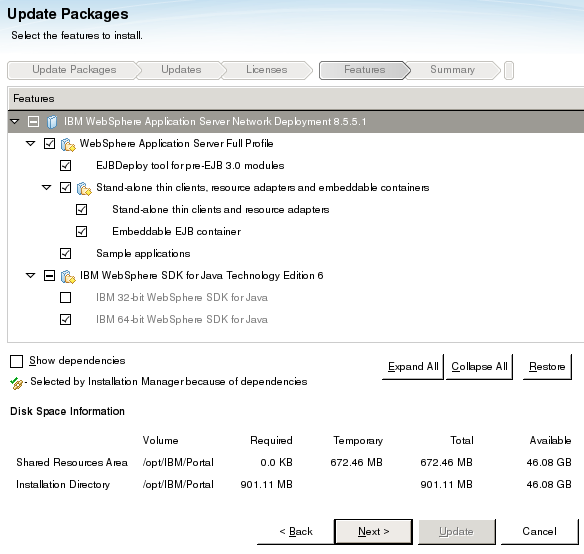
- On the panel, "Select the features to install", keep defaults, then select Next
- On the Summary panel, select Update
- Add repository for WAS 8.5.5 FP 1
- Install Portal v8.0
- Add repository...
-
/opt/IBM/Portal/media/Portal8/Setup/eimage/repository.config

- On Install Packages panel, select IBM WebSphere Portal Server

- Select "Create a new package group" and set Installation Directory to...
-
/opt/IBM/Portal/WAS1/PortalServer

- For features, select only...
- Config Engine
- Portal Server Binary

- On the next screen, select "Existing WebSphere Application Server Root Directory"
-
/opt/IBM/Portal/WAS1/AppServer

- On the Summary page, click install...

- Once the installation completes, click the radio button for None and click Finish to exit the installer.
- Add repository...
- Upgrade Portal v8 with FP1
- Review: Update Portal v8 with FP1
- Add FP1 to Installation Manager repository
/opt/IBM/Portal/media/Portal8_FP1/repository.config
- From Installation Manager select "Update"
- If you have more than one fix in your repository, it will try to install them all. To install just FP1, de-select "Show recommended only", then select only "v8.0.0.1"

- Ignore warnings about needing to update wps.properties. Unlike primary node, we did a binary only install of portal on this host, so don't need to update wps.properties
- After upgrade finishes, make tarball backup
- Upgrade Portal v8 with CF09
- Download CF09
- Add CF09 to Installation Manager repository
- Change class loader from parent first to parent last.
- Stop all WebSphere processes
- Because no profile has been created yet, we do not need to update wps.properties to include profile name and location
- Add CF09 to repository
- Use Installation Manager to install
To install manually..
- Determine offering ID...
-
$ cd /opt/IBM/InstallationManager/eclipse/tools
$ ./imcl listAvailablePackages -repositories /opt/IBM/Portal/media/CF09/repository.config
com.ibm.websphere.PORTAL.SERVER.v80_8.0.1.20131217_0755 - Install
./imcl install \
       com.ibm.websphere.PORTAL.SERVER.v80_8.0.1.20131217_0755 \
       -repositories /opt/IBM/Portal/media/CF09/repository.config \
       -installationDirectory /opt/IBM/Portal/WAS1/PortalServer \
       -sharedResourcesDirectory /opt/IBM/IMShared \
       -log /tmp/imcl.log  \
       -acceptLicense
- Determine offering ID...
- Start Portal
- Make tarball backup
- Create profiles on secondary nodes
Do this step only after configuring the portal primary node with DB2 and LDAP
- From primary node, copy profileTemplates.zip to secondary nodes. For example...
-
cd /opt/IBM/Portal/WAS1/PortalServer/profileTemplates
scp profileTemplates.zip user1@prdhost2.myco.com:/tmp
scp profileTemplates.zip user1@prdhost3.myco.com:/tmp
scp profileTemplates.zip user1@prdhost4.myco.com:/tmp - On target node, unzip profileTemplates.zip
-
cd /opt/IBM/Portal/WAS1/PortalServer/profileTemplates
mv /tmp/profileTemplates.zip .
unzip profileTemplates.zip - Update permissions...
-
cd /opt/IBM/Portal/WAS1/PortalServer/
find profileTemplates -name \* -exec chmod 755 {} \; - Execute...
-
cd /opt/IBM/Portal/WAS1/PortalServer/profileTemplates
./installPortalTemplates.sh /opt/IBM/Portal/WAS1/AppServer - On each WebSphere Portal additional node...
cd /opt/IBM/Portal/WAS1/AppServer/bin/
./manageprofiles.sh -create  \
                    -templatePath /opt/IBM/Portal/WAS1/PortalServer/profileTemplates/managed.portal  \
                    -profileName wp_profile  \
                    -profilePath /opt/IBM/Portal/WAS1/wp_profile \
                    -cellName P1Cell02 \
                    -nodeName P1Node02 \
                    -hostName prdhost2.myco.com

cd /opt/IBM/Portal/WAS1/AppServer/bin/
./manageprofiles.sh -create  \
                    -templatePath /opt/IBM/Portal/WAS1/PortalServer/profileTemplates/managed.portal  \
                    -profileName wp_profile  \
                    -profilePath /opt/IBM/Portal/WAS1/wp_profile \
                    -cellName P1Cell03 \
                    -nodeName P1Node03 \
                    -hostName prdhost3.myco.com

cd /opt/IBM/Portal/WAS1/AppServer/bin/
./manageprofiles.sh -create  \
                    -templatePath /opt/IBM/Portal/WAS1/PortalServer/profileTemplates/managed.portal  \
                    -profileName wp_profile  \
                    -profilePath /opt/IBM/Portal/WAS1/wp_profile \
                    -cellName P1Cell04 \
                    -nodeName P1Node04 \
                    -hostName prdhost4.myco.com

...etc...
Do NOT use the same node name as your primary node or any other node that may already be part of the DMGR cell. You will be unable to add this node to the DMGR cell if the node names are identical. Do NOT use the same cell name as the DMGR cell. Do NOT use the manageprofiles option to Federate the profile now. This results in an unusable Portal profile. A WebSphere_Portal server will NOT be created during the profile creation. The WebSphere_Portal server will be created after the node is added to the existing cluster.
- After creating the profile, edit...
-
/opt/IBM/Portal/WAS1/PortalServer/wps.properties
...and verify the following is set...
-
ProfileName=wp_profile
ProfileDirectory=/opt/IBM/Portal/WAS1/wp_profile
- Copy and configure DB2 client jars
- From primary node...
-
cd /opt/IBM/Portal/WAS1/PortalServer
scp -r db2drivers user1@prdhost2.myco.com:/tmp
scp -r db2drivers user1@prdhost3.myco.com:/tmp
scp -r db2drivers user1@prdhost4.myco.com:/tmpFrom secondary node
-
cd /opt/IBM/Portal/WAS1/PortalServer
cp -r /tmp/db2drivers . - Edit...
-
/opt/IBM/Portal/WAS1/wp_profile/ConfigEngine/properties/wkplc_dbtype.properties
...and set...
-
db2.DbLibrary=/opt/IBM/Portal/WAS1/PortalServer/db2drivers/db2jcc4.jar:/opt/IBM/Portal/WAS1/PortalServer/db2drivers/db2jcc_license_cu.jar
- From primary node...
- On remote dmgr host, ensure the Deployment Manager is started...
-
cd /opt/IBM/Portal/WebSphere/AppServer/profiles/Dmgr01/bin
./startManager.sh - Ensure that the time on the Deployment Manager server and the time on the additional Portal node server are no more than 5 minutes apart.
- Create backup of all nodes and dmgr
- Log on to each secondary host in turn, and add the node...
-
cd /opt/IBM/Portal/WAS1/wp_profile/bin
./addNode.sh prd2dmgr.myco.com 9879 -username wasadmin -password mypassword**Example output...
-
ADMU0003I: Node P1Node02 has been successfully federated.
- Edit...
-
/opt/IBM/Portal/WAS1/wp_profile/ConfigEngine/properties/wkplc.properties
...and set...
-
WasUserid=uid=wasadmin,cn=users,ou=admins,dc=myco,dc=com
WasPassword=mypassword**
PortalAdminId=uid=wpsadmin,cn=users,ou=admins,dc=myco,dc=com
PortalAdminPwd=mypassword**
PortalAdminGroupId=cn=wpsadmins,cn=groups,ou=admins,dc=myco,dc=com
WasRemoteHostName=prd2dmgr.myco.com
WasSOAPPort=9879
PrimaryNode=false
ClusterName=P1Cluster - Edit...
-
/opt/IBM/Portal/WAS1/wp_profile/ConfigEngine/properties/wkplc_dbdomain.properties
...and ensure that the database password values are all set correctly.
Note that this file should be pre-populated with your database information from running the 'enable-profiles' script on the primary node earlier.
- Review settings in...
-
/opt/IBM/Portal/WAS1/wp_profile/ConfigEngine/properties/wkplc_dbtype.properties
- Confirm the database properties are set up correctly on this node
-
cd /opt/IBM/Portal/WAS1/wp_profile/ConfigEngine
./ConfigEngine.sh validate-database -DWasPassword=mypassword**Example output:
-
Wed Feb 26 15:24:28 EST 2014
BUILD SUCCESSFUL - Edit...
-
/opt/IBM/Portal/WAS1/wp_profile/PortalServer/jcr/lib/com/ibm/icm/icm.properties
...and set...
-
jcr.textsearch.enabled = false
- In the same file, set...
-
jcr.admin.uniqueName=uid=wpsadmin,cn=users,ou=admins,dc=myco,dc=com
- Start the nodeagent
-
cd /opt/IBM/Portal/WAS1/wp_profile/bin
./startNode.sh - Add node to cluster
-
./ConfigEngine.sh cluster-node-config-cluster-setup-additional -DWasPassword=mypassword**
- Execute appserver specific steps for setting up the following...
- Restart appserver and verify no errors in logs
- Verify we can access the new cluster member in a web browser using the port we identified earlier:
MemberNotFound Issue
Secondary portal site not rendering. Error in log...
-
MemberNotFoundException: EJPSG0002E: Requested Member does not exist.uid=wpsadmin,o=defaultWIMFileBasedRealm
We do not want to re-add file registry because that would break short name logon.
Startup errors...
E INI8504E: One or more initialization step failed.
javax.jcr.RepositoryException: RT7508E: Unable to initialize RepositoryFactory due to exception of type: com.ibm.wps.ac.PrincipalNotFoundException with message:
EJPSB0005E: Exception occurred during creation of the principal with Name uid=wasadmin,o=defaultWIMFileBasedRealm and Principal Type USER..
Fix: Edit...
-
/opt/IBM/Portal/WAS1/wp_profile/PortalServer/jcr/lib/com/ibm/icm/icm.properties
...and set...
-
jcr.admin.uniqueName=uid=wpsadmin,cn=users,ou=admins,dc=myco,dc=com