SNMP
Connection settings
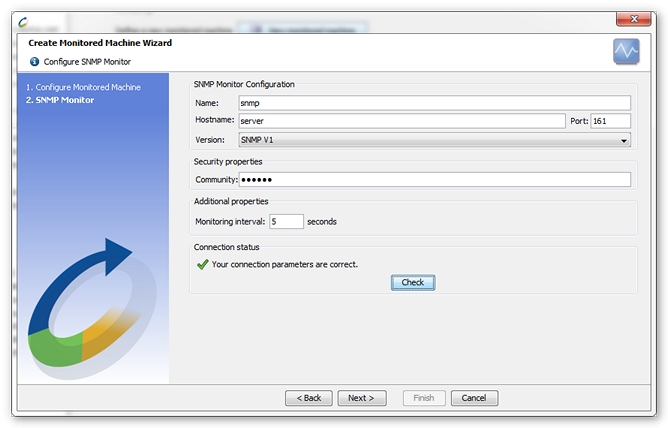
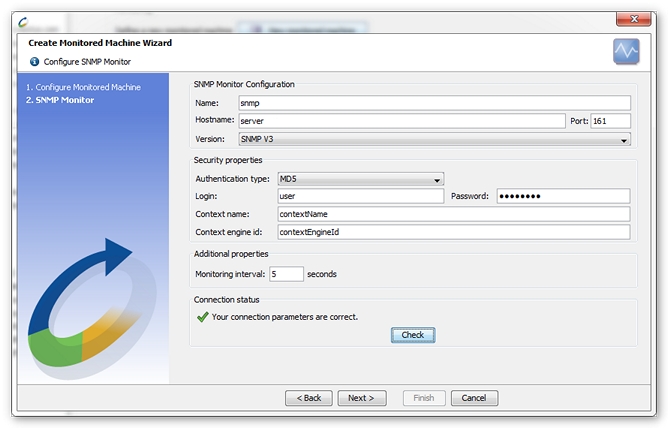
Defining an SNMP monitor requires the name or IP address of the machine to be monitored, as well as the connection port. The standard access port for SNMP parameters is port 161.
The connection is made through an SNMP community. The community name is required for authentication and to allow NeoLoad to retrieve the SNMP counter values. The default community name is "public".
Create an SNMP monitor
Creating a new monitor is either performed:
- with the monitored machine creation wizard, as described in Create and configure a monitored machine
- or from an existing monitored machine, as described in Create and configure a monitor
A connection can be defined with the SNMPv1, SNMPv2c, or SNMPv3 protocols.
Specifying the name of the community is necessary to authenticate with the SNMPv1 and SNMPv2c protocols.

To define the authentication function for the SNMPv3 version, it is necessary to enter a login and a password, and to select the MD5 or SHA-1 hashing mode.
The context name and identifier are optional parameters. They help make out information bases and/or SNMP agents. Making out agents is useful, for instance, when an engine acts as a gateway between SNMPv3 and SNMPv1. An SNMPv3 packet is sent as an identifier to the SNMPv1 agent which is expected to receive the packet.

Add counters
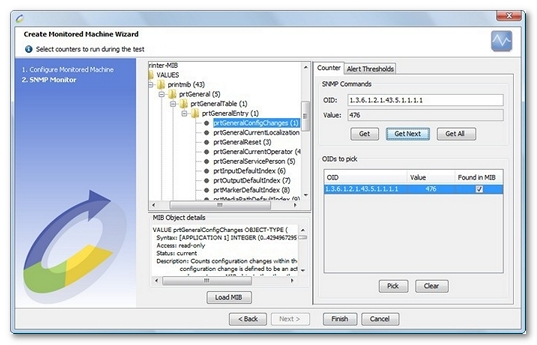
Adding SNMP counters is done through a dedicated pane. Each counter is defined by an OID.
To choose the OID, an MIB may be loaded. A MIB is an information base containing all the OIDs defined for an SNMP component type. For example, router manufacturers such as Cisco provide MIBs containing the OIDs monitoring open or waiting connections.
To load a MIB, click on the Load MIB button, then navigate to the MIB file. The OID tree for the MIB is then displayed in the left-hand pane. Click on the nodes to obtain a description of the OID.
A MIB may be defined by OIDs present in other MIBs. For the MIB to load correctly, these other MIBs must be available in the same directory.
An OID also may be entered directly in the SNMP commands area.

Once the OID has been specified, several commands may be executed that send requests to the server. Clicking:
- Get returns the value corresponding to the declared OID.
- Get Next returns the value of the next OID implemented on the server after the declared OID. Please note this OID may be in the selected MIB.
- Get All returns the values of all OIDs present, including those under the declared OID.
- To add a counter
- Specify the name of the machine.
- Specify the connection port (161 by default).
- Define the security properties.
- Test the connection.