WebSphere Lombardi Edition 7.2 > Manage the Process Center repository
Manage workspaces
You can enable and manage workspaces for the process applications and toolkits that you create or to which you have administrative access. To learn how to manage user accounts and authorizations.
Before performing any of the following tasks, start Lombardi Authoring Environment and access the Process Center Console as explained in Start Lombardi Authoring Environment.
Enable workspaces in the Process Center Console
- Select the Process Apps or Toolkits tab.
- Select the process application or toolkit for which you want to enable workspaces.
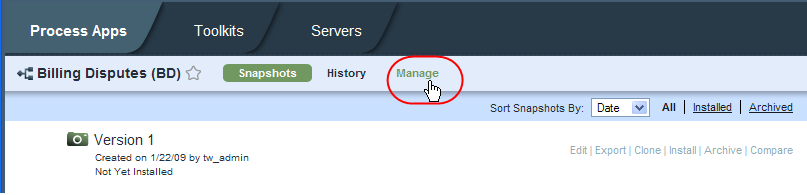
-
Click the Manage option shown in the following image:
-
Click the Allow users to create workspaces in this process app check box :

For toolkits, the check box label is Allow users to create workspaces in this toolkit.
Administrators can now create additional workspaces in the selected process application or toolkit
Create new workspaces in the Process Center Console
When you create a process application as or a toolkit. Lombardi creates a singe default workspace named Main. After workspaces are enabled for a process application or toolkit as described in the preceding task, you can create additional workspaces.
To create a new workspace, you must enable workspaces as instructed in the preceding task and you must use a snapshot as the basis for a new workspace.
- Select the Process Apps or Toolkits tab.
- Select the process application or toolkit for which you want to create a new workspace.
-
If a snapshot does not exist, create one by clicking Create New Snapshot as shown in the following image:

-
Click the New Workspace option for the snapshot as shown in the following image:
The New Workspace option is available only if you have enabled workspaces for the process application or toolkit.

-
Enter a name and click Save. The description is optional.
When you create a new workspace, the Process Center Console displays a drop-down menu for the process application or toolkit that enables you to select the workspace that you want.
-
To access the new workspace, click the Workspaces drop-down menu and select the workspace that you want :

-
To open the new workspace in the Designer in Lombardi Authoring Environment, click the option highlighted in the following image:

Edit workspaces in the Process Center Console
- Select the Process Apps or Toolkits tab.
- Select the process application or toolkit in which the workspace that you want to edit resides.
-
Click the Workspaces drop-down menu and select the workspace that you want :
-
Click the Edit Workspace Details option as shown in the following image:
- In the Workspace Details dialog, edit the workspace name and description and click Save.

Set the default workspace in the Process Center Console
When you create a process application as described in
Manage process applications
or a toolkit as described in
Manage and using toolkits,
Lombardi creates a singe default workspace named Main. If you create additional
workspaces, you can configure one of the new workspaces as the default
workspace. When a workspace is the default workspace, the library items within
it run by default when an event or other trigger that applies to items in more
than workspace is received by the Process Center Server. For example, when you
are executing a service by URL and that service exists in more than one
workspace, the service in the default workspace is executed.
- Select the Process Apps or Toolkits tab.
- Click to select the process application or toolkit that contains the workspace that you want.
-
Click the Workspaces drop-down menu and select the workspace that you want :
-
Select the Make Default Workspace option as shown in the following image:

Archiving workspaces in the Process Center Console
If a workspace is no longer used, you can archive it. When you archive
a workspace, the option for that workspace no longer appears in the Workspaces
drop-down menu for the process application or toolkit. If only two workspaces
exist for a process application or toolkit and you archive one of them, the
Workspaces drop-down menu is no longer displayed. You must restore an archived
workspace before you can open it in the Designer view in Lombardi Authoring
Environment.
- Select the Process Apps or Toolkits tab.
- Select the process application or toolkit in which the workspace that you want to archive resides.
-
Click the Workspaces drop-down menu and select the workspace that you want :
-
Select the Archive Workspace option :
- When prompted, click the Archive button to confirm that you want to archive this workspace.
-
To view or restore archived workspaces, click the Manage option for your process application or toolkit and then click the View Archived Workspaces option shown in the following image:


Parent topic: Manage the Process Center repository