WebSphere Lombardi Edition 7.2 > Modeling processes > Advanced modeling tasks > Build services
Build an Integration service
Build an Integration service when you want to integrate with an external system to complete a task. For example, you may want end users to choose from a list of products available from a common site on the internet. In that case, you can build an Integration service that calls a Web service to display the list of options. Integration services are the only services that can include Web Service Integration and Java Integration components.
See:
Read the following procedures to learn how to:
- Build a sample Integration service. The sample service illustrates how you can easily use existing Web services in your Lombardi BPDs.
- Map the input and output variables for the nested Integration service.
- Create a Human service that implements the Integration service as a nested service.
- Create the Coach interfaces to collect the input and display the output for the nested Integration service.
Build the sample Integration service
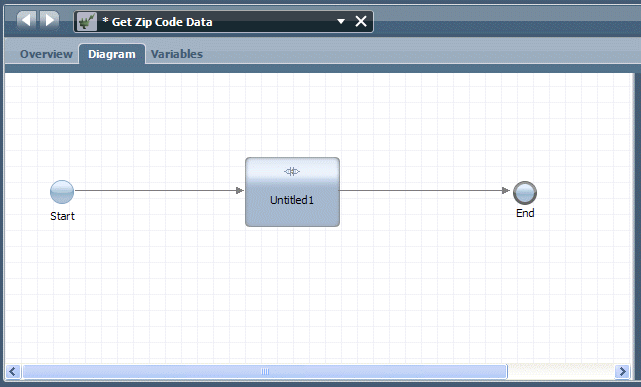
- Create the appropriate service type (Integration service) and name it Get Zip Code Data.
-
Drag a Web Service Integration component from the palette to the service diagram and then use sequence lines to connect the component to Start and End Events :
-
Click on the Web Service Integration component in the diagram and then click the Step option in the properties.
For this sample service, type Zip Code Lookup in the Name field.
-
Click the Implementation option in the properties and in the WSDL URI text box, type the URI for the WSDL that you want to use.
For this sample service, type: http://www.weather.gov/forecasts/xml/DWMLgen/wsdl/ndfdXML.wsdl
You can browse both UDDI and WSRR registries for available services
-
Click the Discover button.
To use a protected WSDL, enable the check box and then provide the user name and password required to access the WSDL. For this sample, simply click the Discover button.
The Operations drop-down list is populated with the services that are available.
-
Choose the operation that you want to use from the drop-down list.
For this sample service, choose the LatLonListZipCode operation.
You can use any of the operations listed. You can enter the URI for the WSDL in your browser and review the WSDL documentation to understand the input to provide to implement and test the chosen operation.
-
Click the Generate Types... button.
In the Generate Types dialog, select the same operation from the previous step (LatLonListZipCode) and then click the Next button.
The Generate Types Wizard lists the types to be generated.
- In the wizard, click the Next button to continue and then click the Finish button when type generation is complete.
-
Click the Variables tab for the Get Zip Code Data service.
Click the Add Input button and in the Name text box, type: zipList.
Click the Select button next to Variable Type and choose zipCodeListType from the available types. (This type was generated in the preceding step.)
Click the Add Output button and in the Name text box, type: latLong.
Click the Select button next to Variable Type and choose listLatLonType from the available types. (This type was generated in the preceding step.)
-
Click the Data Mapping option in the properties.
For the input mapping, click the variable selector icon to the right of the text box and choose the previously created zipList variable. When the mapping is done, tw.local.zipList displays in the text box.
For the output mapping, click the variable selector icon to the right of the text box and choose the previously created latLong variable. When the mapping is done, tw.local.latLong displays in the text box.
- Click Save in the main toolbar.
Nesting the Integration service and mapping its variables
- Create a Human service and name it My Zip Code Service.
-
Open the diagram for the new Human service and drag the Integration service that you created in the preceding steps (Get Zip Code Data) from the library to the diagram.
When you have an existing service that you want to nest in another service, you can drag the existing service directly from the library to the diagram of the parent service. This creates the Nested Service component with the service attached in a single step :
- If not already selected, click the nested service in the diagram (Get Zip Code Data) to view its properties.
-
Click the Data Mapping option in the properties.
For the parent service to be able to pass the data to and from the nested service into its Coaches, you need to map the input and output variables of the nested service to the parent service. The Designer can auto-map these variables for you.
Because you already created the input and output variables for the nested service, the Data Mapping tab for the parent service includes those variables :
-
From the Input Mapping section, click the auto-map icon highlighted in red in the preceding image.
The Create variables for auto-mapping dialog box opens, indicating that a matching private variable was not found in the parent service, and should be created.
-
Select the suggested variable item and then click OK.
A private variable of that name is created for the parent Service (My Zip Code Service) and automatically mapped to the input variable of the nested service, making it available to all components in the parent service.
-
From the Output Mapping section, perform the automapping step to create the matching private variable to capture the output from the nested service.
You can see the private variables added for the parent service (My Zip Code Service) :
- Click Save in the main toolbar.


Build the Coaches to collect input and display output
In the following steps, you'll create the Coach interfaces in the
parent service, and map the associated Coach controls to the variables from the
previous procedure.
- Click the Diagram tab for My Zip Code Service and then drag a Coach component from the palette to the diagram. (Place the Coach component before the Nested Service component).
- While the Coach component is selected in the diagram, click the Step option in the properties and type Enter Zip Code in the Name field.
- Click the Coaches tab.
- Right-click the Checkbox control, and from the shortcut menu that opens, select Delete. Do the same for the Input Text control. Neither of these controls is needed for the Coach.
-
Drag the zipList variable from the palette to the Coach.
An input text field is created with a mapping to the variable, and a label that matches the variable.
- In the Coach, select the group containing the default OK and Cancel buttons, and then in the properties, click the Presentation option.
- In the Buttons section, click the OK Button definition and type Search in the Label text box.
- Click the Preview tab for the Coach to see your label change.
- Click Save in the main toolbar.
- Click the Diagram tab for My Zip Code Service.
- Drag another Coach from the palette to the diagram and name it View search results. (Place the Coach component after the Nested Service component.)
- Click the Coaches tab.
- You can delete the Input Text and Checkbox controls from the Coach since they are not needed.
- From the palette, drag an Output Text control to the Coach.
- In the properties, select the Output Text option in the properties and in the Behavior section, click the Select button to create a binding to the results variable.
- From the list that opens, find and select the latLong variable.
-
Click the Diagram tab to return to the diagram view of My Zip Code Service. Select the Sequence Flow tool from the palette and then connect the components :

-
Click Save in the main toolbar.
-
To test My Zip Code Service, click the Run icon in the upper right corner.
The Coach opens in your browser. When prompted, enter a valid zip code and then press the Search button.
The service returns the latitude and longitude for the zip code location.
Parent topic: Build services