WebSphere Lombardi Edition 7.2 > Modeling processes > Advanced modeling tasks > Build services
Build an Ajax service
The Ajax services that you build in Lombardi are subsequently bound to coach controls to perform functions such as automatically populating drop-down lists and enabling type-ahead capability in input fields. You can use an Ajax service to pull data dynamically from a connected data source, such as a database.
The following steps describe how to build a sample Ajax service. The
service in the sample is used to populate the fields in a table control in a
Lombardi Coach.
- Create the appropriate service type
Name the new service Query Product Lines.
-
Drag a Server Script component from the palette to the service diagram and then use sequence lines to connect the script to Start and End Events .

-
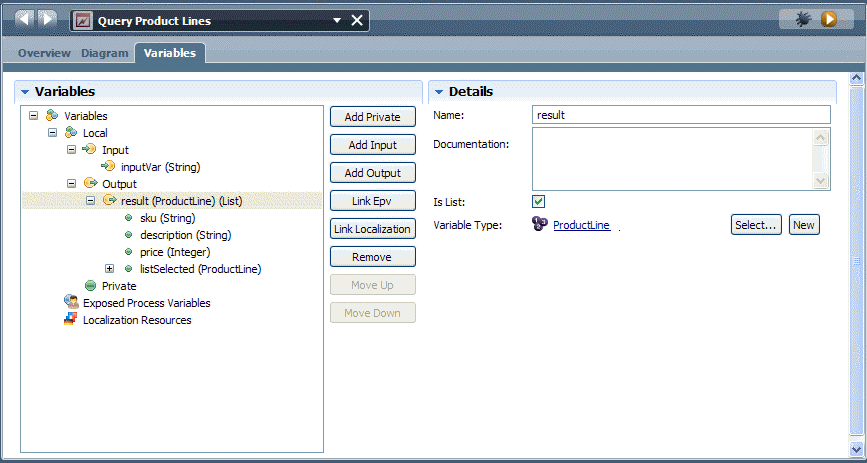
Click the Variables tab to specify the input and output variables for the sample service.
As shown in the following image, the sample service contains an input variable named inputVar and an output variable named result of type ProductLine, which contains three parameters: sku, description, and price. (You need to create the ProductLine variable type and add the parameters. See Declaring and passing variables and Create custom variable types if you need instructions.)
Be sure to enable the Is List checkbox for the result output variable as shown in the following example.
For the inputVar variable, ensure that the Has Default check box is enabled.
- Click the Diagram tab and then click on the Server Script component in the diagram.
-
Click the Implementation option in the properties to write the script for the Ajax service using the specified variables.
The script for the sample service (shown in the following image) specifies the sku, description, and price for two different suppliers: QuickServ and ProServ.
- Save your work.
- Create a Human service named Select Supplier.
- Drag a Coach from the palette to the service diagram and then use sequence lines to connect the Coach to Start and End Events.
- Click the Variables tab and add a private variable named product of type ProductLine. Enable the Is List and Has Default check boxes for the product variable.
-
Click the Coaches tab and then drag the product variable from the palette to the Coach editor.
This automatically creates a table control. Make sure the table control is directly beneath the default Input Text field.
-
Click the Input Text control in the Coach editor to select it and then click the Input Text option in the properties.
-
In the Common section, change the Label field to Supplier:.
- Right-click the default Check box control in the Coach editor and select Delete to remove it. It is not necessary for the current Coach.
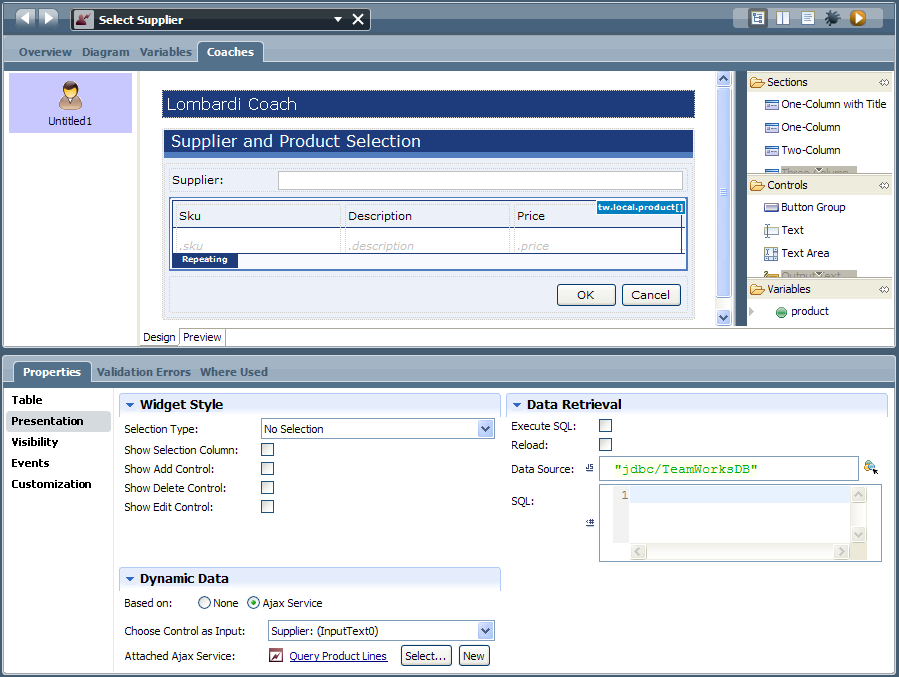
- Click the table control in the Coach editor to select it.
- Click the Presentation option in the properties for the table control and in the Dynamic Data section, click the radio button next to Ajax Service.
- From the Choose Control as Input drop-down list, select Supplier (Input Text).
-
Click the Select button and choose the Query Product Lines Ajax service. The presentation properties for the control should be set :
- Click the Section control in the Coach editor and change the title from Section Title to Supplier and Product Selection.
- Save your work.
-
Click the Run icon in the upper right corner. The Coach runs in a browser and when you provide one of the Supplier names included in the Ajax script (QuickServ or ProServ), the Coach displays the information for that supplier as shown in the following example.
If the supplier information does not immediately display, reload the browser page.


Parent topic: Build services