Configure the virtual host
A virtual host is a configuration entity that allows WAS to treat multiple host machines or port numbers as a single logical host (virtual host) for configuration purposes. Each virtual host can be associated with multiple aliases. Each alias is a particular host name and port number. By combining multiple host machines into a single virtual host or by assigning host machines to different virtual hosts, you can separate and control which WAS resources are available for client requests.
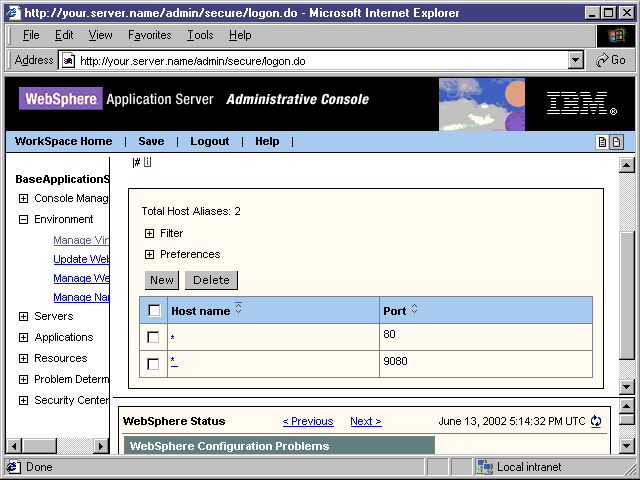
If your external HTTP server configuration uses ports other than the default ports, update the Host Aliases table under the virtual host to reflect the correct HTTP port number.
Note: If your external HTTP server configuration uses the default port (80), skip these steps and continue to Start the HTTP server instance.
To update the Host Aliases table for the default_host virtual host from the administrative console, use these steps:
-
Expand Environment -> Virtual Hosts in the left frame of the administrative console.
-
Click default_host in the right frame.
-
Click Host Aliases. The settings for default_host are displayed.
-
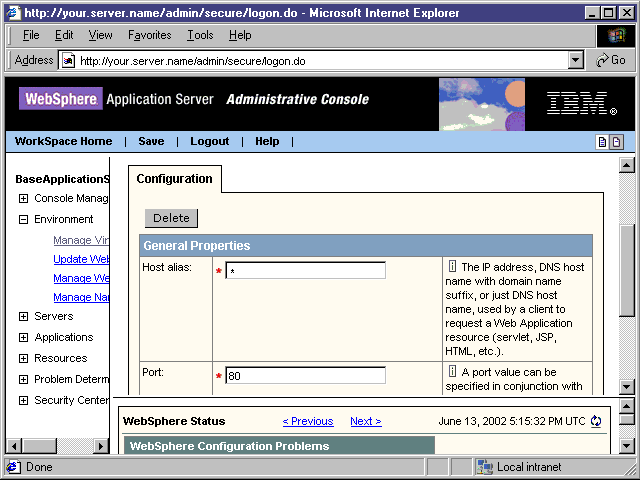
In the Host Name list, click on the asterisk in the row that has a Port of 80.
Note: The host names are set to "*" when you install WAS.
-
Specify the correct port number for your HTTP server in the Port field.
-
Click OK and click Save to save your configuration.
-
After you specify a new port number, regenerate the plug-in configuration. In the left pane, expand the Environment list item and click Update Web Server Plugin. When the right frame appears with a prompt, click OK.
