Work with WCM items in a project
To add a WCM item to a project, we can either:
- Open an item in read mode and click...
-
Add to project
- Open an item in edit mode and click...
-
Add to project
...and then save the item. If the item is closed before saving, the item is not added to the project.
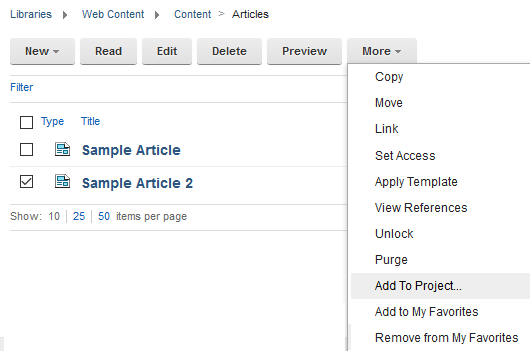
- Select items in a view and click...
-
More actions > Add to project
- Open a project and click...
-
Add to project
...and then select an item to add to the project.
- Open a project and click New to create a draft item in the project.
The maximum number of items that can be used in a single project is 500.
To add an item to a project, we must have editor access to that item.
When we add an item to a project:
- We can also select items referenced by the item we are adding to the project.
- Non-workflowed item types are saved as a draft.
- Workflowed items are added to a project in the first workflow stage of their workflow.
Once added to a project, we work with the items in the same way as any other item by selecting an item in the project and clicking Edit:
- Non-workflowed item types are saved as drafts until we are ready to publish them by clicking Approve.
- Workflowed items are processed through a full workflow cycle until reaching a pending state.
- Draft items in a project are displayed alongside other items in your item views, but are displayed with a status of draft. If we have created a draft of a previously published item, both the draft and published versions of the item will appear in the item views.
- When using selection dialogs, draft items from the current project appear alongside currently published items allowing us to select and link to both current items and draft project items.
Workflow item types: Workflows, workflow stages and workflow actions cannot be added to projects.
Previewing items in a project
While we are working on a project, we can preview the draft items in the project as if they were published together on the live site.
Delete items in a project
- Remove From Project
- When we select an item in a project and click Remove From Project, the draft item is removed from the project but is still visible in the Library Explorer.
- Delete
- When we select an item in a project and click Delete, the draft is removed from the project and also deleted.
- Mark for deletion
- When an item is marked for deletion, the item is deleted when the project is published.
- We can mark items for deletion in a project by:
- adding the item to a project
- opening a draft project item in read mode and clicking Mark for deletion.
- adding the item to a project
- When an item is marked for deletion, other buttons in the edit view of the item are disabled. To cancel a deletion, click Cancel deletion.
- When an item is marked for deletion, its workflow status is displayed as Delete Pending.
- When performing Save As and Copy operations on an item being marked for deletion, the newly saved item will be in the first workflow stage.
- When previewing a project, items being marked for deletion are not displayed in the previewed website.
- If we delete an item originally created in the project it will be immediately deleted and will not be displayed as Delete Pending.
- We can mark items for deletion in a project by:
Disable a workflow in a project
A workflow can be configured so that it is disabled when an item using that workflow is added to a project.
- Any items using the disabled workflow have a status of draft when added to a project, but no longer require to pass through a workflow before being published.
- The workflow stage the item is returned to when the project is published is also defined in the workflow.
- Any actions set to run on entering the stage the item is returned to are not run.
- An item has a status of "published" when the project is published regardless of the workflow stage it is returned to, even if the workflow stage does not use a publish action or if it precedes or follows a workflow stage containing a publish action.
Publish Methods
Select the default publishing method to be used by projects created using this project template:
- Date
- When Date is selected, all items are published as soon as all the items in the project reach a state of "pending" and the publish date selected in the project is reached. We can also click Publish in the project form before the date being reached once all items in the project reach a state of "pending".
- Manual
- When Manual is selected all items remain in a state of "pending" until the project is manually published by clicking Publish in the project form. The Publish button is not activated until all items in the project reach a state of "pending". Only users with editor access or higher to a project can publish a project.
- Automatic
- When Automatic is selected all items are published as soon as all the items in the project reach a state of "pending".
Parent Create a project
Previous topic: Project identification
Next topic: Define project approval settings