Publishing personalization rules
After developing personalization rules, you publish the rules.
- To begin publishing personalization rules, you create an
object in the authoring environment which describes the target endpoint.
This endpoint definition is referred to as a publish server and is
created and managed in a manner similar to creating and managing rules
and campaigns.
Figure 1. Creating a new publish server 
The server requires one field, which is the URL associated with the publish servlet for that endpoint. The publish server may also define which workspace will receive publishing data. Personalization operates in the default Content Manager run-time edition workspace after installation. If the target workspace field is empty, then the publish server uses the default workspace. (We need to set the workspace field if we are configuring scenario three described previously.)
The last option is whether or not to delete remote objects that have been deleted on the local system. The default is Smart Delete, which simply removes items that are no longer present. If we do not have delete permission on the remote server you could select the Leave deleted resources on server option.
- After creating a publish server, we can publish either
the entire workspace or a set of objects within it. You specify either
of these options by selecting the More Actions > Publish submenu
Figure 2. Start a publish job 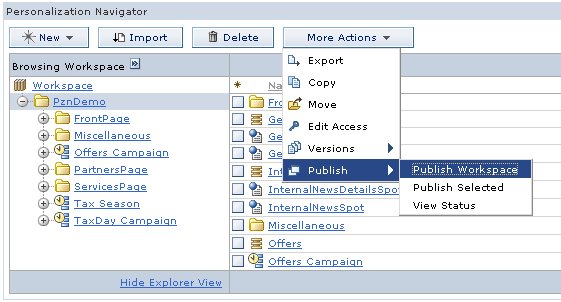
The Publish page displays what will be published. This page requires the user to choose a destination publish server and any necessary authentication information. If the remote system is secured and is not a member of the current server's Single Sign-On domain we can enter a user name and password in the provided fields. The values for user and password are stored in the HCL WebSphere Portal credential vault and are not accessible to any other user.
- Finally, click Publish to launch
the publish job.
Figure 3. Publish page 
If the local system is able to locate and authenticate with the remote publish server, we are returned to the main navigator view, and you see the Personalization message EJPVP20001I. Then, the publish job runs as a background process on the local server.
- Click the View the details of this job link
to open the publish status window to see information about the progress
and success or failure of the publish job.
Figure 4. 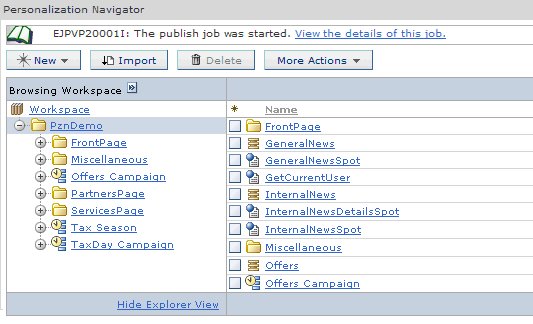
Parent topic: Publishing personalization rules