Installation and upgrade for new HCL DX v9.5 customers
HCL DX 9.5 runs on top of IBM WebSphere Application Server ND v9.0.5 using the following installation path.
Prepare the environment
Before installing, review the hardware and software requirements to ensure we have supported versions of prerequisite and co-requisite software and the required hardware.
Note: There are several different Portal 9.5 offerings. Our license determines which offerings we will see listed as available to download.Example package names for the different Portal 9.5 offerings are:
HCL WebSphere Portal Express v9.5
HCL WebSphere Portal Server v9.5 Multiplatform
HCL WebSphere Portal Enable v9.5 Multiplatform
HCL WebSphere Portal Extend v9.5 Multiplatform
In this example, we will use HCL WebSphere Portal Enable v9.5 Multiplatform.
Click on the HCL WebSphere Portal Enable v9.5 Multiplatform package.
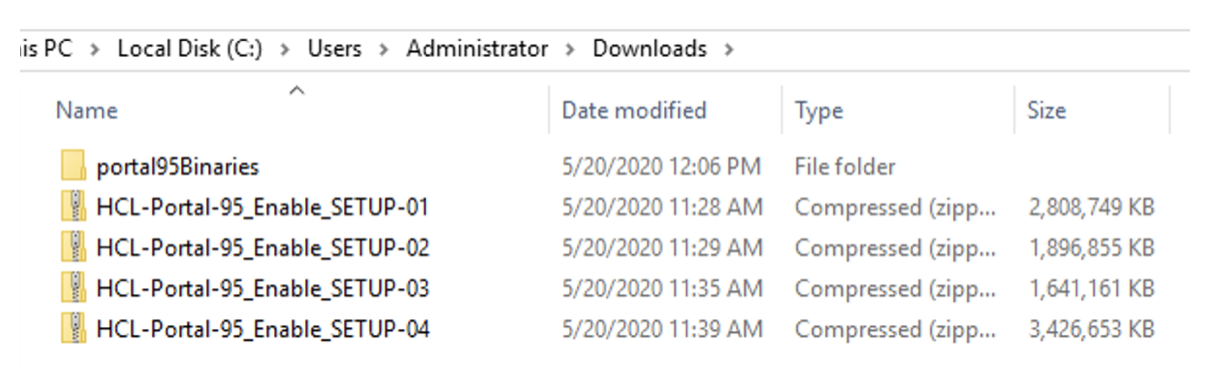
On the package page, we will see a long list of parts/components. But we only need to download the following four (4) files:
HCL-Portal-95_Enable_SETUP-01.zip
HCL-Portal-95_Enable_SETUP-02.zip
HCL-Portal-95_Enable_SETUP-03.zip
HCL-Portal-95_Enable_SETUP-04.zip
Note: The zip files above contain all the software required to install Portal 9.5 including Installation Manager, WebSphere Application Server, Portal CF213, etc.
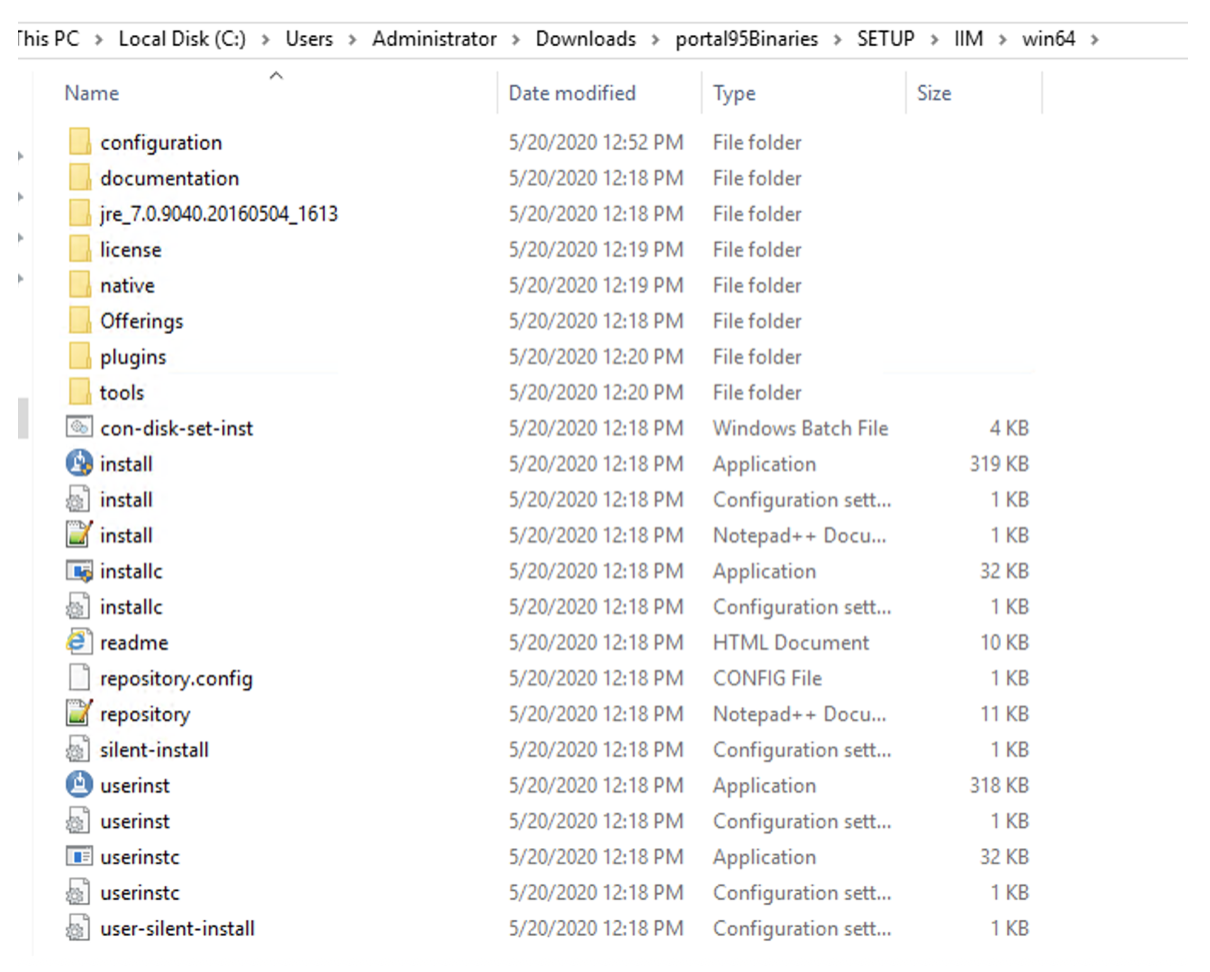
Prepare the files for install Once we have the parts downloaded, create a parent folder wherein the files are to be extracted. We can name it as portal95binaries as shown in the example below:
Extract the .zip files to the created parent folder. Once all four (4) files are extracted, you should have a folder called SETUP under your parent folder as shown below:
Navigate to the SETUP folder, there should be a Product folder that holds the files and repositories for WAS 9.0.x, JDK 8.0.x, Portal 8.5.0.0, CF213 for Portal 8.5, Portal 9.5, and iFix PI59896.
Install HCL WebSphere Portal 8.5 with IBM WebSphere Application Server ND v9.0.5 and JDK v8 using the IBM Installation Manager
This guide was written using Windows as the base operating system, however the steps/concepts listed in this guide are independent of the operating system. The only significant difference is that for Windows, we must use the batch file commands instead of the UNIX shell commands listed in this guide.
For example:
./ConfigEngine.sh config-ch-integ
Also, it is recommended to use the Command Prompt (cmd.exe) on Windows instead of PowerShell.
Note: The installation steps below were done using a graphical user interface. There are other ways to install Portal server, via the console or a response file. If you prefer either one of these methods, please refer to the following documentation resource:
In any case of problems during the installation, please collect the above data and contact HCL Software Support.
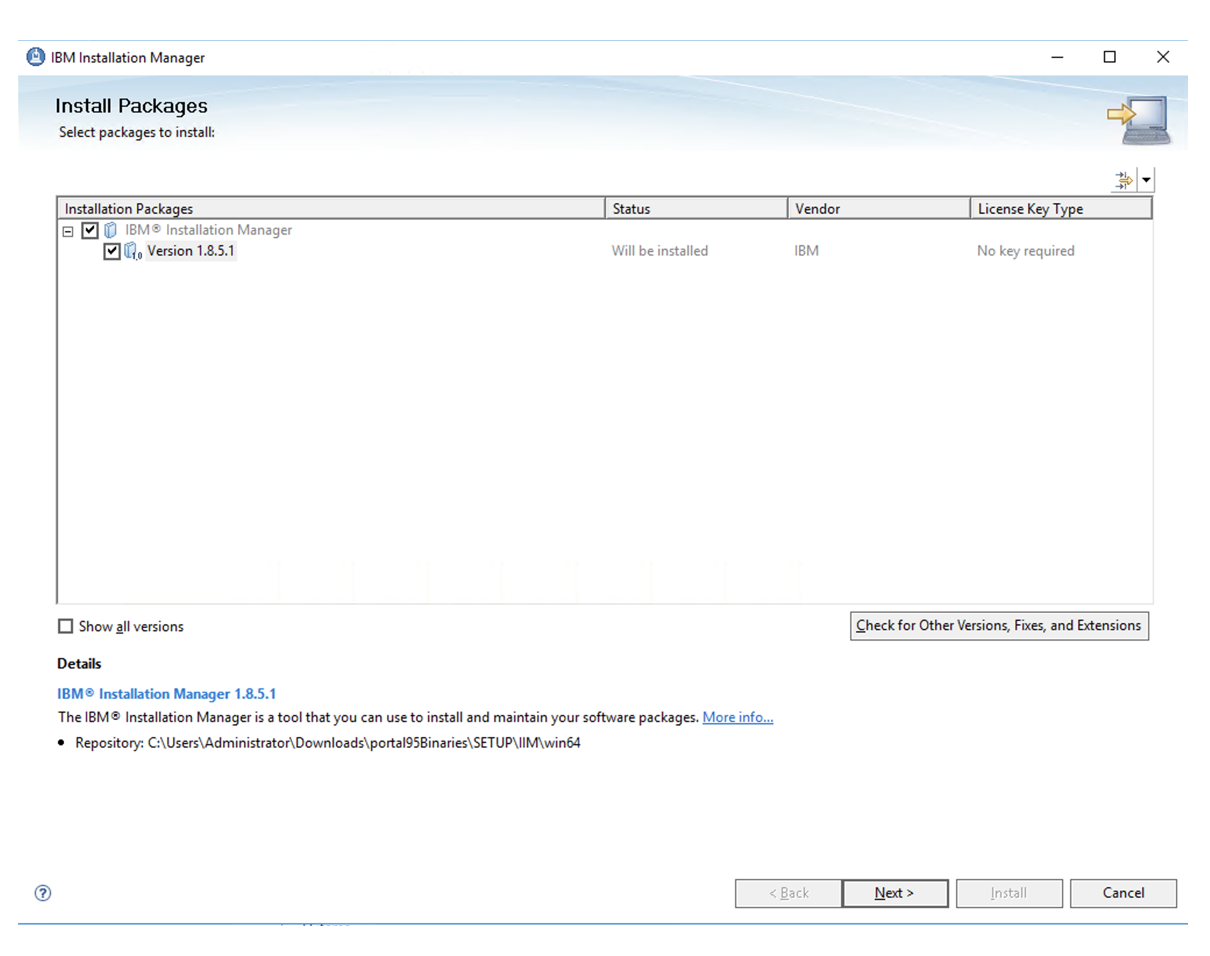
Install IBM Installation Manager
The IBM Installation Manager (IIM) is a tool we can use to install and maintain your software packages. Wizards guide us through the steps that we must take to install, modify, update, roll back, or uninstall the IBM or HCL products.
To install IIM, navigate to C:\Users\Administrator\Downloads\portal95Binaries\SETUP\IIM
folder.
Within that folder, there are multiple IIM binaries for their relevant
operating systems.For this guide, we will be installing onto a Windows 2012
R2 system so will need to navigate the win64 folder.
From here, run the install.exe file.You should see the following window appear:
Select Next. Agree to the licensing terms and select Next again.
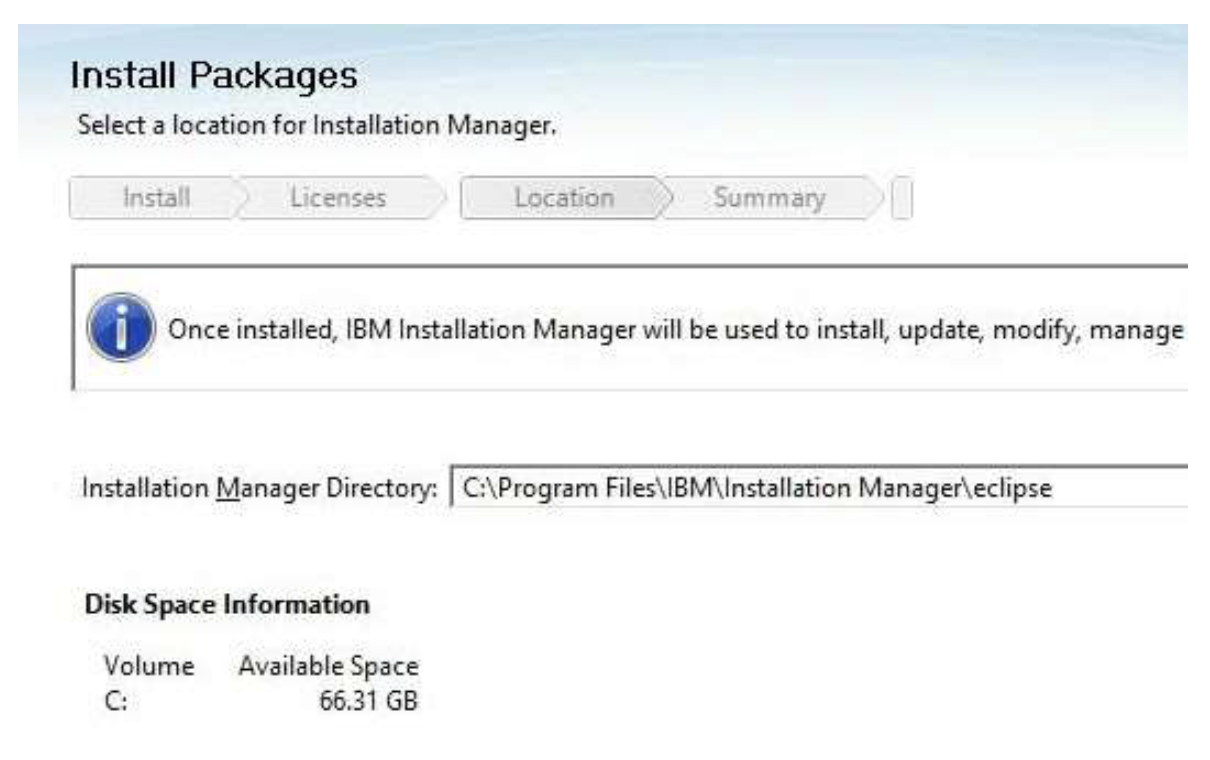
Set install path for IIM:
Select Next. Review the install summary and select Install.
When the installation is complete, select the Restart Installation Manager button.
Install the Portal 8.5 BaseWith a fresh install of Portal v9.5, the first step is to install the base Portal 8.5 with WAS 9.0.5 , JDK 8.0.5, and PI59896. Due to the continuous deployment model and how the product has been architected, this is not a one step install. Portal v9.5 is not applied until Portal 8.5 base has been installed and upgraded to CF213.
Note: The iFix PI59896 is required so that Portal 8.5 is in an installable state with WAS 9.0.x and JDK v8.
This is a temporary step while Portal environment is being built up to the final goal of Portal 9.5 on WAS 9.0.5. Portal 8.5 is NOT supported on WAS 9.0.5 as a final configuration.
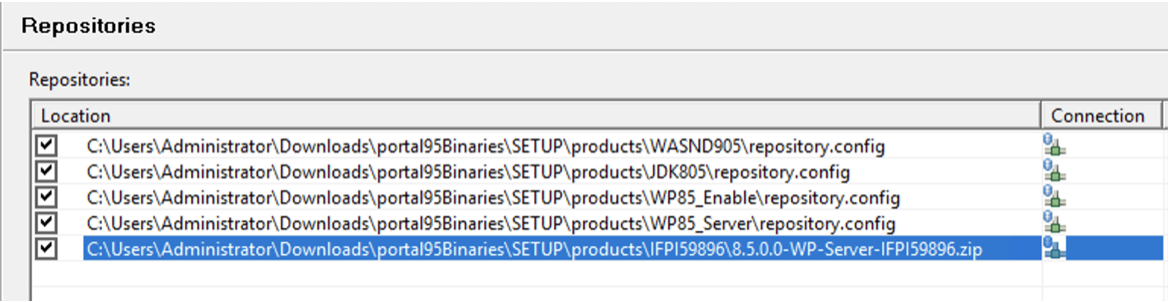
Continue adding the following repositories noted below:
For any iFix, point the repository to the zip file itself.
Is iFix PI59896 still required?.
Select OK.
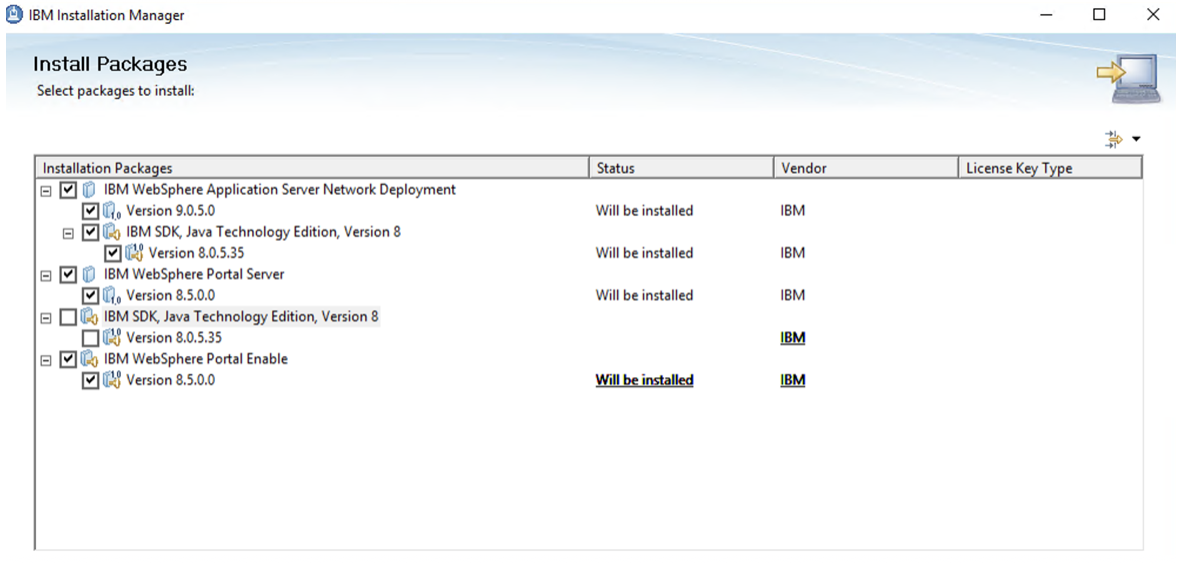
Within IIM, select Install icon, then highlight all the items listed
Note: Due to the way WAS defines the SDK as a co-requirement, we get two entries for SDK. Both entries are the same package and only one needs to be selected. Select Next.
Select iFix listed.
Warning: This iFix is required for Portal 8.5 to be installed while on WAS 9.0 using JDK8. Select Next.
Accept terms of licensing agreement. Then select Next.
Set location of IMShared.
Select Next.
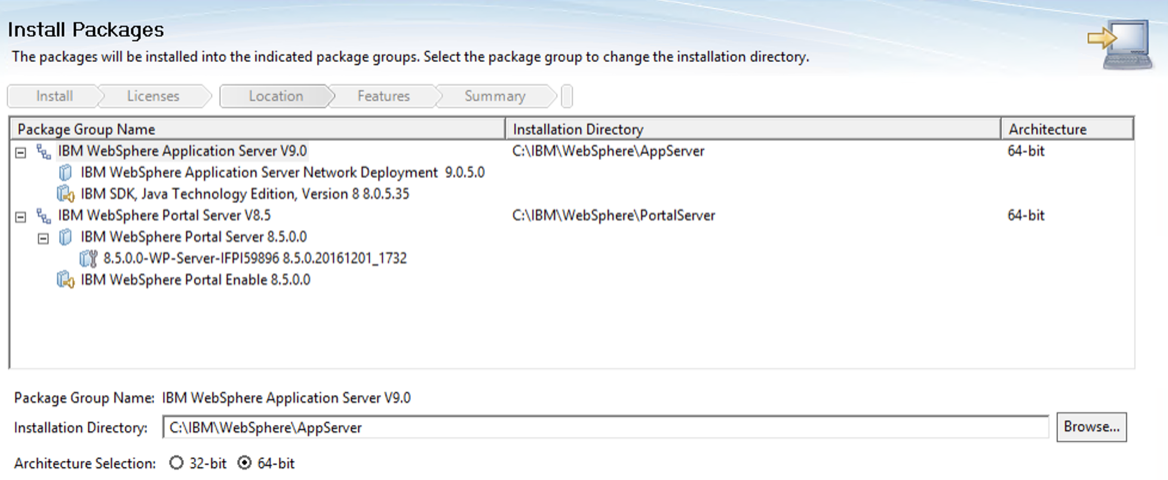
Set the path you wish the WAS and Portal package to be installed.
Note: The WebSphere Application Server package installation path will need to be customized as it tries to put it under the Program Files folder by default. Select Next.
Select the translations to use.
Select Next.
Review the packages that are going to be installed.
Select Next.
Enter the user id and password for the ConfigWizard admin user. This user is used to access the configuration wizard for when we do the database transfer, or create the cluster, etc.
Select Next.
Enter the user id and password for the Portal Admin user. This is your Admin user for logging into Portal Administration page or the WAS admin console.
Select Next.
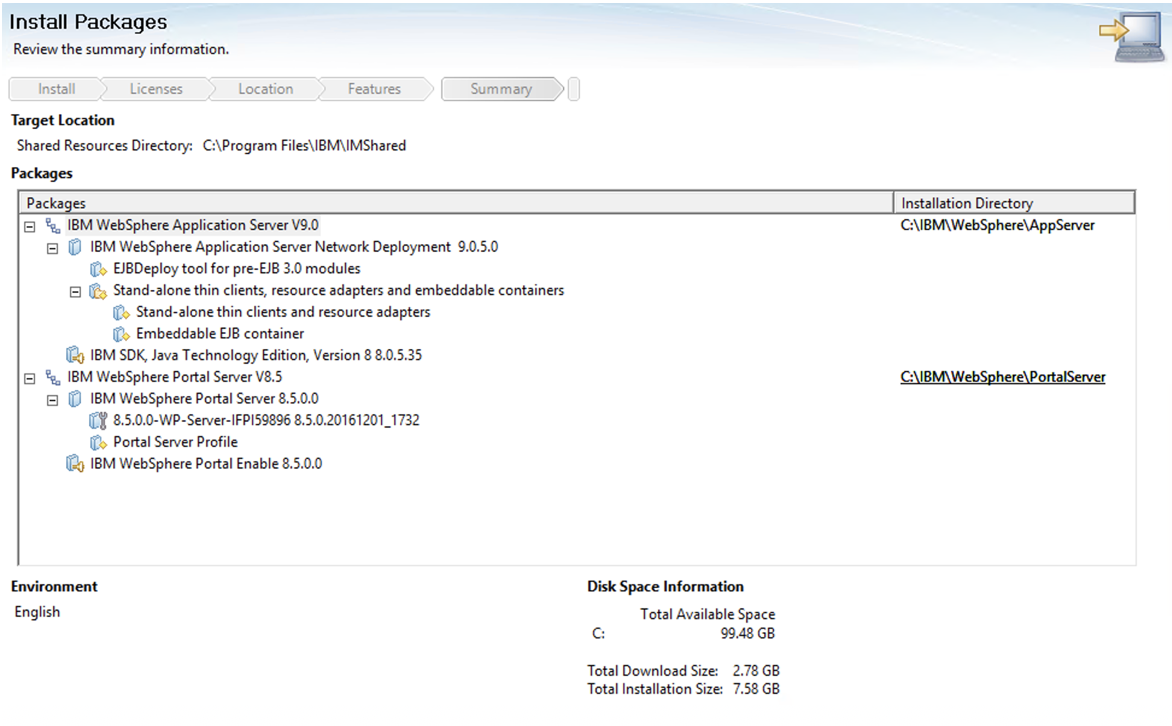
Final review the package information.
Select Next.
When the installation is finished, select the None option for "Which program do we want to start?' and click Finish.
Verify that we can access the Portal in an internet browser by navigating to: http://myportal.hcl.com:10039/wps/portal.
While we have successfully installed HCL WebSphere Portal v8.5 with WebSphere Application Server 9.0.5 using JDK 8.0.5, please note we are still in an UNSUPPORTED state.
Install the latest Fixpack update (CF213 or later) using IBM Installation Manager to upgrade HCL WebSphere Portal to CF213 or later
Portal now needs to be upgraded to CF213 to support the installation of HCL WebSphere Portal 9.5. We will need to stop the Portal Server and ConfigWizard to allow us to proceed with the upgrade.
Open a Command Prompt and navigate to <wp_profile_root>/bin.
Run:
stopServer.bat HCL WebSphere Portal and HCL Web Content Manager
Enter Portal credentials when prompted.
Navigate to <AppServer_root>/profiles/cw_profile/bin.
Run:
stopServer.bat server1
Enter ConfigWizard credentials when prompted.
Before proceeding, HCL highly recommends that you take a backup of the system. Please review the following links for further details.
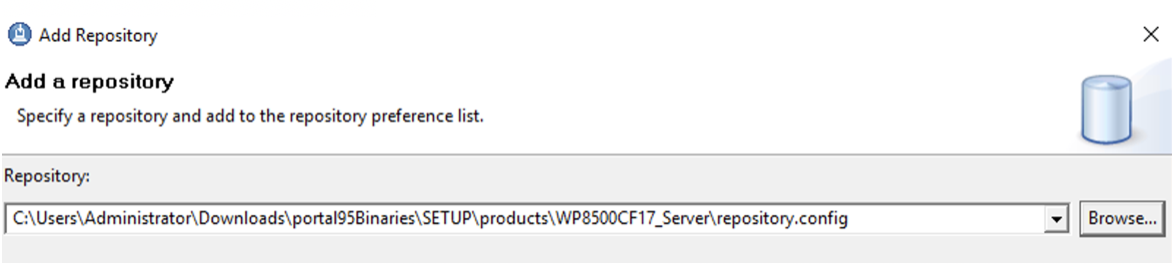
Open IBM Installation Manager (IIM) and under File > Preferences > Repositories, add the following repository:
Reminder: Remove the previous repository entries. Select OK.
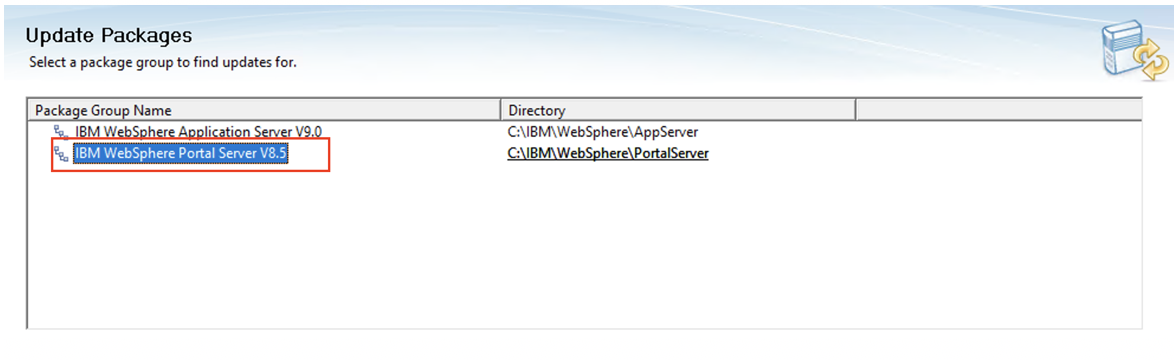
Within IIM, select Update icon, then select the Portal package.
Select Next.
Select CF213 package.
Reminder: We need to stop Portal
Server/ConfigWizard to be able to proceed. Select
Next.
Review validation results. Select Next.
Accept terms of licensing agreement. Then select Next.
Review Features that are going to be installed. Select Next.
Select Update.
At this point ONLY the Portal binaries have been updated to CF213 . The IIM only manages the binaries so we will need to run a Portal script to upgrade the profile.
Next, update the profile
Ensure the HCL WebSphere Portal and HCL Web Content Manager server is stopped on the profile you intend to upgrade.
Execute the following command from within the path of the profile to configure:
Lastly, validate if the server has been updated to CF213 and all is well. Log in and check the about HCL WebSphere Portal and see if it says CF213.
Install HCL WebSphere Portal 9.5 using IBM Installation Manager
Make sure the server is stopped before doing the following steps:
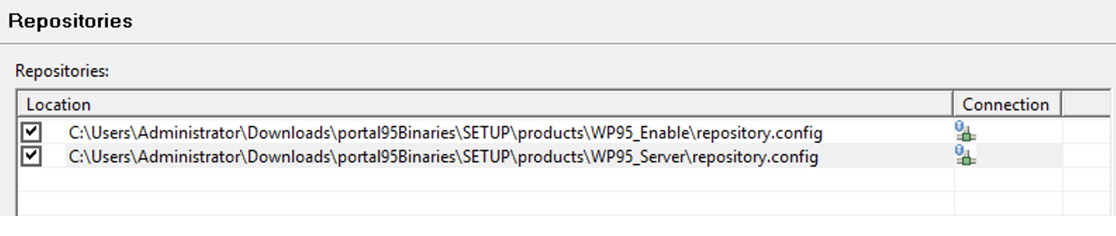
Add the HCL WebSphere Portal 9.5 repositories to IIM.
In this case, we are using the Enable offering so need the following repo: ĀServer and Enable.For the other offerings, this is what we need for each:
Enable Offering: needs Server and Enable repo
Express Offering: needs Express repo
Extend Offering: needs Extend and Server repo
Server Offering: needs Server repo
Reminder: Remove the previous repositorySelect OK.
Within IIM, select Install option. Select both packages.
Select Next.
Accept terms of licensing agreement. Then select Next.
Use existing Portal 8.5 package.
Select Next.
Enter Admin user id and password for WebSphere Application Server and Portal Server. Then select Next.
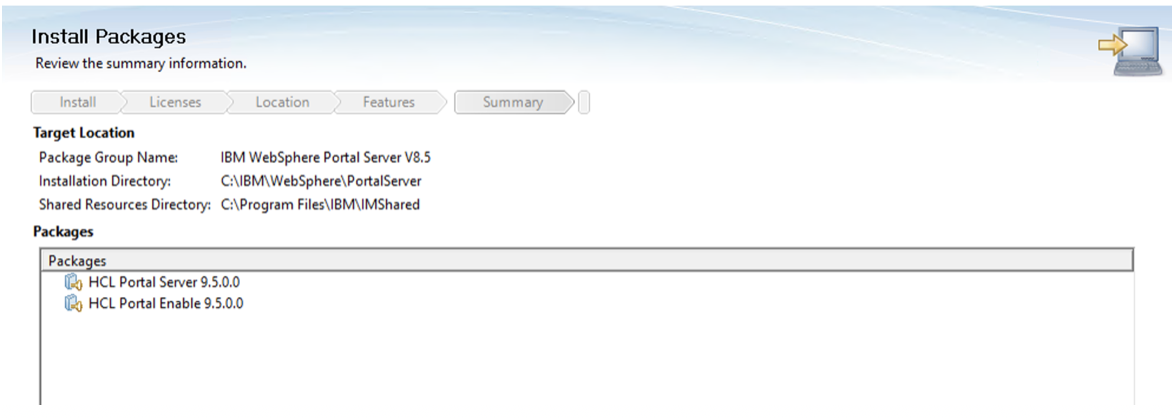
Review Summary. Select Install..
Note: During the install, a series of ConfigEngine tasks will be run to upgrade Portal 8.5 to 9.5 so upgrading the profile after is not required.
When the installation is finished, you should now be able to verify that we can access the Portal in an internet browser by navigating to: http://myportal.hcl.com:10039/wps/portal.
Check the About HCL WebSphere Portal portlet to make sure it says 9.5.
This completes the upgrade to HCL WebSphere Portal 9.5 standalone.