Update the custom style
After creating a theme style, use this procedure to apply a customized look and feel to the theme.
Do not edit the HCL WebSphere Portal 8.5 theme CSS style sheets directly, because these changes might be lost during a fix pack upgrade. Instead, create the CSS class in a new style sheet belonging to the custom theme.
- Apply the custom style to a page.
- On the page to apply the style, turn on Edit Mode.
- Click the Page > Styles on the toolbar.
- Click the custom style.
- On the page to apply the style, turn on Edit Mode.
- Write the new styles.
- Open a portal page that has the theme and custom style applied.
- Use a tool, like Firebug, to select and inspect the style rules to change.
- After determining the styles to override in the theme, copy the overrides to the custom style sheet on WebDAV.
- Open a portal page that has the theme and custom style applied.
- Apply the custom style sheet to the entire page structure.
- Figure out the root page for the area on which to apply the custom style. To apply to the entire site, select the Content Root.
- Add metadata on the root page with a key of colorPalette and a value pointing to the custom style sheet in relation to the theme directory on WebDAV. For example: css/custom/custom.css.
- Figure out the root page for the area on which to apply the custom style. To apply to the entire site, select the Content Root.
- Use Firebug to inspect the CSS file.
- Open the Firebug plug-in in a Mozilla Firefox browser.
- Click the element selection icon
 in the Firebug menu bar.
- Click the area on the page to change.
- Check the correct area is selected in the HTML tab.

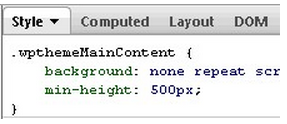
- Look at the Style tab to inspect all the CSS files applied to the HTML element.

- Edit the CSS file in the Style tab until the HTML element looks how we want it to. To edit an attribute click the text.

- After determining the new value applied has the appearance that we want, copy the CSS file that we changed in the Style tab into the custom style sheet.
- Open the Firebug plug-in in a Mozilla Firefox browser.
- Style definitions
Customize the theme with these definitions.
Parent Styles
Related information
Get Firebug