Deploy DX Container to Amazon EKS
Learn how to deploy HCL WebSphere Portal (DX) 9.5 CF_183 and higher container release along with Ambassador to Kubernetes, as verified in Amazon Elastic Container Service (Amazon ECS) for Kubernetes.
Prerequisites
Prior to using the procedure below, it is assumed that the HCL DX Administrator is generally experienced in using Kubernetes. Additionally, the DX Administrator must have the appropriate access to the target environment. If not, following are some preliminary steps that need to be taken.
- Setup KUBECONFIG to refer to the target server. This will ensure any kubectl commands executed locally affect the target environment.
- Amazon EKS Cluster
- The following tools must be installed on desktop/laptop
- Docker
- AWS Command Line Interface (CLI) - used to get image details.
- Volume requirement:
- Requires an AccessMode of ReadWriteMany
- Requires a minimum of 40 GB , with the default request set to 100 GB
- RECLAIM POLICY = Retain
- For DAM, additional volume is needed. For more details on storage class and volume, see Sample storage class and volume .
Note: HCL WebSphere Portal is input-output (I/O) intensive which requires a high performing file system for optimization; NFS is an option for this.
- Hardware:
- 4 cores / 7 GB - - - 5 cores / 9 GB
- Amazon Elastic Container Registry (ECR) or any container registry access, for tagging and pushing.
- See the support topic for the HCL WebSphere Portal detailed system requirements.
- Download and extract the contents of the HCL DX 9.5 CF_183 and higher package to the local (local to cloud or system).
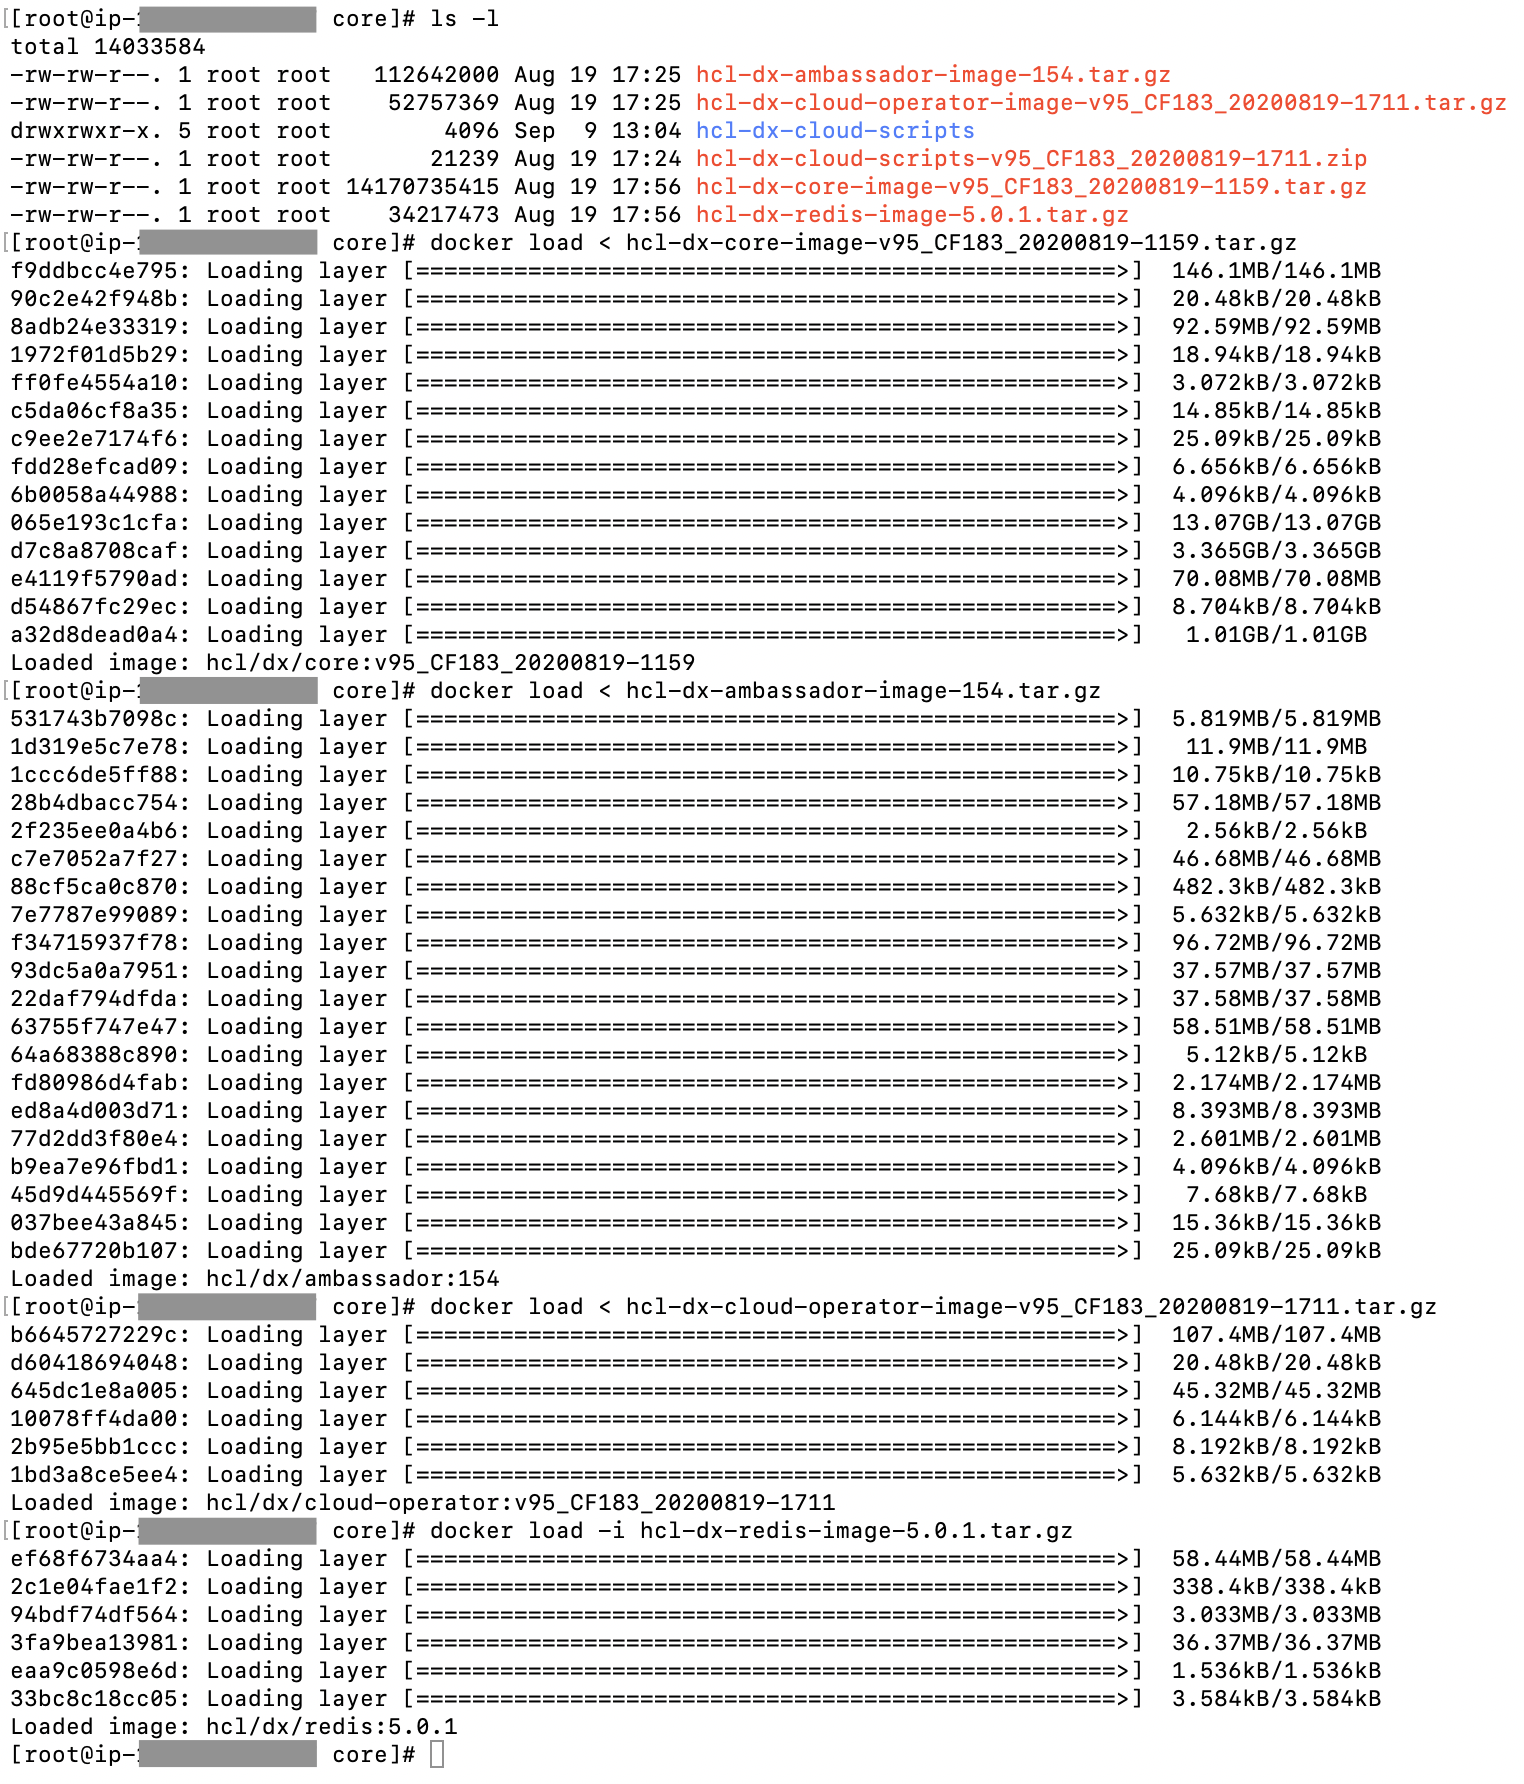
If deploying HCL WebSphere Portal 9.5 Container Update CF_183 release, the image and package names are as follows:CF183-core.zip files:
- HCL DX notices V9.5 CF183.txt
- hcl-dx-ambassador-image-154.tar.gz
- hcl-dx-cloud-operator-image-v95_CF183_20200819-1711.tar.gz
- hcl-dx-cloud-scripts-v95_CF183_20200819-1711.zip
- hcl-dx-core-image-v95_CF183_20200819-1159.tar.gz
- hcl-dx-redis-image-5.0.1.tar.gz
Note: Images included in the 'other' package released with CF_183 are optional and used to support use of OpenLDAP, Remote Search, the Experience API, Content Composer, and Digital Asset Management components and services.
Follow these steps to deploy HCL WebSphere Portal 9.5 CF_183 and higher container release along with Ambassador to Kubernetes, as verified in Amazon Elastic Kubernetes Service (Amazon EKS). This deployment relies heavily on Kubernetes Operators for full functionality.
Note: Reference the latest HCL DX 9.5 Container Release and Update file listings in the Docker deployment topic.
DX Container Management
- Change directory
Open a terminal window and change to the root directory of the extracted package.
- Docker load
Load the containers into your Docker repository:
-
- docker load < hcl-dx-core-image-v95_CF183_20200819-1159.tar.gz
-
- docker load < hcl-dx-ambassador-image-154.tar.gz
-
- docker load < hcl-dx-cloud-operator-image-v95_CF183_20200819-1711.tar.gz
-
- docker load < hcl-dx-redis-image-5.0.1.tar.gz
Note: Either -i or < works for the load command. In case you encounter an error when using one, try running the command using the other.

-
- Docker tag and push
Get the Docker images in your local Docker repository to the target Kubernetes system by tagging and pushing them appropriately. If we used docker load to get your images on the target environment, proceed to the next step.
- docker tag <local image:tag or image id> <destination image:tag>
-
- docker push <image:tag>
DX Deployment
- Unzip
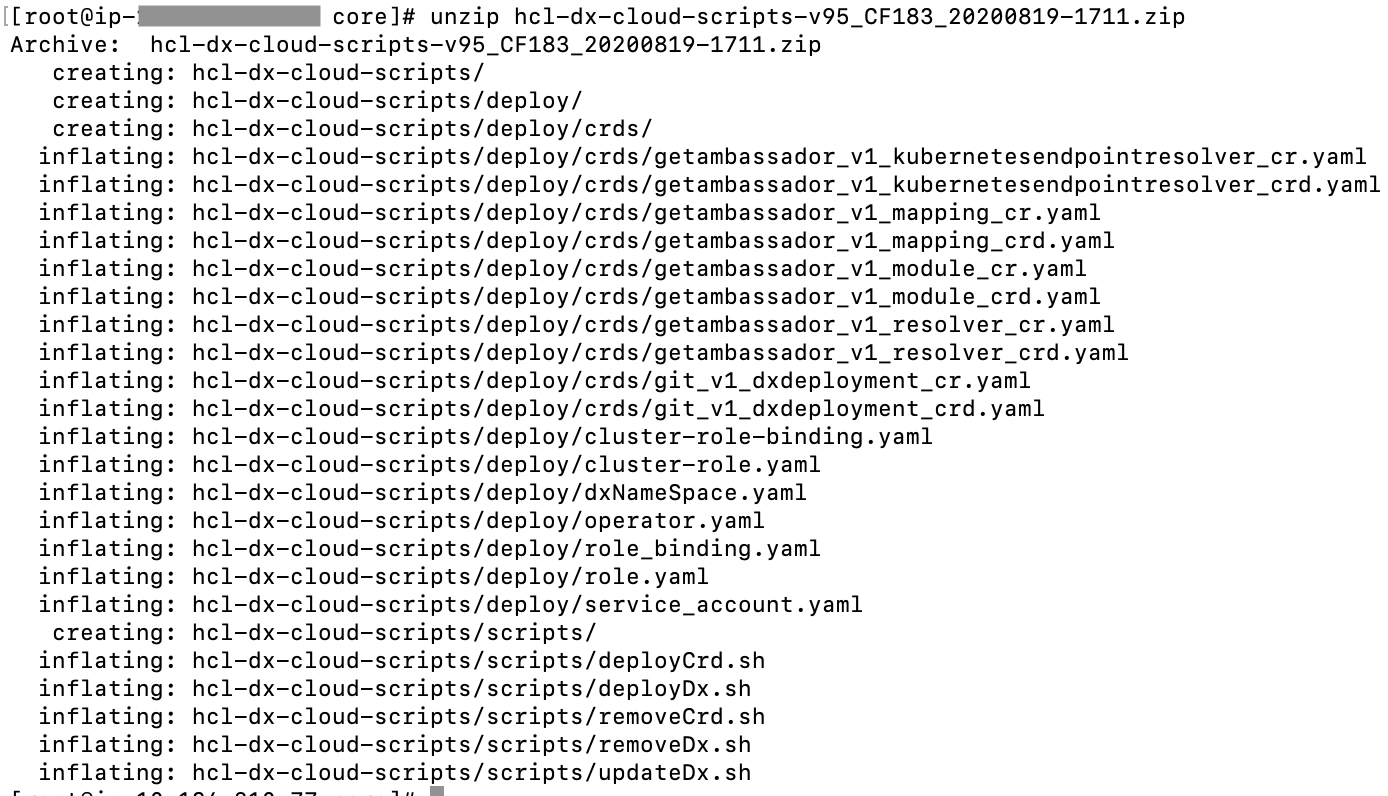
Extract the HCL DX deployment scripts onto the environment as follows:
- unzip hcl-dx-cloud-scripts-v95_CF183_20200819-1711.zip

- Change directory
Change to the extracted files directory,
- cd hcl-dx-cloud-scripts
- Custom resource definition
Install the DxDeployment custom resource definition.
- Do not modify the git_v1_dxdeployment_crd.yaml file.
- Customize ./deploy/crds/git_v1_dxdeployment_cr.yaml, if required
Use either of the following commands:
-
- kubectl create -f hcl-dx-cloud-scripts/deploy/crds/git_v1_dxdeployment_crd.yaml
-
- ./scripts/deployCrd.sh
- Persistence volume
Create (or have the Kubernetes Administrator create) a persistent volume and storage class where the AccessMode must be ReadWriteMany and the persistent volume reclaim policy must be Retain .

For more details on storage class and volume, see Sample storage class and volume
- NFS server
Provide the HCL DX 9.5 CF_183 and higher Docker image access to the volume mount created in order to copy the profile. There are various ways to do this and NFS is one option. If NFS is used, here are the parameters that have been tested to work:
-
rw, (Default)
-
sync, (Default after nfs 1.0, means that the server does not reply until after the commit)
-
insecure,** (Requires requests originate on ports less than 1024)
-
root_squash,** (Map requests to the nobody user).
-
hard,** (Required because this means the system will keep trying to write until it works.)
-
nfsvers=4.1,
-
rsize=8388608, (Avoids dropped packages, default 8192)
-
wsize=8388608, (Avoids dropped packages, default 8192)
-
timeo=600, (60 seconds)
-
retrans=2, (Number of retries after a time out)
-
noresvport** (Tells the NFS client to use a new Transmission Control Protocol (TCP) source port when a network connection is reestablished. Doing this helps make sure that the EFS file system has uninterrupted availability after a network recovery event.)
Note: Those marked with ** are critical and, in many cases, HCL recommends to have the rsize and wsize set to 8388608 .
-
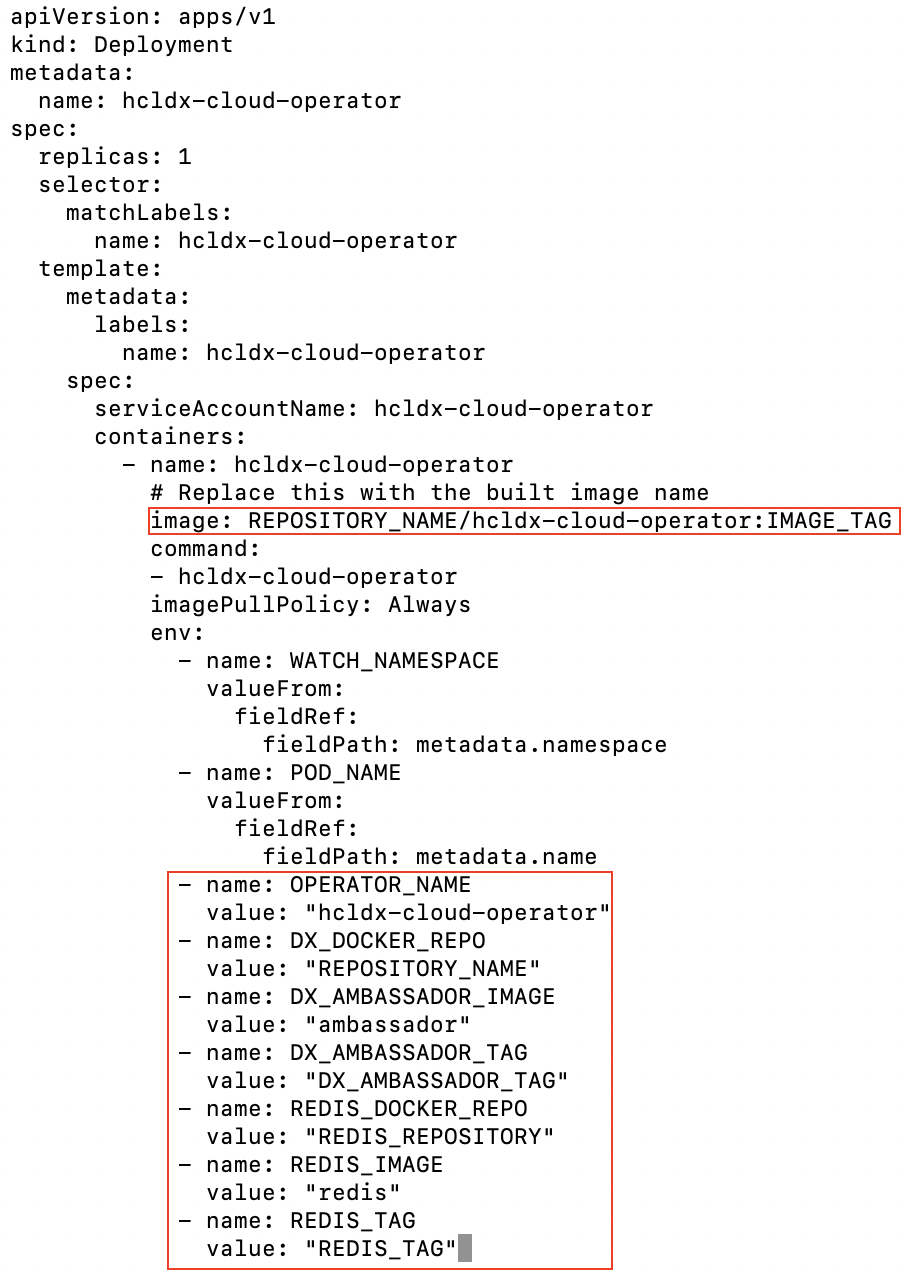
- Update YAML
Replace the REPOSITORY NAME , IMAGE TAG , AMBASSADOR , and REDIS values in operator.yaml


- Deploy
Create the DX container deployment.
Run the deployDx.sh script to create the namespace, install the project scoped service account, role, role binding, operator, and deployment.
- ./scripts/deployDx.sh NAMESPACE REPLICAS REPOSITORY IMAGENAME IMAGETAG VOLUMENAME STORAGECLASS DBTYPE INGRESSIMAGE INGRESSTAG
- NAMESPACE - the project or the namespace to create or use for deployment. This namespace will be used in subsequent commands.
- REPLICAS - the number of initial instances for the deployment.
- REPOSITORY - your local repository, the repository used by Kubernetes.
- IMAGENAME - the name of the dxCore image, as added to the repository above.
- IMAGETAG - the tag for the target image as added to the repository above.
- VOLUMENAME - the volume to be used by the deployment for persistence, this must use AccessMode ReadWriteMany .
- STORAGECLASS - the storage class name used to create the persistent volume.
- DBTYPE - the database type. By default, and initially, this is Derby. HCL DX 9.5 uses Apache Derby, Oracle Database, DB2, or Microsoft SQL Server. Acceptable values are derby, oracle, db2, or msSql.
- INGRESSIMAGE - The image name to use for ambassador (Native K8s).
- INGRESSTAG - The image tag to use for ambassador (Native K8s).
For example:
- $cd hcl-dx-cloud-scripts
$scripts/deployDx.sh dx-11 1 REPO_NAME dxen v95_CF183_20200818-1342 dx-pv-11 dx-deploy-stg derby ambassador 154
Generate TLS Certificate
Create a TLS certification to be used by the deployment:
- For development purposes:
- Use SSL, we can create a private key:
- openssl genrsa -out my-key.pem 2048
- Use OpenSSL, we can create a certificate signed by the private key:
- openssl req -x509 -key my-key.pem -out my-cert.pem -days 365 -subj '/CN=my-cert
- Use SSL, we can create a private key:
- Create a TLS certification:
- kubectl create secret tls dx-tls-cert --cert=my-cert.pem --key=my-key.pem -n aws-mynamespace
Note: The default name is the dx-tls-cert this can be changed in the configuration. aws-mynamespace is your Kubernetes namespace. We can set your preferred namespace but we must consistently use this namespace in subsequent commands. See Customize the Kubernetes deployment.
Final Output
External IP from Load balancer in the below example can be used to access PORTAL
- Output
- $ kubectl get all -n NAMESPACE

- https://aea731c305cf24a20bfe69d04b025055-1983428718.us-east-1.elb.amazonaws.com/wps/portal

- Understand the HCL DX 9.5 Container deployment on Amazon Elastic Kubernetes Service This section describes the output and artifacts created when deploying HCL Digital Experience 9.5 container release in on Amazon Elastic Kubernetes Service (EKS).
- Finding the Kubernetes deployment This section describes how to find the HCL WebSphere Portal deployment.
- Customize the Kubernetes EKS deployment This section describes how to customize the HCL WebSphere Portal deployment.
- Containerization Limitations/Requirements This section describes the limitations and requirements for deploying HCL Digital Experience 9.5 on container platforms.