Enable a credit line for a B2B store
Configure the business account with the appropriate credit line settings to allow a business account to use a credit line as a payment method.
Procedure
- Open WebSphere Commerce Accelerator
- Select your Store name, and click OK.
- Click Sales > Accounts. The Account List page displays business accounts currently defined for the selected store.
- Select the account to enable the credit line service and click Change.
- Click the Credit line tab and select the check box for the option The account has a credit line. When we enable this check box, you assign a credit line to the business account.
- Enter a description in the Description (required) field,
and a credit line account number in the Credit line account
number (required). Select a Billing address from
the drop-down menu.
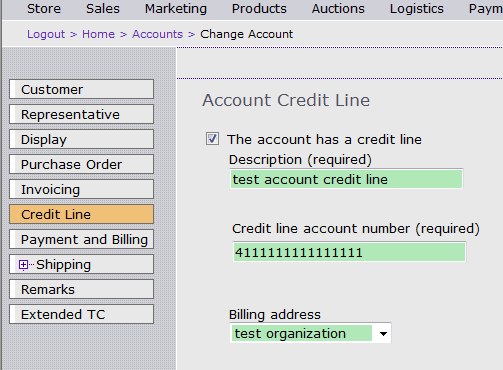
- Click OK to save all changes.
- Select the check box to the left of the business account for which we want to enable a credit line and click Contracts.
- Enable payment to use credit line.
Option Description To edit a draft contract to enable a credit line account: - Select the check box to the left of the draft contract to edit.
- Click Change.
- Click the Payments and Billing tab and select the check box for the option Allow payment using the account's credit line.
To create a new contract and enable a credit line account: - Click New.
- Fill out the Contract General Information.
- Click the Payments and Billing tab and select the check box for the option Allow payment using the account's credit line.
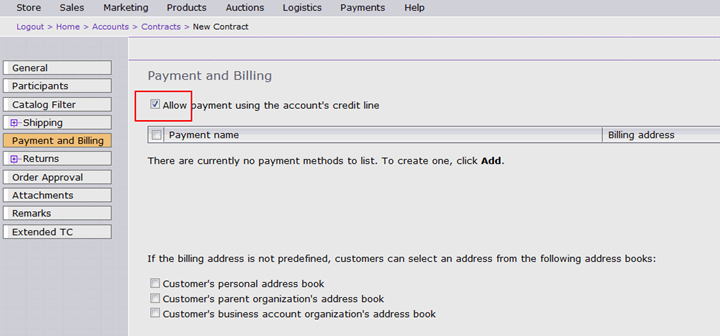
- Click OK to save the changes.
Related concepts
LOC (Line of credit) plug-in
Related reference
LOC plug-in financial transactions