Tutorials > Sales Center > Add a column to the order items table
Create a customer and an order
In this tutorial it is necessary to have an existing order in pending state in WebSphere Commerce. If you have a order in pending state and know its order number, skip this step.
Otherwise, create an order:
Procedure
- Start the WebSphere Commerce Test Server in the WebSphere Commerce development environment. At a command prompt, navigate to WCDE_INSTALL\bin and run the script startwcserver.bat.
The server is started when you see the message Server server1 open for e-business. Running the startwcserver.bat script is equivalent to starting the WebSphere Commerce Test Server using the Rational Application Developer graphical interface, but without the memory required by that graphical interface.
For now, you do not need to use the graphical interface for the WebSphere Commerce server side. Later in this tutorial we will launch the Rational Application Developer graphical interface and see that the WebSphere Commerce Test Server is already running.
- Start the IBM Sales Center development environment by clicking Start > IBM WebSphere Commerce Developer > IBM Sales Center development environment.
- From the Run menu, click Run.
- In the Configurations list, select Sales Center and click Run.
- When the IBM Sales Center opens, click Open on the left pane and select IBM Sales Center - Order Management to open the Order Management main window.
- From the main menu select File >
Logon to display the logon panel. Click the Connectivity button to display the Preferences panel. Under HTTPS settings, for Server enter localhost and for HTTPS port enter 8000; click OK.
- Back on the logon dialog enter a user name and password with site administrator privileges, for example, wcsadmin. By default the password for the user name wcsadmin is wcsadmin, and we will be required to change it the first time you logon.
- From the main menu select Store > Select. Click the Find button to search for all stores.
- From the Search Result list select a store, for example ConsumerDirect, and click OK.
- Create a customer profile. For more information, launch the IBM Sales Center information center by clicking Help > Help Contents in the IBM Sales Center client and search for "Creating a customer profile".
- Create an order for the new customer by navigating to the Order menu and clicking Create. The New Order panel displays within the order editor.
- Click the Order Items tab.
- Click the Add button to add an item to the order.
For example, enter TATA-0101 into the red Product Code field and press Enter, or search for an product in the catalog. For more information, open the IBM Sales Center information center. In the IBM Sales Center client, navigate to the Help menu, click Help Contents and search for the topic "Finding a product".
- Click Apply.
- Write down the Order ID as displayed on the order editor tab for reference so that the same order can be quickly located during the verification step at the end of this tutorial.
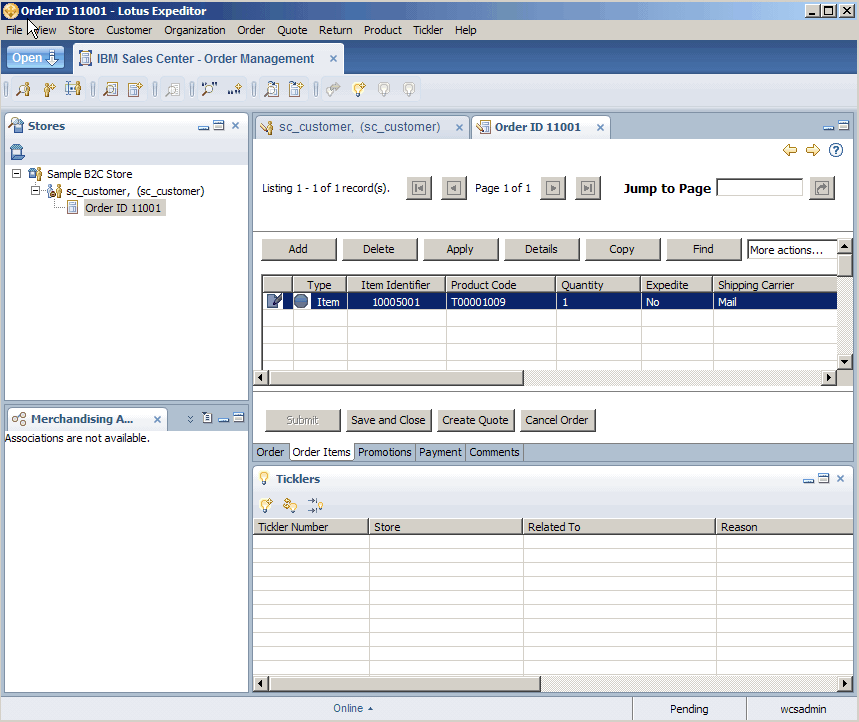
The Order ID is also shown on the top left corner under the Stores view. In this example, the order ID is 11001.
- Click Save and Close. On the Confirm Cancel dialog, click Yes.
- Close the Sales Center client by selecting File > Exit. On the Confirm Exit panel click OK.