Tutorials > Management Center > Add new fields in the Catalogs tool
Add a new column to the product list view
In this lesson, you customize the product list table by adding new property warranty information for catalog entries. You update the list view to include new widgets for the new property.
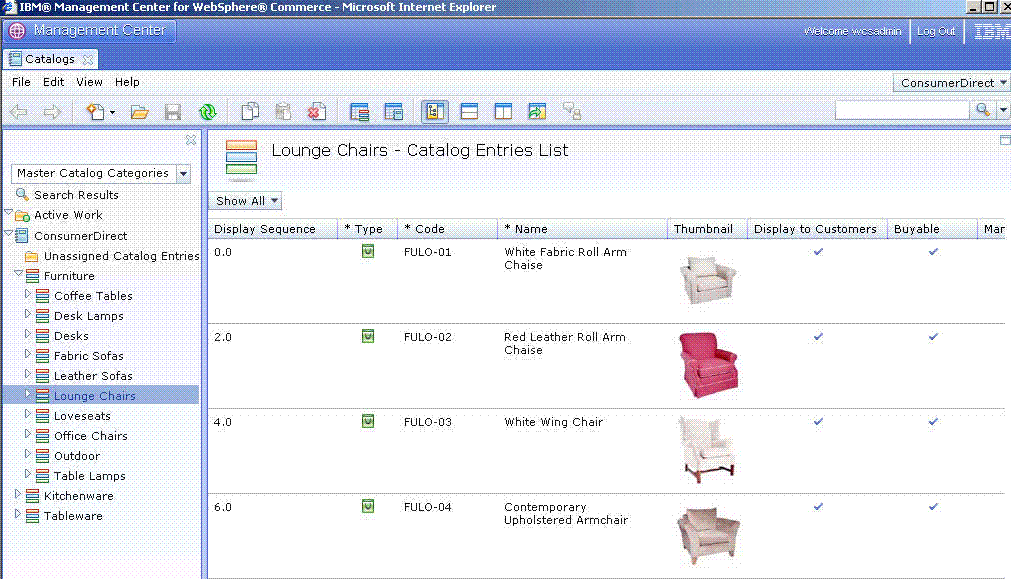
The following screen capture shows the default Management Center Catalog Entries List.

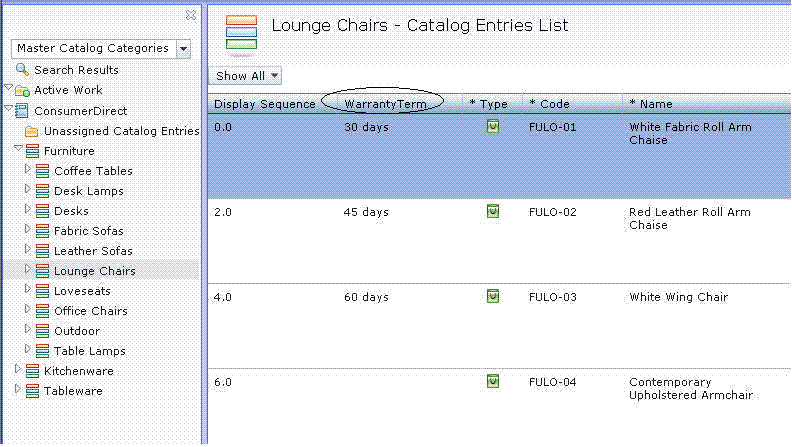
After completing these steps, a new column, WarrantyTerm, is added to the list view.

Update the list view to include a new widget:
Procedure
- Open
WebSphere Commerce Developer.
- Open Java EE perspective and select the Enterprise Explorer view.
- Complete one of the following steps:

 Navigate to LOBTools > WebContent > WEB-INF > src > lzx > commerce > catalog > listViewDefinitions
 Navigate to LOBTools > WebContent > config > commerce > catalog > listViewDefinitions
- Open one of the following files:

 CatalogEntryGrid.lzx
 CatalogEntryGrid.def
- Add the new column to the list view. The list columns are defined as XML nodes
in:

 The catCatalogEntryBrowseGrid class.
 The catCatalogEntryBrowseGrid definition.
Each column can use a different widget to display data. For example:

 Use the
<wcfGridText> tag for simple
text and the
<wcfGridComboBox> tag to define a list of selectable
options.
 Use the
<GridText> tag for simple text
and the
<GridComboBox> tag to define a list of selectable options.
Option Description 
 Locate the class definition
of catCatalogEntryBrowseGrid and
add the code for the
<wcGridComboBox> tag


- Search for the following line:
<class extends="wcfObjectGrid"
name="catCatalogEntryBrowseGrid" preferenceKey="catCatalogEntryBrowseGrid">
- Add the code shown in bold:
<wcfGridNumeric editable="true" name="sequence"
            propertyName="sequence" required="false"
            numDecimalPlaces="1"
            text="${catalogResources.displaySequence.string}"
            visible="true" width="130"/>
<wcfGridText editable="false" name="catentryId"
            objectPath="CatalogEntry" propertyName="catentryId"
            text="${catalogResources.productUniqueId_ColumnHeader.string}"
            visible="false" width="90"/>

<wcfGridComboBox name="WarrantyTerm" editable="true"
objectPath="CatalogEntry" propertyName="x_warterm"
text="${extCatalogResources.productWarranty_ColumnHeader.string}" width="90" visible="true"/>
 Locate the catCatalogEntryBrowseGrid
definition and add the code for the
<GridComboBox> tag

- Search for the following line:
<ObjectGrid definitionName="catCatalogEntryBrowseGrid"
preferenceKey="catCatalogEntryBrowseGrid">
- Add the code shown in bold:
<GridNumeric editable="true" name="sequence" numDecimalPlaces="1" propertyName="sequence" required="false" text="${catalogResources.displaySequence}" visible="true" width="130"/>
<GridText editable="false" name="catentryId" objectPath="CatalogEntry" propertyName="catentryId" text="${catalogResources.productUniqueId_ColumnHeader}" visible="false" width="90"/>

<GridComboBox name="WarrantyTerm" editable="true" objectPath="CatalogEntry" propertyName="x_warterm" text="${extCatalogResources.productWarranty_ColumnHeader}" width="90" visible="true"/>
- Save the changes.