Tutorials > Management Center > Create the Project BOD service module
Create an extended sites store for the Recipes tool customization
This lesson details how to create an extended sites store with a custom catalog for use in the Recipes tool tutorials. This extended sites store is used in other tutorials in the Recipes tool series of tutorials and must be created before proceeding any of the five tutorials in the series.
This store is created with a custom product catalog which contains materials used by our recipes. In other tutorial lessons, we will test the customizations by inserting recipe data into the database. These recipes will be associated with the created store through its storeent_id value, which is contained in the STOREENT table of the database.
Procedure
- Publish a custom sar file on the default extended sites catalog.
The examples in the Recipes tool scenario use products in the Kitchenware category of the Consumer Direct catalog. Because this is not a selectable catalog when creating an extended sites store, publish the Housewares.sar file in the extended sites store.
- Create a directory named sar in WCDE_INSTALL\conf and put HousewaresCatalog.sar in it.
You must also create the conf directory, if it does not exist.
- Start the server if it is not running and log into the Administration Console. Select Site.
- In the Store Archives page, select Publish.
- If ExtendedSites.sar has been published, proceed to step 1f. If, however, it has not been published yet, check the box next to ExtendedSites.sar and click Next.
This enables the Extended Sites Asset Store as a parameter in later steps.
See View publish status for more information.
- In the parameters page, select Automotive under Sample data and ATP under Inventory model. Click Next and then Finish to publish the store.
- Select Site again. In the Store Archives page, check the box next to HousewaresCatalog.sar and click Next.
- In the Parameters page select Extended Sites Catalog Asset Store and click Next and then Finish. Confirm that the catalog has been successfully published.
- Create a directory named sar in WCDE_INSTALL\conf and put HousewaresCatalog.sar in it.
- Create the store:
- Log onto WebSphere Commerce Accelerator, select Extended Sites Hub and click Ok
- From the Extended Sites menu select New Store.
- On the General page, complete the store information fields and select Extended Sites Organization under Store organization. Then click Next.
- In the Store Type page, select MadisonsStorefrontAssetStore and click Next.
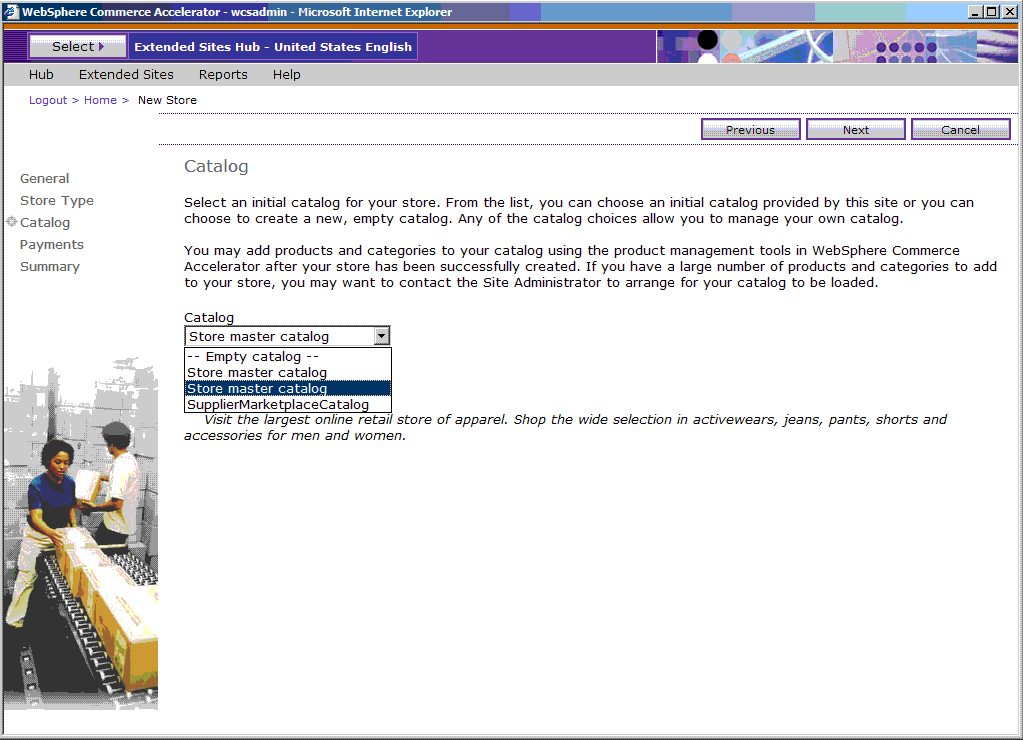
- In the Catalog page, select the store master catalog that has the description Visit the largest online retail store of apparel. Shop the wide selection in activewears, jeans, pants, shorts and accessories for men and women (be sure to select this catalog, there are two named Store master catalog). Click Next.
- In the Payments page select any desirable options, this will not affect the tutorial. Click Next and then click Finish to create the store.
- On the Store Creation Confirmation page, click Bookmark Store to save the URL for the store's home page to the browser so that you can view the store home page by selecting the bookmark in the Internet browser.
- Close WebSphere Commerce Accelerator.
- Open WebSphere Commerce Accelerator.
- From the Store menu select Sample store (recipe tutorial)
- In the Store menu select Open/Close and then click Launch. The store is now viewable and contains the default extended sites car parts catalog as well as the Consumer Direct catalog.
- Log onto WebSphere Commerce Accelerator, select Extended Sites Hub and click Ok
- Filter out unused product categories inherited from the asset store. You only need to use the Kitchenware category of the catalog, so filter out all the other product categories inherited from the asset store by the extended site store.
- Select the newly created store in WebSphere Commerce Accelerator.
- In the Merchandise menu, select Catalog Filter.
- Right click the Kitchenware category; then click Include and Save.
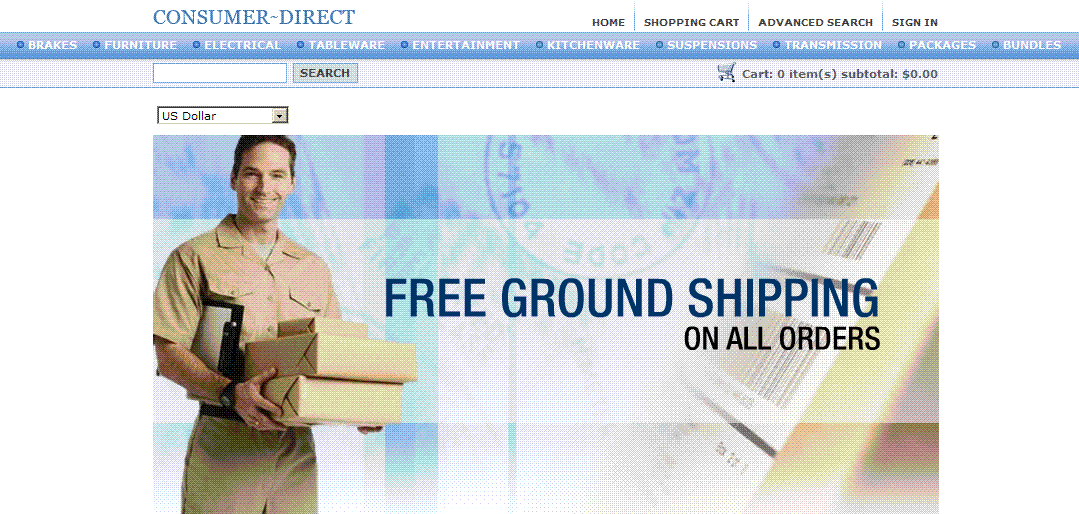
The store has now been created and is ready to be customized to implement a recipes section. The homepage should look like the following screen capture:
- Select the newly created store in WebSphere Commerce Accelerator.
- Optional: If you do not remember the storeent_id of the created store, find the storeent_id by following these instructions.
The storeent_id is needed when inserting recipe test data in other lessons. Therefore, we will require the storeent_id of this store in order to associate recipes with it.
- Access the WebSphere Commerce database through the following link: http://localhost/webapp/wcs/admin/servlet/db.jsp
- Submit the SQL query select * from storeent;
- Find the row which represents the created store. The store's name is in the identifier column. The created store's storeent_id is the number in the storeent_id column of that row.
- Access the WebSphere Commerce database through the following link: http://localhost/webapp/wcs/admin/servlet/db.jsp


