Install the DynaCacheEsi application
- Open the Network Deployment Manager administrative console and verify whether the DynaCacheEsi application is already installed.
Applications | Enterprise Applications
If DynaCacheEsi is not displayed in this list, click Install. Otherwise, proceed to External cache group settings.
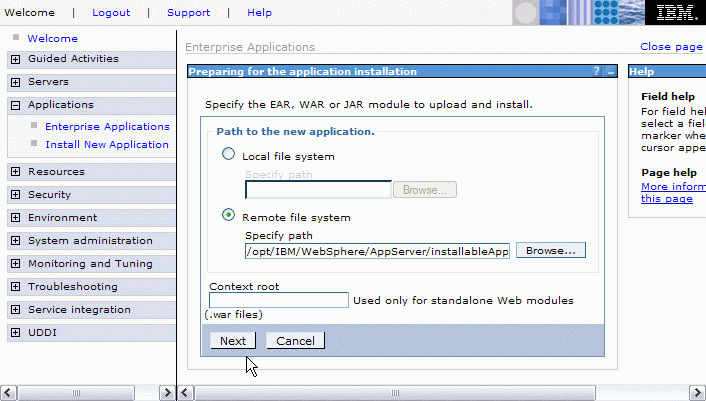
- On the Preparing for the application installation panel, browse to...
WAS_INSTALL/installableApps
...and select the DynaCacheEsi.ear file...

- Click OK. This takes you back to the Preparing for the application installation panel...
- On the next panel, enter VH_<Instance_Name> for the Virtual Host. DynaCacheEsi needs to be installed using the same virtual host as the cached application.

- Click...
Next| Continue
On the Application Security Warnings pane, click Continue.
Accept the default options on the next panel (step 1) and click Next once again.

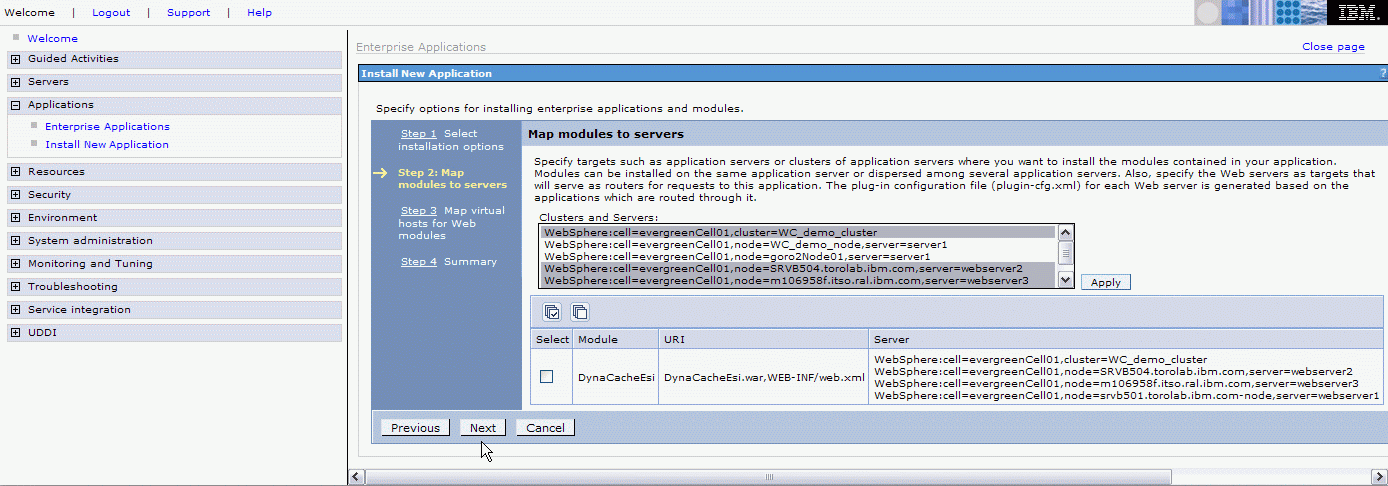
- Step 2 - Map modules to application servers.
On this panel, you need to select your application server cluster and all your Web servers, and click the check box in the Select column for the DynaCacheEsi Module.
 br />
br />
- Click Apply. In the server column next to the DynaCacheEsi module, your cluster and Web servers are now listed. Click Next.
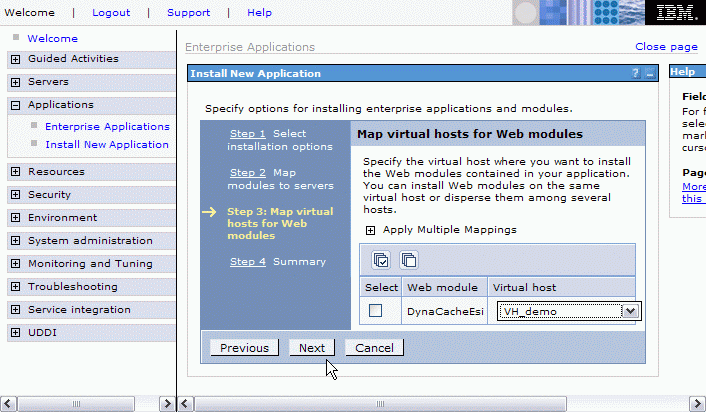
- Step 3 - Map virtual hosts for Web modules.
Check DynaCacheEsi and select the VH_<Instance_Name> virtual host from the pull-down menu. Then click Next.
 br />
br />
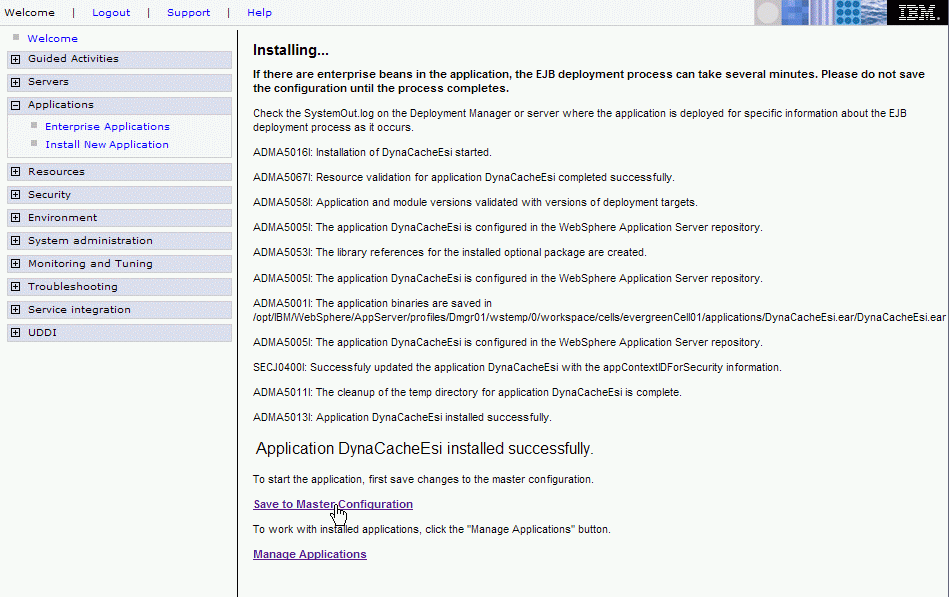
- Confirm the installation on the Summary window. Click Finish.

- Once the installation has completed successfully, click Save to Master Configuration.
- On the following page make sure to select Synchronize changes with nodes, then click Save.