Step 2: Creating a payments cassette plug-in
In this part of the tutorial you will create the payments cassette plug-in. In order to create the plug-in, you do know the following prerequisite tasks:
- Be familiar with Java programming
- Review the Payment plug-in specification
- Review the API information related to the plug-in specification: com.ibm.commerce.payments.plugin.Plugin or com.ibm.commerce.payments.plugin.QueryablePlugin
This tutorial uses WebSphere Commerce Developer as the development tool.
To create the payments cassette plug-in, do the following tasks:
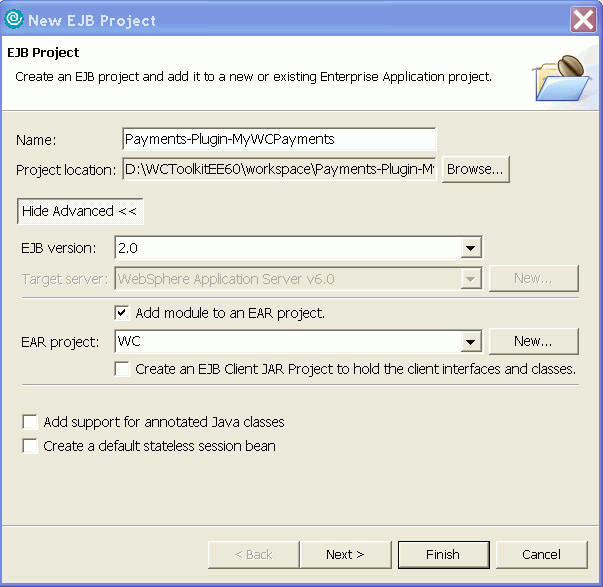
- In WebSphere Commerce Developer, create a new EJB project
- Click File > New > EJB Project.
- In the Name field, type Payments-Plugin-MyWCPayments.
- For EJB version, select 2.0.
- Select Add module to an EAR project.
- For EAR project, select WC.
- Click Finish.
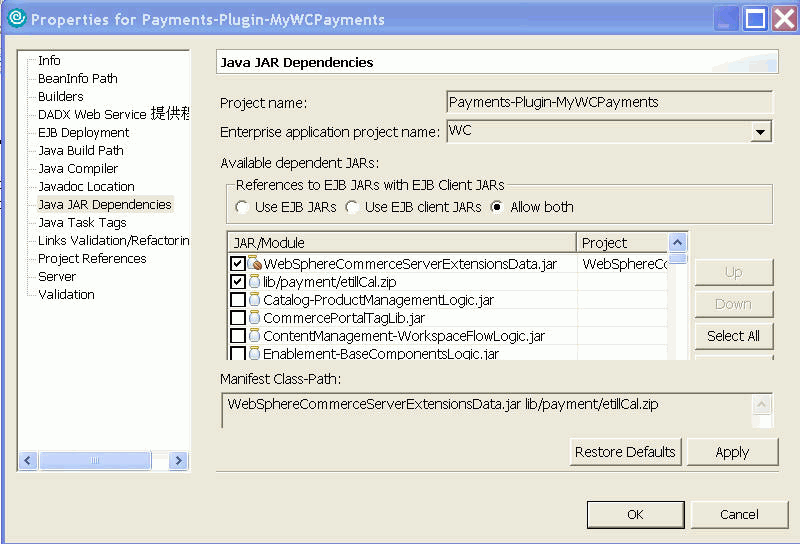
- In the Project Explorer:
- Click Payments-Plugin-MyWCPayments.
- Select Project > Properties.
- Add the Java JAR dependencies for WebSphereCommerceServerExtensionData.jar and lib/payment/etilCal.zip:
- Select the check boxes and click OK.
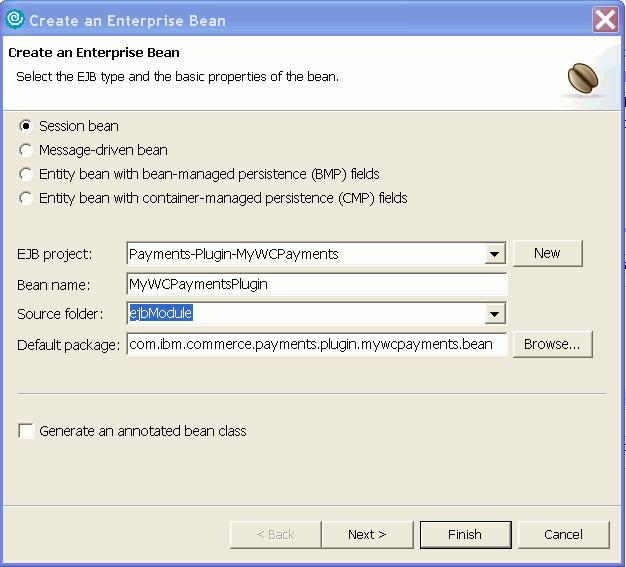
- Create an Enterprise Bean:
- Select the Payments-Plugin-MyWCPayments project.
- Select File > New > Enterprise Bean.
- Select Session Bean.
- In the EJB Project field, select Payments-Plugin-MyWCPayments.
- In the Bean name field, type MyWCPaymentsPlugin.
- In the source folder field, select ejbModule.
- In the Default package field, type com.ibm.commerce.payments.plugin.mywcpayments.bean .
- Click Next.
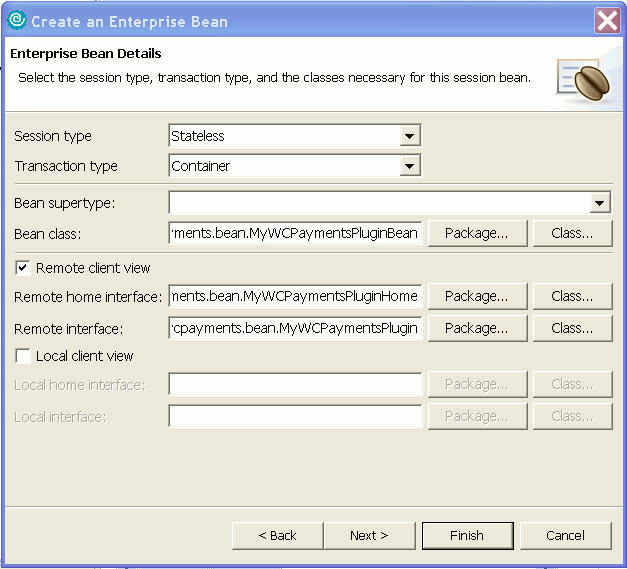
- In the Enterprise Bean Details page, in the Session type field, select Stateless. In the Transaction type field, select Container. Select Remote client view and click Next.
- In the "Which interfaces should the remote interface extend?" field, type com.ibm.commerce.payments.plugin.QueryablePlugin. Click Finish.
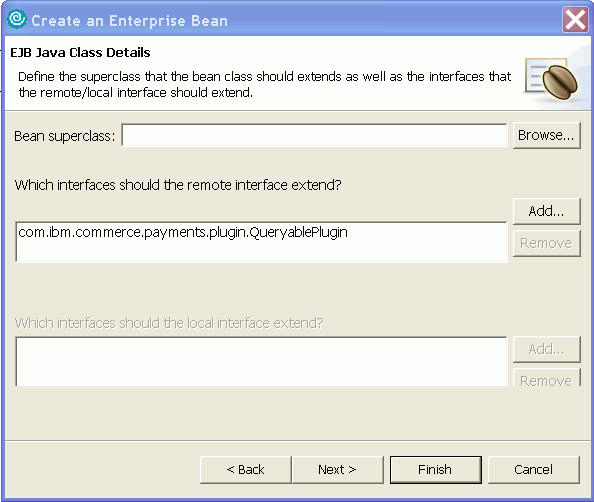
- Now that you have a session bean payment plug-in created, add the logic for your design to the MyWCPaymentsPluginBean.java. For this tutorial, you just import the files from the attached Payments-Plugin-MyWCPayments.jar file and override the source code when you import the project.
- For the NLV messages, you should create the properties files for your payment plug-in. In this tutorial, the MyWCPaymentsPluginErrorMessages_*.properties files are included in Payments-PluginPayments-Plugin-MyWCPayments.jar\com\ibm\commerce\payments\plugin\mywcpayments\util
- Create the payment plug-in descriptor or other configuration files required by your payment plug-in. For the payments cassette plug-in, you need PluginDeployment.xml, and cassette profiles to connect to the old implementation of WebSphere Commerce Payments. They are included in Payments-Plugin-MyWCPayments.jar. Copy the MyWCPaymentsPlugin directory and its content to the following directory:WCDE_installdir\xml\config\payments\ppc\plugins
- Generate deployment code for the enterprise bean MyWCPaymentsPlugin:
In J2EE perspective,- Select the Payments-Plugin-MyWCPayments>Deployment Descriptor:Payments-Plugin-MyWCPayments>Session Beans>Payments-Plugin-MyWCPayments to highlight it.
- Right-click and select deploy.
- Build the Payments-Plugin-MyWCPayments project in WebSphere Commerce Developer if your Rational Application Developer environment is not configured to build automatically.
- Republish WebSphere Commerce Test Server.
In the next step of the tutorial you will learn how to configure the remote payment instance.
(C) Copyright IBM Corporation 1996, 2006. All Rights Reserved.
