Enable database persistence
It is assumed in this section that the following tasks have already completed before enabling database persistence:
- Create a session database. In this example, it is assumed that the data source JNDI name is jdbc/Sessions.
- In distributed environments, the session table will be created automatically for you when you define the data source for the database as the session management table; however, if you want to use a page (row) size greater than 4 KB, you will need to create the tablespace manually.
For z/OS DB2 create a table for the session data. Name the table SESSIONS. If you choose to use another name, update the Web container custom property SessionTableName value to the new table name. Grant ALL authority for the server region user ID to the table.
- Create a JDBC provider and data source for the database. The data source should be non-XA enabled.
The following example illustrates the steps to enable database persistence at the appserver level. Session management settings can also be performed at the enterprise application level and the Web application level.
To enable database persistence, repeat the following steps for each appserver:
- Select...
Servers | Application servers | server | Additional Properties | Web container | Session management | Distributed environment settings | Database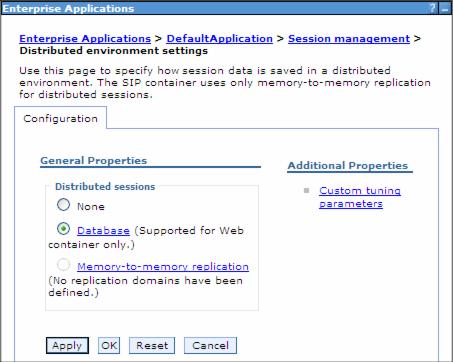
- Enter the database information:
- Enter the data source JNDI name. The data source must be a non-JTA enabled data source.
- Enter the user ID and password to access the database.
- If you are using DB2 and you anticipate requiring row sizes greater than 4 KB, select the appropriate value from the DB2 row size menu.
- If DB2 row size is other than 4 KB, you are required to enter the name of tablespace.
- If you intend to use a multi-row schema, select Use Multi row schema.
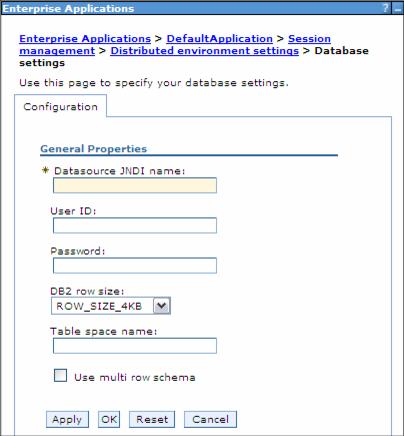
For z/OS implementations, only the Datasource JNDI name and Use multi row schema settings will appear in the window.
- Click OK.
After you have updated each server, save the configuration changes, synchronize them with the servers, and restart the appservers.