8.7.2 Install BeenThere
To install and deploy the BeenThere Enterprise Application Archive file, follow these steps:
- Log on to the WAS console and click...
Applications | Install New Application
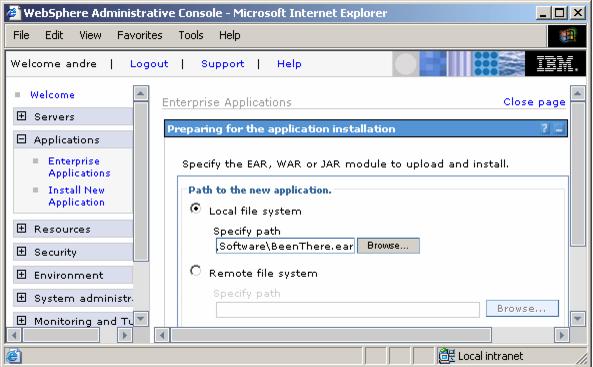
- The "Preparing for the application installation" window appears
- Here you can specify the EAR/WAR/JAR module to upload and install.
By default, the BeenThere.ear file is found in...
<WAS_ND_install_root>/samples/lib/BeenThere
Click the Browse button to specify the location of the file, select it and click Next to continue.
The .ear file can reside on any node in the cell or on the local workstation running the WAS console. Depending on where you stored it, use the Browse button next to the Local file system or Remote file system selection.
- The next window allows you to define mappings and bindings. We do not need to change anything here, so click Next to accept all defaults.
- The next panel shows warnings regarding the policy file included in the EAR. Since we have not enabled Java 2 security in our cell you can ignore it and click Continue.
- Here you can specify the EAR/WAR/JAR module to upload and install.
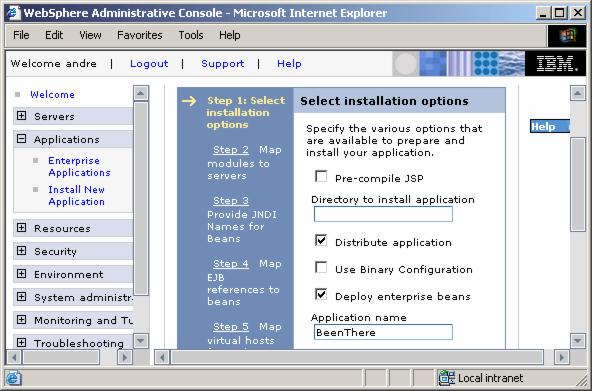
- The upcoming window shows the first of several steps in the Install New Application process.
- Select to Deploy enterprise beans during the installation.
- Make sure the Application name BeenThere is correct and click Next.
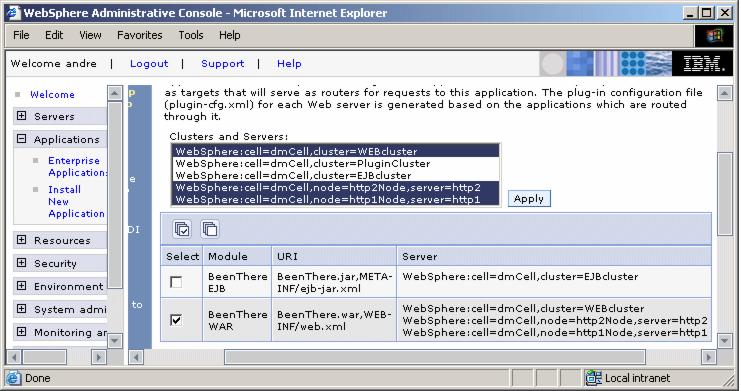
- On the next step (Map modules to servers) map the application's modules to the proper servers.
We want to run Web modules on the WEBcluster and EJBs on the EJBcluster.
In addition, the Web modules must also be mapped to the Web servers. You can map a module by checking it, selecting the application or Web server(s) from the Clusters and Servers list and clicking Apply.
For our scenario:
- Select the BeenThere WAR Module, then the WEBcluster and the Web servers http1 and http2 and click Apply.
- Select the BeenThere EJB Module and the EJBcluster and click Apply.
The final mapping...
- Click Next.
- Accept the defaults on the Provide options to perform the EJB Deploy panel and click Next.
- Accept the EJB JNDI name supplied in Step 4 (Provide JNDI Names for Beans) and click Next to reach Step 5 (Map EJB references to beans).
- In this step configure an existing EJB reference in the Web module to the BeenThereBean EJB.
Enter the fully qualified JNDI name of...
cell/clusters/EJBcluster/BeenThere

- Click Next to reach Step 6 (Map virtual hosts for Web modules). Accept the default virtual host (default_host) and click Next.
- Step 7 (Map security roles to users/groups) and Step 8 (Ensure all unprotected...) are unnecessary for our configuration, since security is not enabled. Therefore, accept the defaults for both and click Next.
- The last step shows the installation summary. Review it and click Finish to perform the installation.
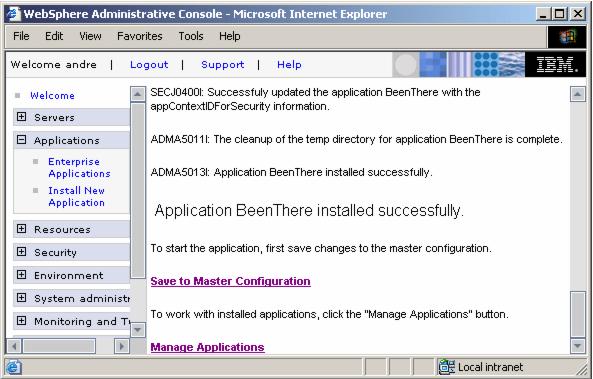
- Click Save to Master Configuration to save your changes (and do not forget to check the Synchronize changes with Nodes option).