Installing IBM Support Assistant V3
- Introduction
- System Requirements
- Installing IBM Support Assistant V3
- Running IBM Support Assistant V3
- Uninstalling IBM Support Assistant V3
- Maintenance and Troubleshooting
1. Introduction
This document contains useful information to assist you during the installation of IBM Support Assistant V3.0.0. IBM Support Assistant uses the InstallShield installer to install onMicrosoft Windows, Unix, and Linux systems. There are also instructions on how to modify application parameters during and after installation and the method of uninstalling IBM Support Assistant.
2. System Requirements
IBM Support Assistant V3.0 supports the following operating systems:On Windows systems, the IBM Support Assistant uses the Eclipse embedded browser widget. The embedded widget requires MS Internet Explorer 6.x.
- Microsoft Windows XP SP1, 2000 and 2003 server
- Linux RedHat Advanced Server 3, Linux SuSE 9.0
- HP/UX 11
- Solaris 9
- AIX 5.2 and 5.3
On Unix and Linux platforms, the IBM Support Assistant application can be used with the following web browsers:
- Mozilla 1.7 and above
- Mozilla Firefox 1.0.7+. Mozilla Firefox 1.5.x is not supported
3. Installing IBM Support Assistant
There are three modes for installing IBM Support Assistant on all platforms:
- GUI Mode
- Console Mode
- Silent Mode
GUI Installation Mode:
This is the default installation mode and can be started by simply executing the executable installer file for an operating system. It launches the IBM Support Assistant installer in a graphical wizard that guides the user through the installation process.
Console Installation Mode:
This installation mode launches the IBM Support Assistant installer in a text based wizard that guides the user through the installation process. It is useful when a GUI installation is not possible but the user would like to use an installation wizard in a text-only environment.The console installation can be launched by using the following command:
setupwin32.exe -console
Silent Installation Mode:
This installation mode does not require any user interaction. This lets the user specify wizard settings in a text file without having to run the wizard in graphical or console mode. For silent mode execution, use the following command line arguments when running the installer:
setupwin32.exe -silent -options <options file>
where
<options file> is the options file as described below:
The Options File:
The options file specifies the values that can be set during an installation execution. It can be used to configure an install with the options specified below when the wizard is run with the "-options" command line option. Read each setting's documentation for information on how to change its value. These settings must be specified in a text file which can then be used as the options file. A sample options file is included with the IBM Support Assistant V3 download archive.
The following settings must be included in the options file for the IBM Support Assistant silent install:
1. License Acceptance: The options file must contain the statement of acceptance of the License Terms and Conditions as described in the IBM Support Assistant license agreement file. This is specified by adding the following lines to the options file:
-V LICENSE_ACCEPT_BUTTON="<value>"
-V LICENSE_REJECT_BUTTON="<value>"
where<value> should be set to true for the LICENSE_ACCEPT_BUTTON and false for the LICENSE_REJECT_BUTTON to continue installation in silent mode.
2. Install Location The options file must contain the location where IBM Support Assistant is to be installed by the silent installer. This is specified by adding the following line to the options file:
-P installLocation="<Installation Location>"
where<Installation Location> is the absolute install location where IBM Support Assistant is to be installed, e.g.
C:\Program Files\IBM\IBM Support Assistant...or...
/opt/IBM/IBMSupportAssistant
3. Install Type (Optional)
-P ISAV3FeatureBean.active="<value>"
where-P ISAV3TranslationsFeatureBean.active="<value>"
<value> is either true or false depending on whether you would like to install the feature.
If IBM Support Assistant v2 is already installed on the same system, the installer will not allow IBM Support Assistant V3 to be installed in the same location. In the GUI and Console installers, the installation will be blocked by a prompt to change the install location so that there is no conflict. In Silent install mode, the installation will exit with an error code value of 2004. 4. Continue Installation if application is already installed: If IBM Support Assistant V3 is detected as being already installed on a machine, the silent installation will not continue and exit with an error code value of 2003. This is done because IBM Support Assistant V3 is designed to have one installation instance for each Windows machine, or one instance for each user (other platforms). However, if you would like to modify the existing installation to continue installing any additional features, the options file must explicitly state so:
-V CONTINUE_IF_ISAv3_PRESENT="<value>"
where
<value> should be set to true if you wish to continue installation and false if you wish to exit installation.
On Unix or Linux systems:
After downloading the installer, make sure it has the right permission to be executed. We can run the command:
chmod +x setupwin32.exe
to give the installer execute permission.
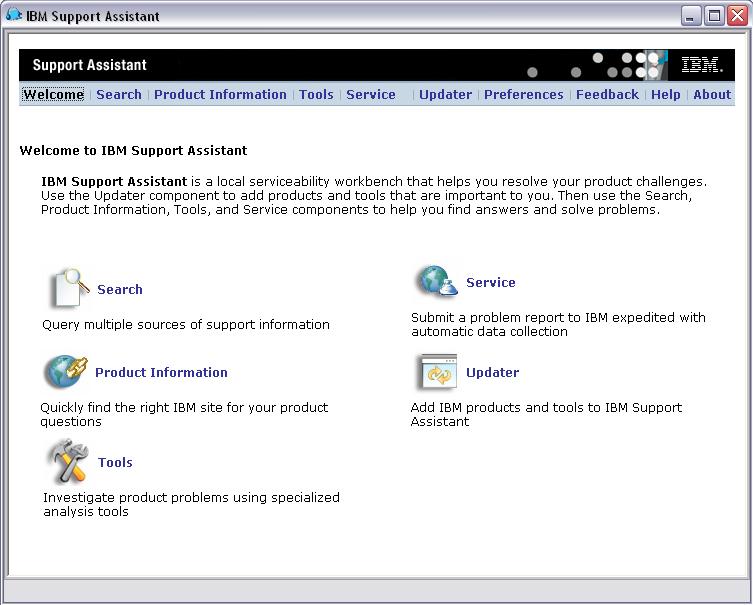
4. Running IBM Support Assistant
IBM Support Assistant is a J2EE web application. On Windows, IBM Support Assistant provides its own GUI using the Eclipse embedded browser widget. On all other platforms, the user interacts with IBM Support Assistant using a web browser.
Windows platform:
Start IBM Support Assistant from the Start Menu...
Start | Programs | IBM Support Assistant | IBM Support Assistant V3...or from the desktop shortcut for the IBM Support Assistant V3. To stop the application, click the ISA icon in the upper left corner, then click 'Close,' then click 'OK.'
All other platforms:
Start IBM Support Assistant by running the startisa.sh script from the command prompt. After this script is invoked, the command will display some messages followed by the launching of a Mozilla browser with the IBM Support Assistant V3 welcome page. If the system does not have a Mozilla browser installed (mozilla binary), then a supported browser will need to be manually opened and the IBM Support Assistant URL must be entered into the address field. The IBM Support Assistant URL can be found in...
<install_root>/workspace/logs/isaurl.logTo stop the IBM Support Assistant, execute the stopisa.sh script from the command prompt. The console should come back with the following message:
The application has stopped successfully.
The user stopping the application must have authority to kill the IBM Support Assistant V3 process (i.e., is the same user that started it or a super user).
Messages that are written to the console when executing the start/stop scripts are also written to the startisa.log and stopisa.log files respectively, located in the IBM Support Assistant installation folder.
5. Uninstalling IBM Support Assistant
Windows platform:
The IBM Support Assistant can be uninstalled in three ways:
1.Add/Remove Programs: The IBM Support Assistant V3 entry can be uninstalled through the Add/Remove Programs task available in the Control Panel.
2.Installation Location: The IBM Support Assistant uninstaller can be invoked by executing the uninstaller from the install location. To do so, navigate to the _uninst folder in the IBM Support Assistant install location and run uninstaller.exe.
3.Start Menu: The IBM Support Assistant can be uninstalled by clicking on the Uninstall IBM Support Assistant entry in the Windows Start menu...
Start | Programs | IBM Support AssistantThe default uninstallation mode is GUI. In order to uninstall in the console mode or silent mode, use the following commands using the uninstaller described in the second method above:
Console mode:
<Support_Location>\_uninst\uninstaller.exe -console
Silent mode:
<Support_Location>\_uninst\uninstaller.exe -silent -options options.txt
A sample uninstallation options file is included with the IBM Support Assistant V3 download archive. If you choose not to specify the -options attribute and do not specify an uninstallation options file, a complete uninstall will be performed.
All other platforms:
The IBM Support Assistant can be uninstalled by running the uninstall executable in the _uninst folder of the location where IBM Support Assistant is installed. The default uninstallation mode is GUI. In order to uninstall in the console mode or silent mode, use the following commands using the uninstaller described in the second method above:
Console mode:
<Support_Location>\_uninst\<uninstaller executable> -console
Silent mode:
<Support_Location>\_uninst\<uninstaller executable> -silent-options options.txt
A sample uninstallation options file is included with the IBM Support Assistant V3 download archive. If you choose not to specify the -options attribute and do not specify an uninstallation options file, a complete uninstall will be performed.
6. Maintenance and Troubleshooting
Installation/Uninstallation log:
The installation and uninstallation log file, log.txt, is present in the location where IBM Support Assistant is installed. If installation fails before the creation of this destination folder, you may check the log file in the temp location of the platform, or specify another location for the log. This may be done by adding -is:log <log_file> after the installer executable, e.g.:
setupLinux.bin -is:log /tmp/isalog.log
Temporary installation space:
If the default temporary location on the system does not have enough space, you may specify the temporary location to be used explicitly by using the following install command:
setupwin32.exe -is:tempdir <Temporary_Location>
e.g: setupwin32.exe -is:tempdir D:\temp
Lack of space on the system may result in a Signal 11 error thrown during installation on some operating systems.
Port number modification:
The port number that IBM Support Assistant runs on is selected at random every time IBM Support Assistant is started. However, it can be changed after installation. To do so, navigate to the <install_root>/configuration folder and modify the com.ibm.osg.webcontainer.port entry in the config.ini file to represent the port number you would like IBM Support Assistant V3 to use. The default value of 0 indicates that a random port number will be selected at startup. The IBM Support Assistant will need to be relaunched for this change to take effect.
Unable to start IBM Support Assistant:
If you are having trouble starting IBM Support Assistant, there are a few log files we can look at for problem determination.
- In the <install_root>/workspace/logs directory, read the isa_*.log files. These files represent a set of rolling log files, where the most recent log file is always named isa_0.log. The level of detail included in this log file is controlled by the Preferences component within IBM Support Assistant. For more information on changing the logging level, refer to the Preferences component documentation
- In the <install_root>/workspace/.metadata directory, the .log file will contain logging messages which may occur either before the IBM Support Assistant logging is initialized (messages during startup) or if the logging initialization fails.
Firewall access:
If IBM Support Assistant does not come up or comes up with a blank page, verify that there is no firewall blocking access to the IBM Support Assistant at the port specified in the config.ini file mentioned in the Port number modification maintenance setting above.
User rights on Unix and Linux platforms:
If you get a message indicating that you do not have the authority to start or stop the IBM Support Assistant, please make sure that either the root user is attempting this operation or that the operation is being performed by the same user responsible for installing IBM Support Assistant.
Some operating systems might have restrictions that let only the root user run programs on ports below port number 1024.
Multiple installation detection:
If you get a message indicating IBM Support Assistant V3 is already installed when you start the installer, please verify that you do not have IBM Support Assistant V3 installed anywhere on the machine. This is very important to ensure that proper maintenance and updates can be applied in the future.
If you are sure that IBM Support Assistant V3 is not installed on the system and you are erroneously getting this error message, or you would like to overwrite a corrupted installation, you may use the following install command to override this check:
setupwin32.exe -V ForceInstall=true
Accessibility options during install:
The installer can be started with the "-accessibility" option. This will start the installer in a console mode which is modified to make it easier to understand the installation screens when they are read by screen readers.
setupwin32.exe -accessibility
Exit Notification on Windows Platform:
When users exit the main ISA window, they are prompted for confirmation. This is because all windows and tools started from within ISA will also be closed. Users have the option of selecting the checkbox to not display this confirmation when exiting ISA. If you have done this, but now want to re-enable this confirmation dialog, perform the following steps:
- Close ISA if it is running.
- Bring up the properties window for the 'IBM Support Assistant V3' shortcut that you use to lauch IBM Support Assistant V3. In the 'Target' field located on the 'Shortcut' tab, add a space at the end of the command string followed by the string -promptonexit
- Select the 'OK' button.
- Start ISA from the shortcut
You will have to remove the string from the field if you decide you no longer want confirmation when exiting ISA.