The installation verification test (IVT) program
The installation verification test (IVT) program is supplied as an enterprise archive (EAR) file called wmq.jmsra.ivt.ear. This file is installed with WebSphere MQ Java in the same directory as the WebSphere MQ resource adapter RAR file, wmq.jmsra.rar. For information about where these files are installed, see Installation of the WebSphere MQ resource adapter.
You must deploy the IVT program on your application server. The IVT program runs as a servlet and tests that a message can be sent to, and received from, a WebSphere MQ JMS Queue or Topic object. Optionally, we can use the IVT program to verify that the WebSphere MQ resource adapter has been correctly configured to support distributed transactions.
Before we can run the IVT program, define the properties of a ConnectionFactory object and a Queue or Topic object as JCA resources, and ensure that your application server creates JMS objects from these definitions and binds them into a JNDI namespace. We can choose the properties of the objects, but the following set of properties is a simple example:
- ConnectionFactory object
-
channel:               SYSTEM.DEF.SVRCONN
hostName:              192.168.0.42
port:                  1414
queueManager:          ExampleQM
transportType:         CLIENT
- Queue object
-
baseQueueManagerName:  ExampleQM
baseQueueName:         SYSTEM.DEFAULT.LOCAL.QUEUE
By default, the IVT program expects a ConnectionFactory object to be bound in the JNDI namespace with the name IVTCF and a Queue object to be bound with the name IVTQueue. We can use different names, and we can use a Topic object instead of a Queue object as a destination. But if you do, enter the names of the objects on the initial page of the IVT program.
After you have deployed the IVT program, and the application server has created the JMS objects and bound them into the JNDI namespace, we can start the IVT program by entering a URL in the following format into your Web browser:
http://app_server_host:port/WMQ_IVT/where app_server_host is the IP address or host name of the system on which your application server is running, and port is the number of the TCP port on which the application server is listening. Here is an example:
http://localhost:9080/WMQ_IVT/
Figure 1 shows the initial page of the IVT program.
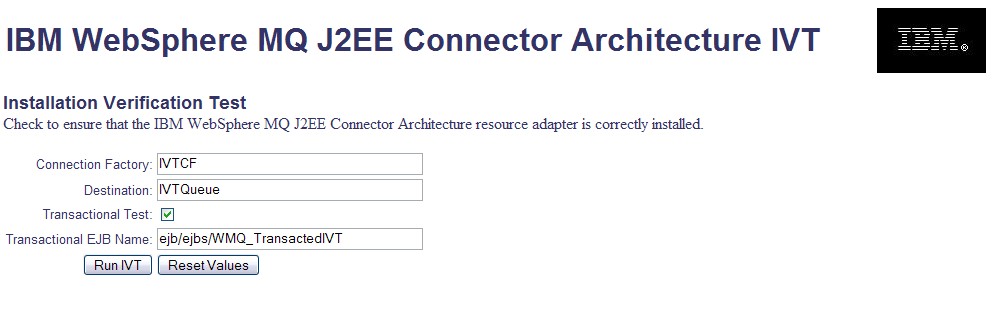
On the initial page, the Connection Factory field already contains the name
IVTCF and the Destination field already contains the name
IVTQueue. If you want to run the IVT program using a ConnnectionFactory object and a Queue or Topic object that are bound in the JNDI namespace with different names, enter the JNDI names of the objects into these fields, replacing the existing contents.
If you want to verify that the WebSphere MQ resource adapter can support distributed transactions, select the Transactional Test check box.
The Transactional EJB Name field specifies the JNDI name of the enterprise Java bean (EJB) to be used for the transactional test. By default, the IVT program expects the EJB to be bound with the name ejb/ejbs/WMQ_TransactedIVT, and this name is the initial value of the field. However, application servers use different naming conventions, and this name might not match the JNDI name used by your application server. The IVT program attempts to use some common variations of the default name but, if none of these variations are valid, the IVT program fails with a javax.naming.NameNotFoundException exception. If this happens, set this field to the JNDI name used by your application server, replacing the existing contents of the field. To help you work out the JNDI name used by your application server, the file ejb-jar.xml contains the following definition for the EJB:
<display-name>WMQ_TransactedIVT</display-name>
<enterprise-beans>
  <session id="WMQ_TransactedIVT">
    <ejb-name>WMQ_TransactedIVT</ejb-name>
    <home>ejbs.WMQ_TransactedIVTHome</home>
    <remote>ejbs.WMQ_TransactedIVT</remote>
    <ejb-class>ejbs.WMQ_TransactedIVTBean</ejb-class>
    <session-type>Stateless</session-type>
    <transaction-type>Container</transaction-type>
  </session>
</enterprise-beans>
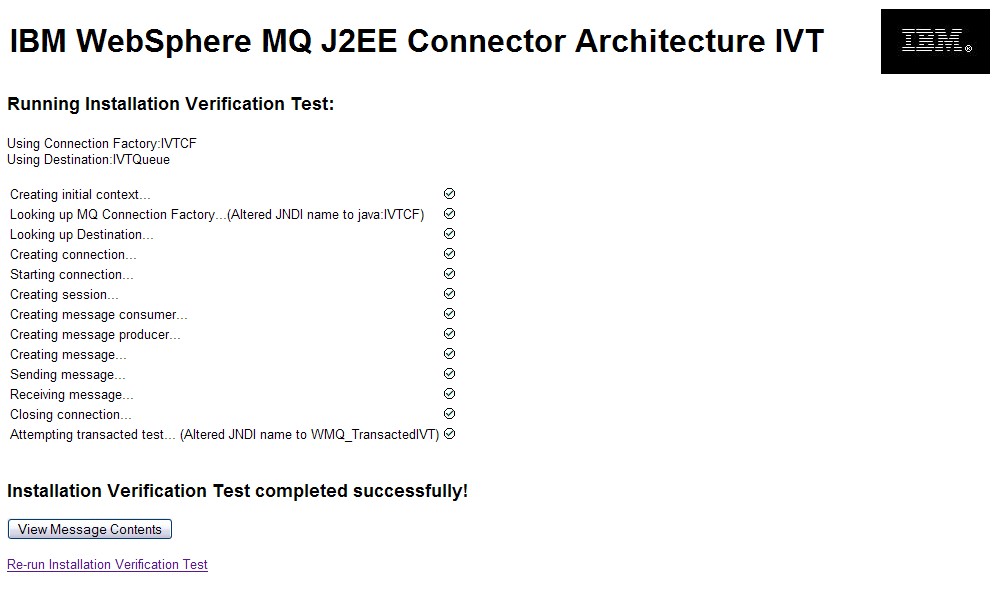
To run the test, click Run IVT. Figure 2 shows the page that is displayed if the IVT is successful.
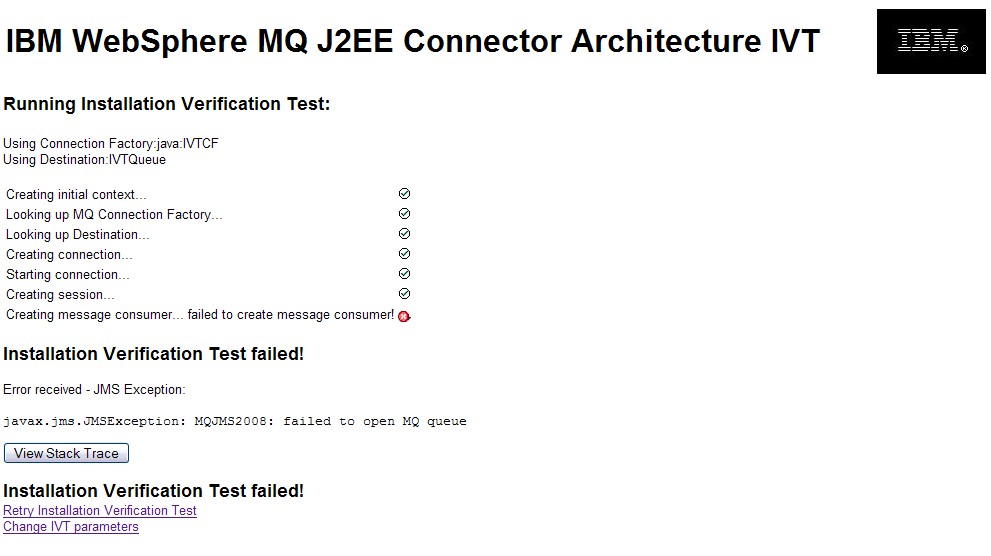
If the IVT fails, a page similar to that shown in Figure 3 is displayed. To obtain further information about the cause of the failure, click View Stack Trace.