Acme Widgets IWWCM - Security and Workflow
Add New Users and Groups
This exercise assumes basic familiarity with the Web Content Management user interface. The first Part of the lab creates new users and groups, and adds the users to the relevant groups for their job role.
- Open the Portal in a browser: http://<portal_server>:9081/wps/portal
- Click Log in and enter wpsadmin for the User ID and Password. Click Log in.
- Click Administration, then click Access, then click Users and Groups.

- Create a new user AcmeUser by clicking on the New User button.
- Provide the user information as directed. Click OK. You should see a User created successfully message.
- Create a second user AcmeApprover. Click OK and wait for the User created successfully message.
- Create a new group AcmeUserGroup by clicking on the New Group button. Click OK and wait for the group created successfully message.
- Create a second group AcmeApproverGroup. Click OK and check that the new group has been created successfully.
- Search for user groups to display your new groups

- Locate and select the approver group from the list of groups by clicking on the name of the group.

- In the resulting screen, select the Add Member button

- Select AcmeApprover and click OK to add it to the AcmeApproverGroup group.
- Repeat the above steps to add AcmeUser to the AcmeUserGroup
- Now add the AcmeApproverGroup into the AcmeUserGroup. In this scenario our Approvers are like Team Leaders and are also content contributors as well as content approvers.
Authoring Portlet Access Control
- Logged on as wpsadmin, navigate to the Web Content Management page by clicking on the My Portal link at the top right of the page. Click on the Web Content Management page.
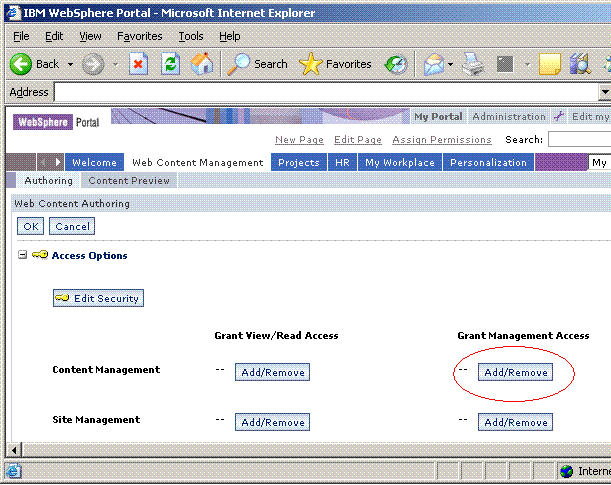
- Select the configure mode of the Authoring Portlet. The configure mode of the portlet should display.
- Expand Access Options.
- Click on the Content Management Add/Remove button for the Grant Management Access (top of the right hand side list)

- Click on the +Add button.
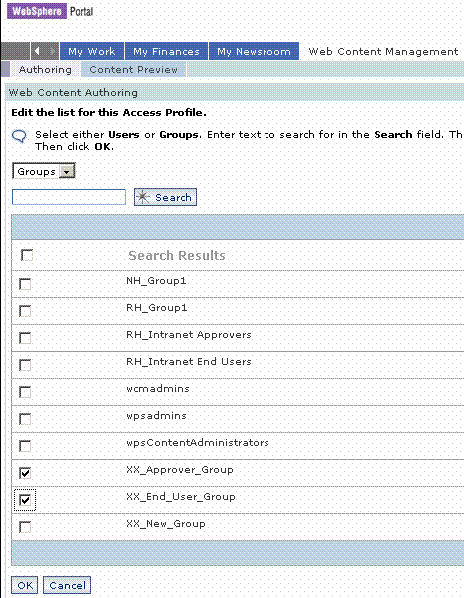
- In the next screen search for Groups and select our two new groups. Click OK.

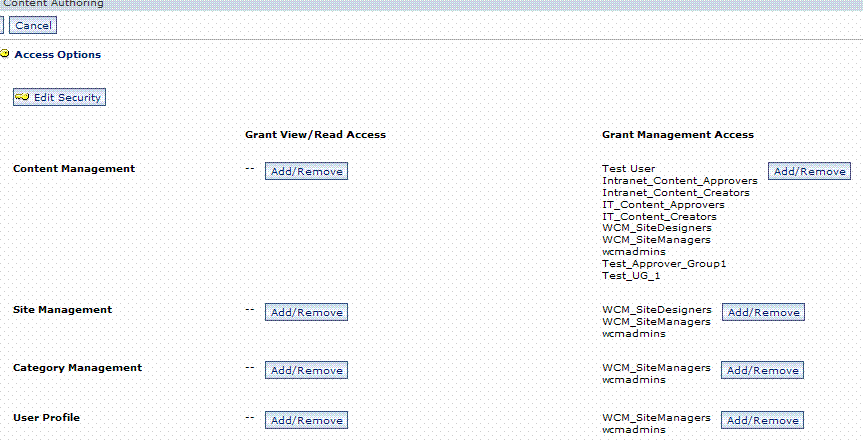
- Click OK on the next screen and see the following results

- Click on the Content Management Add/Remove button for the Grant Management Access (top of the right hand side list)