For up-to-date product documentation, see the IBM MobileFirst Foundation Developer Center.
Register Android applications from the MobileFirst Operations Console
Register your Android application to an instance of MobileFirst Server to establish communication with the server and to provide the server with information about your app.
Before you begin
You must have the IBM MobileFirst™ Platform Operations Console running on the MobileFirst Server targeted for registration. For more information, see The IBM MobileFirst Platform Foundation Developer Kit.
We can register an app on the server before or after setting up the Android Studio environment (see Methods of setting up your environment). You must register your app to the server before developing code that accesses server resources.
Procedure
- In the MobileFirst Operations Console, navigate to the Register Application page by using one
of the following methods:
- In the navigation sidebar, select New next to
Appilcations.

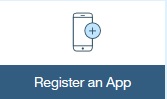
- From the Dashboard, select Register an
App.
- In the navigation sidebar, select New next to
Appilcations.
- On the Register an Application page, select the
Android option.
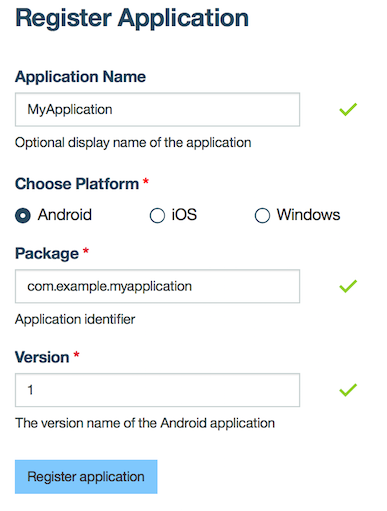
- Fill in the values for the application that you are registering.
If you created your app by using the Android Studio wizard, the version number and package name and are defined in the app\build.gradle file in your Android Studio project, in the defaultConfig enclosure:
defaultConfig { applicationId "com.example.myapplication" minSdkVersion 23 targetSdkVersion 23 versionCode 1 versionName "1.0" }- Application Name: This is for display and can be any convenient value. It is optional.
- Package: The applicationId value specified in your app/build.gradle. For more information, see http://tools.android.com/tech-docs/new-build-system/applicationid-vs-packagename.
- Version: The versionName value found in your
app/build.gradle.
If these parameters do not exist in the app\build.gradle, we can find them in the AndroidManifest.xml file.
<manifest android:hardwareAccelerated="true" android:versionCode="2" android:versionName="0.0.2" ...>
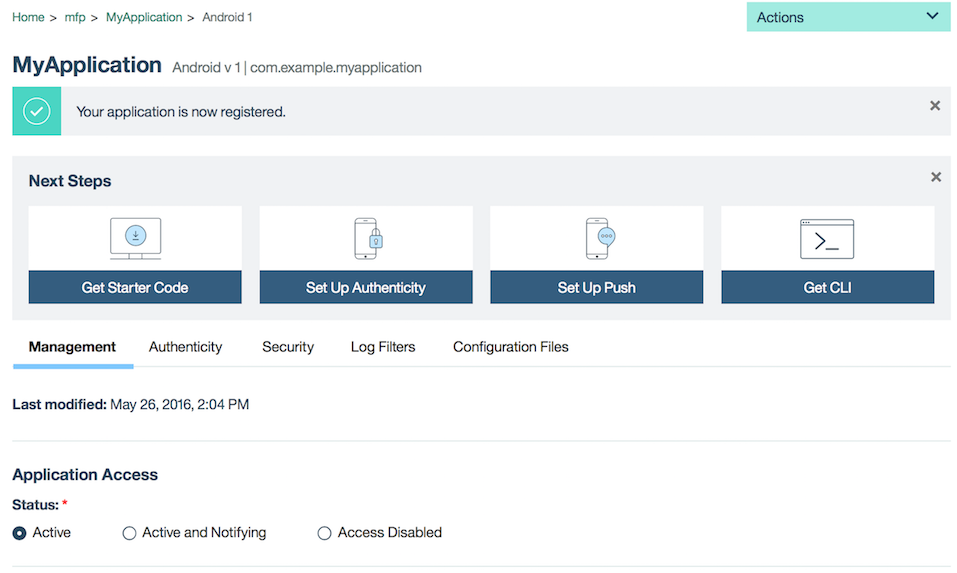
- Click the Register application button. From the main Dashboard page, your application is now listed
under the default mfp runtime.

Note: The mfp runtime is the default value for the WLServerContext parameter in the mfpclient.properties file below.
- Click the application name to display the main configuration page for our app. The main page for our app displays different configuration options for the server-side
registration of your app.
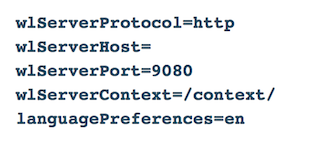
- Click the Configuration Files tab. The
Client Configuration File section displays a template for creating your
mfpclient.properties file. This file is used for connecting the client app to
the server. For information on populating the values in the file and copying it to our Android
Studio project, see Android client properties file.
Results
The app is registered on the target server.
What to do next
To complete the client-server registration, we must complete the required properties in the mfpclient.properties file and copy it to our Android Studio project. For more information, see Android client properties file.
Parent topic: Register Android applications to MobileFirst Server