For up-to-date product documentation, see the IBM MobileFirst Foundation Developer Center.
Install a Windows Store application on a Windows device
Use sideloading to install Windows Store apps through Application Center.
Before you begin
You must check that your configuration satisfies the application sideloading prerequisites that are described in Prepare to Sideload Apps.The device user needs administrator rights on the device to execute the Application Center client.
Install APPX packages through Application Center is done by a process called sideloading. As part of Windows 8.1 Update, sideloading is enabled for all Windows 8.1 Pro devices that are part of an Active Directory domain, which matches the current behavior of Windows 8.1 Enterprise. If we use either of those product versions and the device is part of an Active Directory domain, you have no concerns about sideloading keys or activating sideloading.
When we develop a Windows Store application, Microsoft Visual Studio automatically generates a self-signed certificate and uses it to code sign the application package. To be able to install the application later by using Application Center, we must import this certificate into the "Trusted Root Certification Authorities" store of the "Local Machine". Importing the certificate is a manual procedure.
Note: Manual installation of a certificate is only required for the development phase, because APPX code signing relies on a self-signed certificate generated by Microsoft Visual Studio. In production, your APPX file must be signed by a genuine certificate purchased from a recognized root certificate authority.
Procedure
The first step of this procedure tells you how to install the certificate before we can install the application through Application Center.
- Import this certificate into the "Trusted Root Certification
Authorities" store of the "Local Machine".
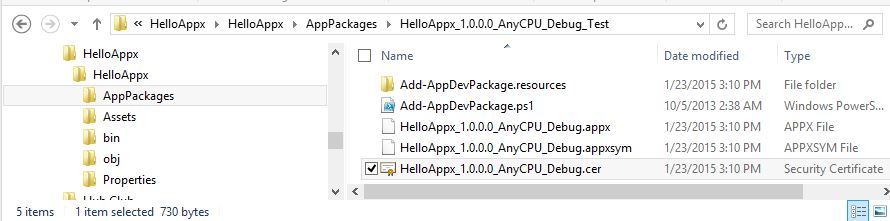
- After you have generated an APPX file by using Visual
Studio, place this file in your file system. In the folder
of the APPX file, we can see a certificate (.cer)
file that contains the self-signed certificate that we must import.
Figure 1. Certificate file in the application package folder
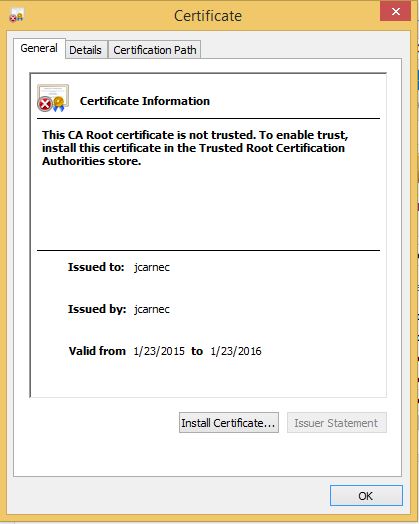
- To open the certificate, double-click the CER file.
- Click Install Certificate.
Figure 2. General information about the certificate
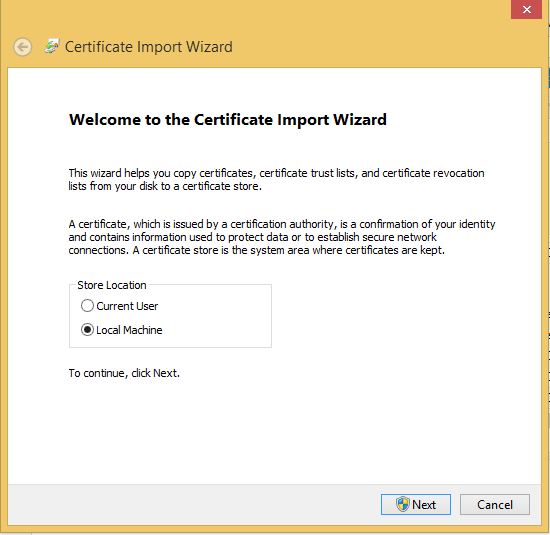
- Select "Local Machine" and click Next.
Figure 3. Specifying the local machine in the Certificate Import Wizard
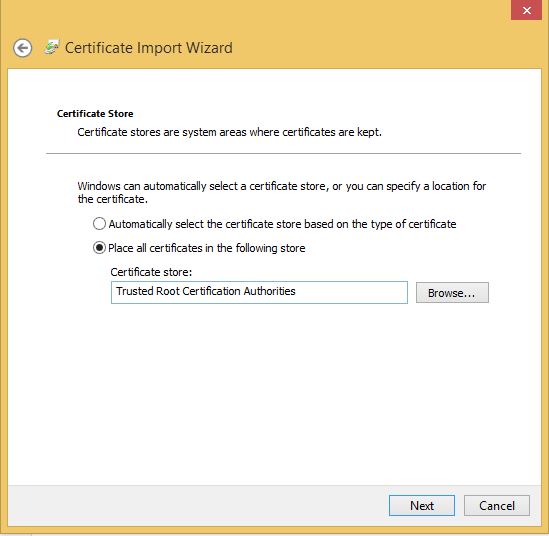
- Select "Place all certificate in the following store" and
then browse to select "Trusted Root Certification Authorities".
Figure 4. Placing the certificate in "Trusted Root Certification Authorities"
- Click Next and then Finish. The successful import of the certificate should be confirmed.
- After you have generated an APPX file by using Visual
Studio, place this file in your file system. In the folder
of the APPX file, we can see a certificate (.cer)
file that contains the self-signed certificate that we must import.
The following steps describe how to perform the installation of a Windows Store application on a Windows device by using Application Center.
- Log in to the Application Center mobile client for Windows Store applications.
- Select the application that we want to install to access
its details.
Figure 5. Details view for installing a Windows Store app
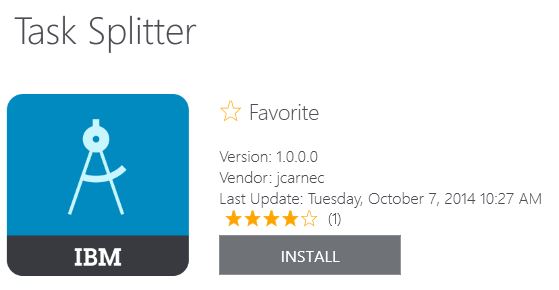
- To install the application, tap Install. If the application is already installed and other versions are available, we can decide to update to a later version or to revert to a previous version.
Parent topic: The mobile client